How to Choose the Right All-Sky Camera for Your Backyard Observatory
You set up your telescope under a clear sky, started imaging, and then clouds rolled in at 2 AM. Your expensive equipment sat exposed while you slept. An all sky camera would have sent an alert and possibly saved your session.
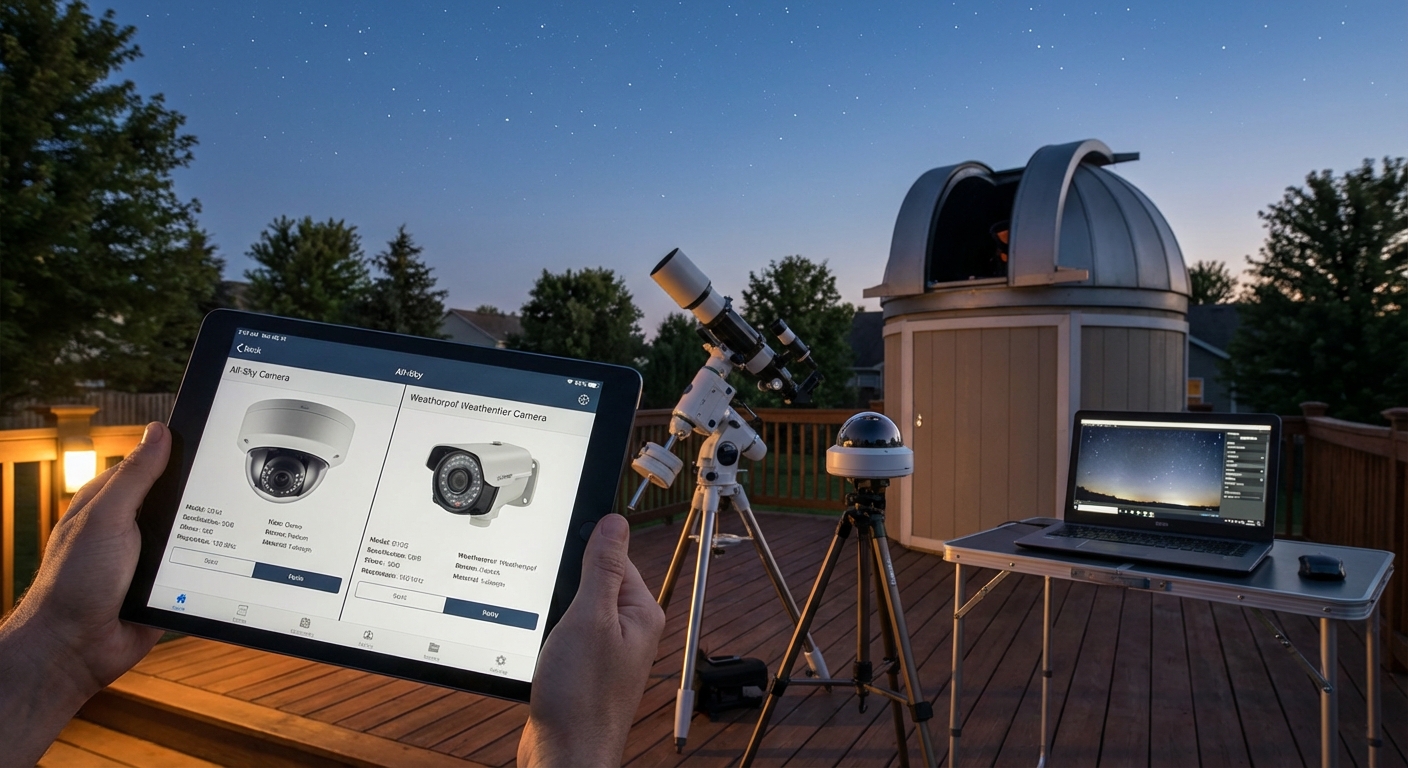
Choosing the best all sky camera for backyard observatory use depends on your primary goal: weather monitoring requires fast refresh rates and cloud detection software, meteor detection needs high sensitivity sensors, and time-lapse projects benefit from higher resolution. Budget options start around $200, while professional systems exceed $1,500. Match camera specifications to your specific astronomy needs rather than buying the most expensive model available.
Why Your Observatory Needs an All Sky Camera
Most backyard observatories operate remotely or semi-autonomously. You might start an imaging session and head inside, trusting your equipment to capture data for hours.
But weather changes fast.
An all sky camera acts as your constant sentinel. It watches the entire hemisphere above your observatory, detecting clouds, monitoring sky brightness, and recording transient events like meteors or satellites.
The right camera saves equipment from unexpected weather. It documents sky conditions for every imaging session. Some amateur astronomers have captured bolides, rare atmospheric phenomena, and even tracked satellite behavior, all as byproducts of their weather monitoring setup.
The wrong camera wastes money and provides false confidence.
Three Primary Uses That Shape Your Choice
Your intended use matters more than specifications alone.
Weather Monitoring and Cloud Detection
If you run automated imaging sessions, weather monitoring becomes critical. Your camera needs to refresh frequently, ideally every 30 seconds or faster. It should integrate with observatory control software like ACP, ASCOM, or custom scripts.
Cloud detection algorithms work better with certain camera types. Infrared sensitive cameras can distinguish cloud layers from clear sky more reliably than visible light cameras. Some systems measure sky temperature directly, comparing readings across the dome to identify approaching weather fronts.
Budget matters here, but reliability matters more. A $300 camera that triggers your observatory roof to close saves a $5,000 telescope from rain damage. That math works in your favor.
Meteor Detection and Recording
Meteor detection requires different specifications. You need high sensitivity to capture faint streaks. Frame rate matters less than sensor performance in low light.
Most dedicated meteor observers use cameras with larger pixels (5 microns or bigger) and sensitive sensors. Resolution can be moderate. A 1920×1080 camera often outperforms a 4K model for meteor work because larger pixels gather more light.
Storage becomes an issue. Recording all night, every night generates terabytes of data. Successful meteor camera operators use motion detection software to save only frames containing events. Popular options include UFO Capture, UFO Analyzer, and RMS (Raspberry Pi Meteor Station software).
Time-Lapse and Documentation
If you primarily want beautiful time-lapse videos of the night sky, prioritize resolution and image quality over refresh rate. A 4K camera producing one frame per minute creates stunning sequences while keeping file sizes manageable.
Color cameras work better for time-lapse than monochrome. You want to capture the Milky Way, auroras, and twilight colors. Some photographers use all sky cameras as “behind the scenes” documentation, showing what the sky looked like while they captured deep sky images with their main telescope.
Camera Types and Technology Options
Several distinct technologies compete in the all sky camera market.
Fish-eye lens with CMOS sensor: The most common setup pairs a 180-degree fish-eye lens with a modern CMOS sensor. These systems range from DIY projects using Raspberry Pi cameras ($100 total) to commercial units ($800 to $2,000). Image quality varies dramatically. Cheaper fish-eye lenses show severe distortion and chromatic aberration at the edges.
Dedicated all sky camera systems: Companies like Starlight Xpress, Oculus, and Lunático manufacture purpose-built all sky cameras. These units include weatherproof housings, integrated heaters to prevent dew, and software for cloud detection. Prices range from $1,200 to $3,000. They work reliably but cost significantly more than DIY alternatives.
Security cameras with fish-eye lenses: Some amateur astronomers repurpose outdoor security cameras. Modern IP cameras offer good low-light performance and weatherproof housings. The main limitation is software integration. Security cameras typically don’t communicate with observatory automation systems without custom programming.
Infrared and thermal options: A few advanced systems use infrared or thermal imaging to detect clouds. These excel at weather monitoring but cost $2,500 and up. They produce less visually appealing images but provide superior data for automated decision making.
Essential Specifications Decoded

Marketing materials list dozens of specifications. Only a few truly matter.
| Specification | Weather Monitoring | Meteor Detection | Time-Lapse |
|---|---|---|---|
| Resolution | 1MP sufficient | 2MP optimal | 4K preferred |
| Sensor sensitivity | 0.01 lux or better | 0.001 lux critical | 0.1 lux acceptable |
| Frame rate | 1 fps minimum | 25+ fps ideal | 0.1 fps adequate |
| Lens quality | Moderate | Good | Excellent |
| Software integration | Critical | Helpful | Optional |
| Weatherproofing | IP65+ required | IP65+ required | IP54 minimum |
Resolution: More pixels sound better but create problems. Higher resolution requires more storage, more processing power, and better lenses. For cloud detection, a 1280×960 image contains enough detail. For meteor detection, 1920×1080 hits the sweet spot. Only time-lapse work benefits from 4K.
Sensor sensitivity: This specification gets misrepresented constantly. Manufacturers quote best-case numbers under ideal conditions. Real-world performance in your light-polluted backyard will be worse. Look for independent reviews with sample images from sites similar to yours.
Frame rate: One frame per second suffices for weather monitoring. Your sky doesn’t change that fast. Meteor detection needs 25 fps or higher to capture the brief streak without motion blur. Time-lapse work needs only one frame every 30 to 60 seconds.
Lens quality: Cheap fish-eye lenses produce terrible images at the edges where horizons matter most. You need to see clouds approaching, not just overhead. Better lenses cost more but deliver usable images across the entire frame.
Building Your System Step by Step
Getting from purchase to operation requires planning.
-
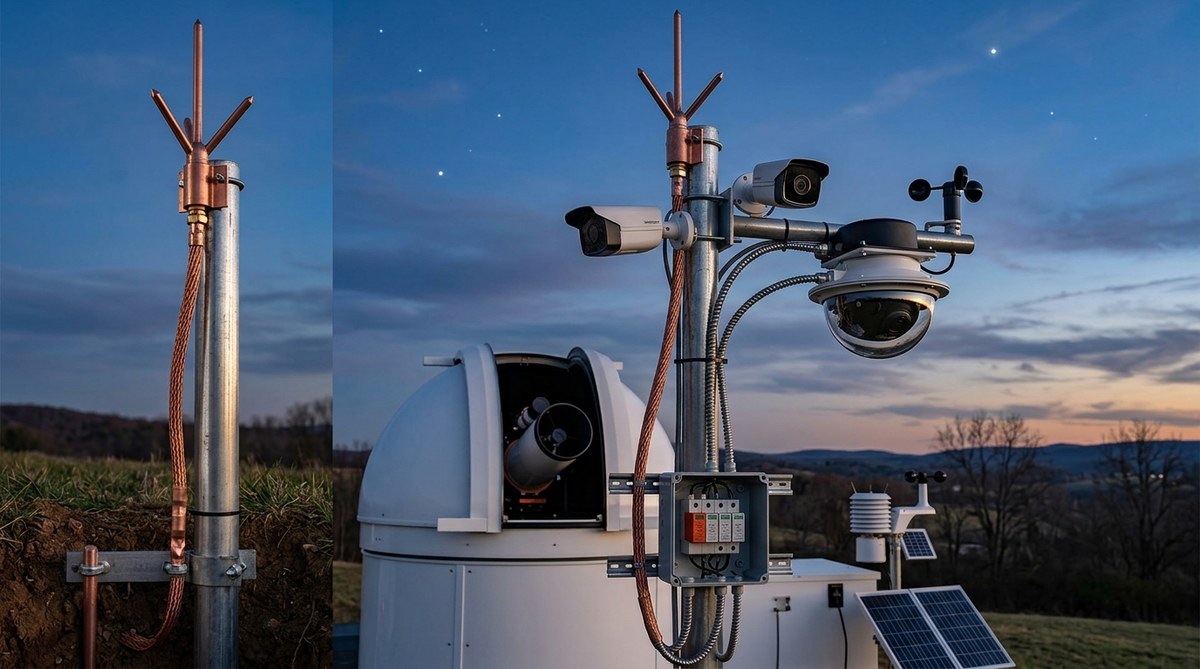
Determine your mounting location: The camera needs an unobstructed view of the entire sky. Mounting on your observatory roof works if the building sits low. Tall observatories create blind spots. A separate pole mount 20 feet from the observatory often works better. Consider power and network cable routing before finalizing the location.
-
Select appropriate weatherproofing: Even cameras rated for outdoor use need protection. Morning dew condenses on the dome. A heated dome or periodic heating cycles prevent moisture buildup. Some systems include automatic heaters that activate based on temperature and humidity sensors. DIY builders often use reptile heating pads controlled by smart plugs.
-
Configure your network and storage: All sky cameras generate substantial data. A 2MP camera recording at 1 fps produces roughly 7 GB per night. Meteor detection at 25 fps creates 50 GB or more. Plan your storage accordingly. Network attached storage (NAS) devices work well. Cloud storage becomes expensive fast. Local storage with periodic archiving to external drives offers a good compromise.
-
Install and calibrate software: Most commercial cameras include basic software. Serious users add specialized programs. For weather monitoring, try ACP Observatory Control or ASCOM-compatible tools. For meteor detection, RMS or UFO Capture work well. Calibration involves marking compass directions, setting sensitivity thresholds, and defining your horizon mask to ignore trees and buildings.
-
Test under various conditions: Run your system for several weeks before trusting it completely. Verify cloud detection accuracy on partly cloudy nights. Check that heating prevents dew formation. Confirm that your storage system keeps up with data generation. Adjust sensitivity settings to minimize false alerts while catching real weather changes.
Budget Considerations and Value Analysis

All sky cameras span a huge price range.
Under $200: DIY systems using Raspberry Pi High Quality Camera and fish-eye lenses. These require technical skills and patience. Image quality is basic but functional. Good for learning and experimentation. Not reliable enough for protecting expensive equipment.
$200 to $500: Entry-level commercial systems or upgraded DIY builds with better lenses and housings. Suitable for time-lapse and casual weather monitoring. Often lack sophisticated cloud detection. May require manual intervention during weather changes.
$500 to $1,200: Mid-range commercial cameras with decent sensors, better lenses, and basic automation features. This range offers the best value for most amateur astronomers. Cameras perform reliably and integrate with common observatory software. Image quality suffices for all typical uses.
$1,200 to $2,500: Professional all sky camera systems with excellent sensors, high-quality optics, integrated heating, and sophisticated software. Worth the investment if you run a serious remote observatory or contribute to meteor detection networks. Overkill for casual users.
Above $2,500: Specialized systems with infrared or thermal imaging. These serve research applications or extremely remote observatories where reliability justifies any cost.
Choose your budget based on what you’re protecting and how you’ll use the data. A $1,000 camera makes sense protecting $10,000 of equipment in a remote observatory. That same camera is excessive for a backyard setup where you can look outside before starting an imaging session.
Common Mistakes That Cost Time and Money
Amateur astronomers make predictable errors when selecting all sky cameras.
Buying for specifications instead of use case: A 4K camera sounds impressive but creates problems. File sizes balloon. Processing takes longer. Most astronomy software can’t use the extra resolution. Match specifications to your actual needs.
Ignoring software compatibility: The prettiest images mean nothing if your camera can’t talk to your observatory control system. Verify compatibility before purchasing. Check user forums for real experiences. Some cameras claim ASCOM compatibility but implement it poorly.
Underestimating weatherproofing needs: Cameras rated IP65 still fail in harsh conditions. Moisture enters through cable connections. Temperature cycling causes condensation inside housings. Plan for active heating and sealed cable entries.
Skimping on lens quality: The camera sensor matters, but the lens determines what reaches that sensor. Cheap fish-eye lenses show severe distortion, chromatic aberration, and vignetting. You can’t fix bad optics with software.
Overlooking ongoing costs: Storage, electricity for heating, and software licenses add up. A camera drawing 10 watts continuously costs $10 to $15 per year in electricity. Add heating during cold months and costs double. Budget for these operational expenses.
Software Integration and Automation
Hardware is half the system. Software makes it useful.
Most commercial all sky cameras include basic viewing and recording software. This works for manual monitoring but falls short for automation.
For weather monitoring, you need software that analyzes images and makes decisions. Popular options include:
-
ASCOM-compatible drivers: Let your camera communicate with observatory control software. Your imaging program can query sky conditions and decide whether to continue or close up.
-
Cloud detection algorithms: Analyze brightness variations across the sky. Clear skies show consistent darkness. Clouds reflect light pollution and appear brighter. Sophisticated algorithms distinguish between clouds, moon glow, and twilight.
-
Meteor detection software: Compares consecutive frames and identifies moving objects. Filters out airplanes, satellites, and insects. Saves only frames containing potential meteors. Some programs automatically upload detections to meteor networks.
-
Time-lapse creators: Assemble individual frames into videos. Add overlays showing time, date, and sky conditions. Some tools create star trails by stacking images.
Open source options exist for all these functions. RMS (Raspberry Pi Meteor Station) provides excellent meteor detection. AllSky Camera software offers cloud detection and time-lapse creation. Both are free but require Linux knowledge.
Real-World Performance Expectations
Marketing materials show perfect images under dark skies. Your experience will differ.
Light pollution affects all sky cameras significantly. Urban and suburban locations show bright, washed-out skies. Stars barely appear. Cloud detection still works because clouds reflect even more light, but images lack aesthetic appeal.
Moonlight creates similar problems. A full moon washes out faint stars and makes meteor detection difficult. Plan your expectations accordingly. Some users run different camera settings for moonlit versus moonless nights.
Weather extremes test equipment limits. Cameras rated to 14°F (-10°C) may function but image quality degrades. Sensors generate more noise at temperature extremes. Lenses can fog despite heating. Very hot weather (above 95°F or 35°C) can cause electronics to throttle or fail.
Insects and spiders love warm camera domes at night. They create false meteor detections and block portions of the view. Regular cleaning becomes necessary. Some users apply insect repellent around (not on) the camera housing.
Making Your Final Decision
Start by honestly assessing your primary need.
If you want to protect equipment in a remote or automated observatory, prioritize reliability and software integration over image quality. A mid-range commercial system with proven ASCOM compatibility makes sense.
If meteor detection excites you, focus on sensor sensitivity and frame rate. Consider joining an established meteor network. They often have recommended camera specifications and provide software support.
If you mainly want beautiful time-lapse videos, invest in resolution and lens quality. A camera that produces mediocre cloud detection but gorgeous images serves your purpose better than the reverse.
Budget matters but shouldn’t dominate the decision. A $400 camera that meets your needs perfectly beats a $1,200 camera with features you’ll never use.
Setting Up for Success Beyond the Purchase
The best all sky camera for backyard observatory use is the one you’ll actually use and trust.
Start simple. Get your system running reliably before adding complexity. Master basic weather monitoring before attempting automated observatory control. Capture some meteors manually before configuring automatic detection.
Join online communities. CloudyNights, Stargazers Lounge, and specialized meteor detection forums host experienced users. They’ve solved the problems you’ll encounter. Most are happy to share configuration files, software tips, and mounting ideas.
Document your setup. Take photos during installation. Save configuration files. Write notes about what works and what doesn’t. Six months later, when you need to adjust something, you’ll thank yourself.
Your all sky camera becomes part of your observatory’s rhythm. You’ll check it before heading out. You’ll review recordings to understand why last night’s images showed strange artifacts. You’ll share meteor captures with friends and maybe contribute data to scientific networks. The camera transforms from a purchase into a tool that deepens your connection with the night sky above your backyard.
Post Comment