What Network Setup Do You Actually Need for Remote Sky Monitoring?
Setting up a remote observatory means solving one challenge most astronomy guides skip: getting reliable network access to equipment that sits outside, often far from your router, running all night without supervision. You need to stream images, send commands, download data, and monitor weather conditions without standing next to your telescope in the dark.
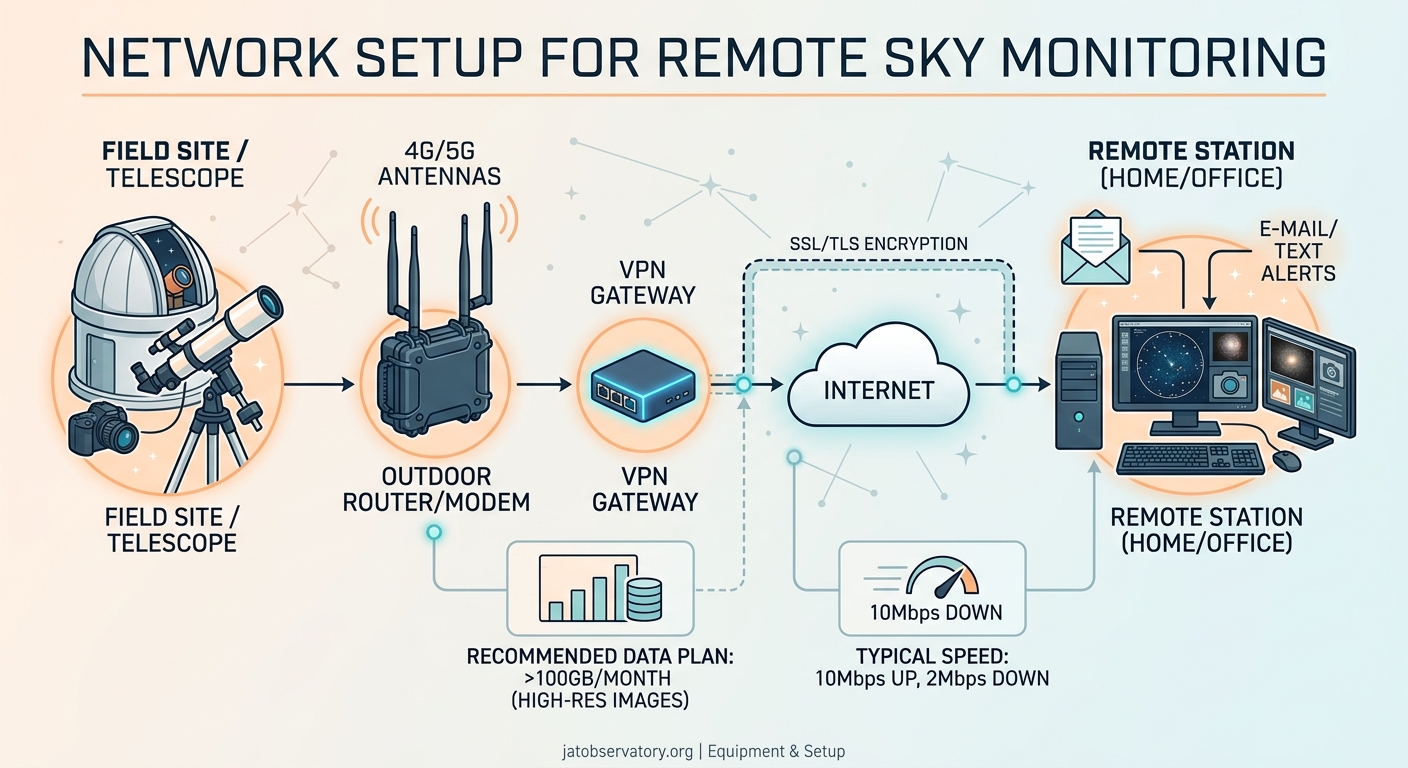
A reliable network setup for remote sky monitoring requires wired ethernet or robust wireless coverage, sufficient upload bandwidth for image transfer, remote access through VPN or dynamic DNS, and redundant connectivity options. Plan for at least 10 Mbps upload, weatherproof cabling, power over ethernet where possible, and automated monitoring to catch connection failures before you lose critical observation data during rare celestial events.
Understanding bandwidth needs for different observation types
Your bandwidth requirements change dramatically based on what you’re monitoring.
An all-sky camera capturing one image every 30 seconds generates about 2 to 5 MB per image. Over an eight-hour night, that’s roughly 1 to 2 GB of data. If you’re uploading these images in real time for cloud backup or public display, you need consistent upload speeds of at least 5 Mbps.
Telescope imaging demands more. A single night of deep-sky astrophotography can generate 50 to 100 GB of raw image files. Most observers don’t upload these in real time. Instead, they transfer files the next morning or use local storage with periodic sync.
Video streaming for monitoring or public outreach requires the most bandwidth. Streaming 720p video uses about 3 to 5 Mbps upload. Streaming 1080p jumps to 8 to 12 Mbps.
Here’s what different setups actually need:
| Setup Type | Data Per Night | Upload Speed Needed | Priority Level |
|---|---|---|---|
| All-sky camera (timelapse) | 1-2 GB | 5 Mbps | Medium |
| Single telescope (image download next day) | 50-100 GB | 2 Mbps | Low |
| Live streaming observatory | 20-40 GB | 10-15 Mbps | High |
| Multiple cameras + telescope | 100+ GB | 15+ Mbps | High |
Most home internet plans provide asymmetric speeds. You might have 200 Mbps download but only 10 Mbps upload. That upload number matters more for remote observatories.
Test your actual upload speed at the physical location where your equipment will sit. Speed varies by distance from the router and obstacles between access points.
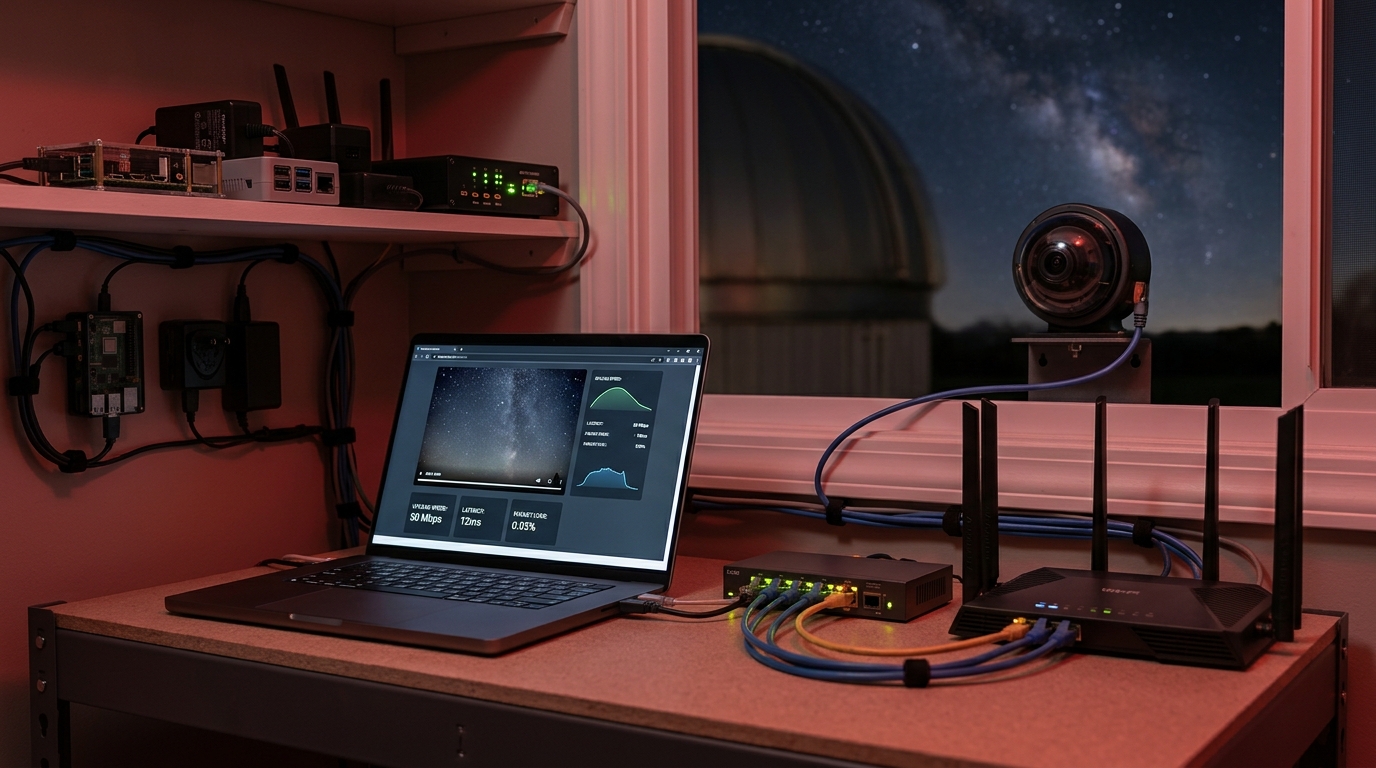
Wired versus wireless connections for observatory equipment
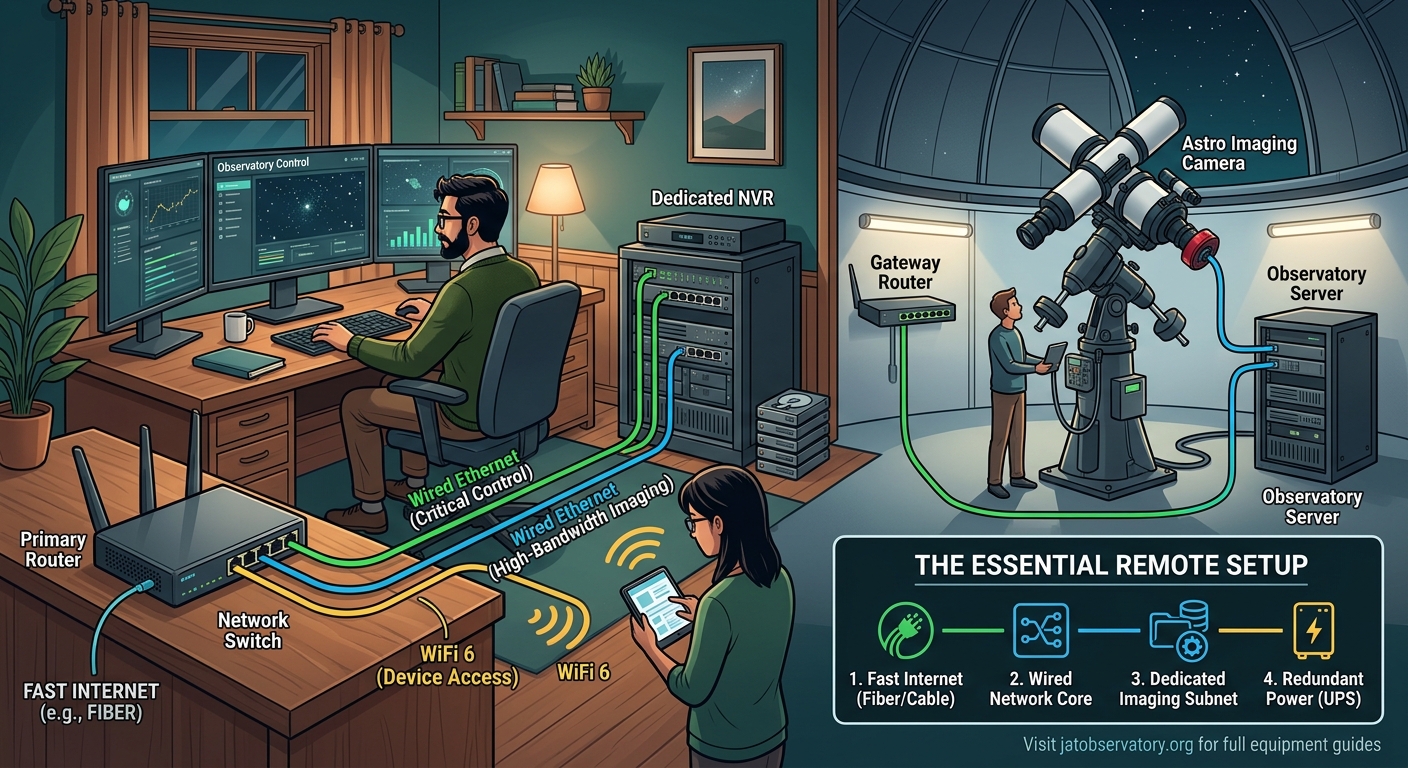
Ethernet cables beat wireless in almost every scenario for permanent observatory installations.
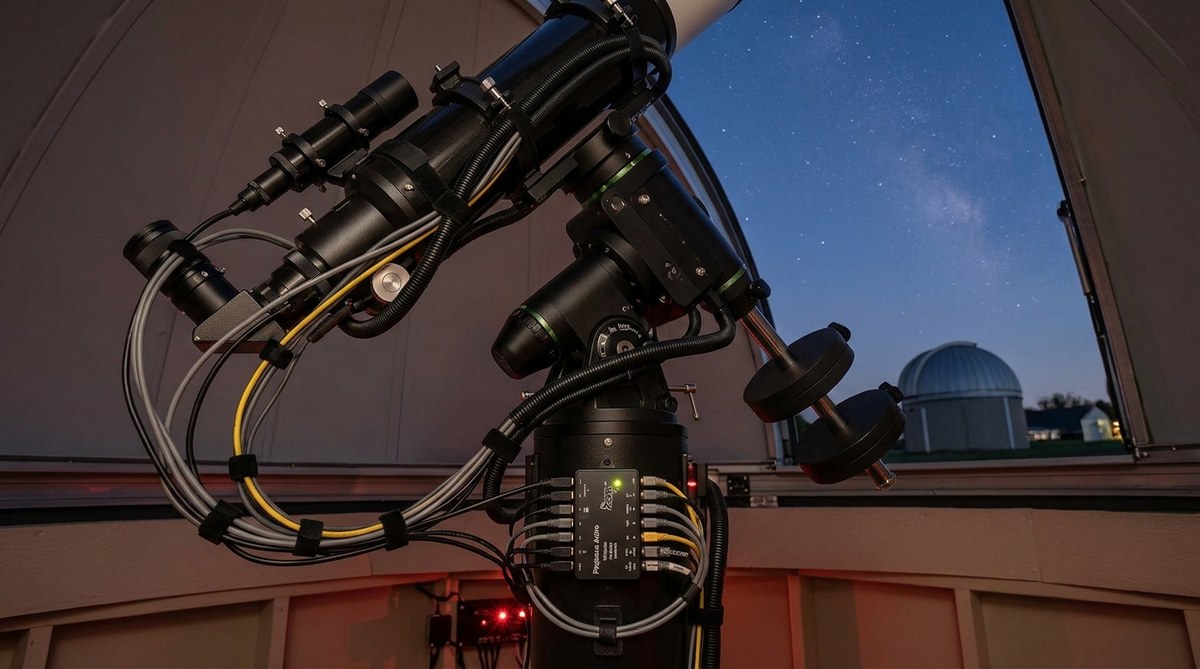
Wired connections provide stable, consistent speeds without interference from weather, neighboring networks, or physical obstacles. A Cat6 ethernet cable can run 300 feet from your router to your observatory without signal degradation.
Running outdoor-rated ethernet cable takes planning. Bury direct-burial rated cable at least 6 inches deep, or run it through conduit for easier future maintenance. Seal entry points where cables enter buildings or enclosures to prevent moisture and pest intrusion.
Wireless works when running cables isn’t practical. You’ll need either a strong signal from your home router or a dedicated outdoor access point. Standard home routers struggle to maintain connection through walls, trees, and 50+ feet of distance.
Point-to-point wireless bridges solve long-distance challenges. These devices create a dedicated wireless link between two locations, often reaching 500 feet or more with clear line of sight. They cost $100 to $300 for a pair and provide ethernet ports on both ends.
Mesh network systems help extend coverage to observatory locations near your home. Place one mesh node inside your house and another in a weatherproof enclosure near your equipment. This works well for observatories within 100 feet of your home.
Power over ethernet (PoE) simplifies installations by sending both network data and electrical power through a single cable. PoE switches or injectors cost $30 to $200 depending on the number of ports and power budget. This eliminates the need for separate power cables to cameras and small computers.
Weather affects wireless reliability. Heavy rain, snow, and even dense fog can degrade 5 GHz wireless signals. The 2.4 GHz band penetrates obstacles better but suffers more interference from neighboring networks and devices.
Setting up remote access that actually works
You need secure remote access to control equipment, download images, and monitor system health from anywhere.
Virtual private networks (VPNs) create encrypted tunnels to your home network. Set up a VPN server on your router (many modern routers include this feature) or run dedicated VPN software on a computer that stays powered on. Connect to the VPN from your phone or laptop, and you can access all your observatory equipment as if you were home.
Dynamic DNS services solve the problem of changing IP addresses. Most home internet connections use dynamic IP addresses that change periodically. A dynamic DNS service gives you a consistent domain name that always points to your current IP address. Services like No-IP and DuckDNS offer free tiers for home users.
Port forwarding provides direct access to specific devices but requires careful security configuration. Forward only the ports you need, use strong passwords, and consider changing default ports to reduce automated attack attempts.
Remote desktop software lets you control observatory computers from anywhere. TeamViewer, Chrome Remote Desktop, and VNC work well for this purpose. Choose software that handles connections behind routers without complex configuration.
“The biggest mistake I see is people opening up too many ports or using weak passwords on internet-facing services. Your observatory computer is a target the moment it’s accessible online. Use VPNs, enable two-factor authentication where possible, and keep software updated.” – Network security guidance from experienced remote observatory operators
Mobile apps for telescope control and camera access need reliable connections. Test your setup during the day before relying on it for a rare astronomical event. Nothing’s worse than missing lunar occultation events worth setting your remote telescope for because your VPN failed.
Network hardware that survives outdoor conditions
Standard consumer network equipment fails quickly in outdoor environments.
Outdoor-rated wireless access points handle temperature extremes, moisture, and dust. Look for devices rated IP65 or higher. These enclosures keep water and particles out while managing heat buildup. Brands like Ubiquiti, TP-Link, and EnGenius make affordable outdoor access points starting around $80.
Weatherproof enclosures protect indoor equipment installed outside. NEMA-rated boxes provide various levels of protection. A NEMA 4X enclosure handles rain, snow, and corrosion. Mount your network switch, power supplies, and small computers inside these boxes.
Ethernet surge protection prevents lightning damage. Install surge protectors where cables enter buildings and at equipment endpoints. These devices cost $15 to $40 each and can save thousands in damaged equipment.
Temperature management matters. Electronics generate heat, and enclosed spaces in direct sunlight get hot. Ventilation fans, heat sinks, or small air conditioning units help maintain safe operating temperatures. Some observers use insulated enclosures with small heaters for winter operation.
Cable management prevents failures. Use cable ties, conduit, and strain relief to protect connections from wind, animals, and accidental damage. Label both ends of every cable. You’ll thank yourself six months later when troubleshooting.
Backup power keeps your network running during outages. An uninterruptible power supply (UPS) provides battery backup for your router, switch, and critical equipment. Size your UPS to run your network gear for at least 30 minutes, giving you time to safely shut down equipment or wait out brief power interruptions. More detailed planning helps with 5 essential power management solutions for unattended remote observatories.
Step-by-step network configuration for a new observatory
Follow this sequence to build a reliable network from scratch.
-
Map your physical layout and measure distances from your router to the observatory location. Account for the path cables will take, not just straight-line distance.
-
Choose between wired and wireless based on distance, obstacles, and budget. Run ethernet cable if the distance is under 300 feet and you can trench or use conduit. Use point-to-point wireless for longer distances or difficult terrain.
-
Install outdoor network equipment with proper weatherproofing and power. Mount access points or wireless bridges with clear line of sight. Use PoE where possible to reduce cable runs.
-
Configure your router for remote access. Enable VPN service, set up dynamic DNS, or configure port forwarding based on your security preferences and technical comfort level.
-
Test bandwidth and latency under real conditions. Transfer large image files, stream video, and verify you can control equipment remotely. Test during different times of day to identify congestion issues.
-
Set up monitoring and alerts for network failures. Use ping monitoring, uptime services, or dedicated network monitoring software to notify you when connections drop.
-
Document your configuration. Write down IP addresses, passwords, port numbers, and cable paths. Store this information securely but accessibly for future troubleshooting.
Common network problems and practical solutions
Connection drops during imaging sessions ruin data. Wireless interference from neighboring networks causes intermittent failures. Switch to wired ethernet or change your wireless channel to one with less congestion. The 5 GHz band offers more non-overlapping channels than 2.4 GHz.
Slow upload speeds prevent real-time image transfer. Check if your internet service provider throttles upload speeds during peak hours. Schedule large file transfers for off-peak times, or upgrade your internet plan if remote access is critical.
Cannot access equipment from outside your network. Verify your dynamic DNS service is updating correctly. Check that your VPN server is running and accessible. Confirm port forwarding rules match your current internal IP addresses.
Equipment loses connection after power outages. Configure your router and network switches to auto-restart after power loss. Set static IP addresses for critical equipment to prevent addressing conflicts during startup.
Weather causes wireless signal degradation. Install higher-gain antennas on wireless devices. Add a secondary wireless link on a different frequency band for redundancy. Consider switching to wired connections for critical equipment.
Building redundancy into your network design
Single points of failure will eventually fail.
Dual internet connections provide backup when your primary service goes down. A cellular hotspot or secondary internet service kicks in automatically with the right router configuration. Cellular backup costs $20 to $50 monthly for plans with enough data for emergency access.
Multiple wireless links on different frequency bands protect against interference. Run both 2.4 GHz and 5 GHz connections to the same equipment. If one band experiences interference, the other maintains connectivity.
Local storage buffers against network failures. Configure cameras and telescopes to save data locally when network uploads fail. Automated scripts can sync this data when connectivity returns. This approach works well when building an all-sky camera system to monitor celestial patterns year-round.
Automated monitoring catches failures before they impact observations. Set up ping monitoring to alert you when devices go offline. Use uptime monitoring services to track internet connectivity. Configure email or text alerts for critical failures.
Manual fallback procedures give you options when automation fails. Keep a long ethernet cable available for temporary direct connections. Document how to access equipment locally if remote access breaks. Store backup configuration files for routers and switches.
Choosing the right equipment for your budget
Network equipment spans a wide price range with real performance differences.
Budget setups ($100 to $300) work for simple installations close to your home. A long ethernet cable, basic outdoor access point, or powerline networking adapter gets you started. This tier suits single all-sky cameras or small telescopes within 100 feet of your router.
Mid-range configurations ($300 to $800) provide better reliability and range. Managed network switches, quality outdoor access points, point-to-point wireless bridges, and small UPS units fall in this category. This tier handles multiple devices, longer distances, and more demanding applications.
Professional-grade systems ($800+) offer maximum reliability and features. Enterprise access points, managed PoE switches with redundant power, high-capacity UPS systems, and cellular backup routers provide the infrastructure for serious remote operations. Choose this tier if you’re running multiple telescopes, offering public access, or can’t tolerate downtime.
Don’t overbuy early. Start with basic reliable equipment and upgrade as you identify actual needs. That $500 managed switch doesn’t help if you only have two devices to connect.
Used enterprise equipment offers good value. Businesses regularly upgrade network gear that still works perfectly. A used enterprise access point or switch costs a fraction of new consumer equipment while providing better performance and reliability.
Integrating network monitoring with observatory automation
Your network should communicate with your observatory control software.
Most observatory automation platforms can check network connectivity before starting observation sequences. Configure your automation software to verify internet access, test remote access, and confirm cloud storage availability before opening covers or starting imaging.
Network-attached storage (NAS) devices provide centralized storage for all your equipment. A basic NAS costs $200 to $400 and gives you terabytes of storage accessible from all devices. Configure automatic backups from cameras and computers to the NAS.
Weather monitoring integration depends on network reliability. Most weather stations connect via wireless or ethernet. Your automation software needs consistent network access to weather data for safe operation. Lost connectivity should trigger safe shutdown procedures.
Scheduled speed tests identify degrading performance. Run automated bandwidth tests weekly and log results. Declining speeds indicate problems with your internet service, failing equipment, or network congestion.
Remote reboot capabilities save trips to the observatory. Smart power switches let you remotely cycle power to stuck equipment. These devices cost $30 to $100 and connect to your network for control via web interface or mobile app. When combined with how to automate your backyard observatory with open-source software, you gain powerful recovery options.
Security considerations for internet-connected equipment
Astronomy equipment makes an unlikely but real target for attackers.
Change default passwords on every device. Routers, cameras, switches, and computers ship with well-known default credentials. Attackers scan for these constantly. Use unique, strong passwords for each device.
Disable unused services and ports. Every open network service is a potential entry point. If you don’t need web access to a device, disable the web server. If you’re not using FTP, turn it off.
Keep firmware and software updated. Manufacturers release updates to fix security vulnerabilities. Enable automatic updates where available, or schedule monthly manual update checks.
Segment your network to isolate observatory equipment. Create a separate VLAN or subnet for astronomy gear. This limits damage if one device gets compromised. Most modern routers support guest networks that provide this isolation.
Use encryption for all remote access. Unencrypted protocols like HTTP, FTP, and Telnet send passwords in plain text. Use HTTPS, SFTP, and SSH instead. Configure your VPN with strong encryption standards.
Monitor access logs for suspicious activity. Check router logs weekly for unknown devices or unusual access patterns. Most routers can email alerts when new devices connect to your network.
Testing your network before the first observation
Thorough testing prevents disappointment during actual use.
Run bandwidth tests at different times of day. Internet speeds vary based on neighborhood usage. Test during evening hours when you’ll actually be observing.
Transfer large files to verify sustained performance. A speed test shows peak performance, but sustained file transfers reveal throttling or connection instability. Copy a 10 GB file to cloud storage and monitor transfer speeds.
Test remote access from outside your home network. Use cellular data on your phone or visit a friend’s house. Verify you can connect via VPN, access your equipment, and transfer files.
Simulate equipment failures to test monitoring and alerts. Unplug devices and verify you receive alerts. Test how long it takes to detect failures and whether automated recovery works.
Verify weather shutdown procedures work over the network. Trigger a weather alert and confirm your equipment safely parks and closes covers. This test could save thousands in damaged equipment.
Maintaining network reliability over time
Networks degrade without regular maintenance.
Inspect outdoor equipment quarterly. Check for water intrusion, insect nests, corrosion, and loose connections. Clean dust from enclosures and verify weatherproof seals remain intact.
Review and update remote access credentials annually. Change passwords, rotate VPN keys, and remove access for old devices or accounts you no longer use.
Test backup systems monthly. Verify your cellular backup connects automatically when you unplug the primary internet connection. Confirm UPS batteries still hold charge and provide adequate runtime.
Monitor long-term performance trends. Keep logs of bandwidth tests, connection uptime, and equipment temperatures. Declining performance often shows up gradually in logs before causing obvious problems.
Update documentation when you make changes. That late-night configuration change you’ll definitely remember? You won’t. Write it down immediately.
Network setup for specific observatory scenarios
Different observatory types need different approaches.
Backyard observatories within 100 feet of your home need simple solutions. A buried ethernet cable or strong wireless signal from your home router works fine. Focus budget on quality cameras and mounts rather than complex networking.
Remote observatories on your property but far from the house require point-to-point wireless bridges or long cable runs. Budget $200 to $500 for networking infrastructure. Consider solar power with cellular backup if running power is difficult.
Shared observatory sites with multiple users need managed switches, VLANs to separate user equipment, and robust authentication. Each user should have isolated network access to their equipment while sharing internet connectivity.
Mobile observatories for dark-sky trips rely on cellular hotspots or satellite internet. Cellular coverage determines feasibility. Satellite internet has improved dramatically but still costs $100+ monthly with higher latency that affects some real-time control applications.
Network requirements for different camera and telescope systems
Equipment capabilities drive network needs.
Simple all-sky cameras need minimal bandwidth. These systems capture low-resolution images every 30 to 60 seconds. A basic wireless connection or long ethernet cable handles this easily. Consider options when choosing the right all-sky camera for your backyard observatory.
High-resolution imaging telescopes generate large files but don’t need real-time transfer. Configure these systems to store images locally and sync during daytime hours. This approach works with slower network connections.
Video monitoring systems for public outreach need consistent upload bandwidth. Plan for 10 to 15 Mbps upload speeds and low latency. Test streaming performance before announcing public viewing sessions.
Multiple simultaneous systems multiply bandwidth needs. Two cameras and a telescope might need 20+ Mbps upload if all transfer data simultaneously. Configure staggered upload schedules to reduce peak bandwidth requirements.
Scaling your network as your observatory grows
Start simple and expand methodically.
Begin with one device and reliable connectivity. Master remote access and monitoring with a single all-sky camera before adding complex equipment.
Add capacity before you need it. Install conduit with extra space for future cables. Buy switches with more ports than you currently need. This costs slightly more upfront but saves expensive retrofits later.
Document everything as you grow. Network complexity increases faster than you expect. That third camera added at midnight seemed obvious then but looks confusing six months later without notes.
Consider managed switches when you exceed five devices. Managed switches let you monitor traffic, configure VLANs, and troubleshoot problems. The learning curve pays off quickly with complex systems.
Plan for power growth alongside network growth. Each new device needs power and network connectivity. PoE switches scale both simultaneously, simplifying expansion.
Getting help when network problems exceed your expertise
Know when to call for assistance.
Online astronomy communities provide free help for common problems. Forums dedicated to remote observatories have members who’ve solved similar challenges. The best online astronomy forums and communities for backyard observers in 2026 connect you with experienced operators.
Local computer networking professionals can configure complex setups. Hiring help for initial configuration costs $100 to $300 but ensures everything works correctly. You’ll learn by watching and asking questions.
Your internet service provider can diagnose connection problems. Call when you experience consistent slowdowns or outages. They can check line quality, verify speeds, and sometimes upgrade equipment at no cost.
Network equipment manufacturers offer support for their products. Most provide phone support, online chat, and detailed documentation. Use these resources before buying replacement equipment.
Making network decisions that match your observing goals
Let your actual needs drive technology choices.
Casual observers checking weather and downloading images next day need minimal infrastructure. A basic wireless connection or single ethernet cable works fine.
Serious imagers capturing rare events need redundancy and monitoring. Budget appropriately for backup connectivity, automated alerts, and reliable hardware.
Public outreach observatories streaming live views need maximum uptime and bandwidth. Invest in professional-grade equipment and redundant systems.
Research-focused installations collecting long-term data need reliable storage and backup. Prioritize data integrity over real-time access.
Your network enables the astronomy, not the other way around
Network infrastructure should fade into the background once configured properly.
You’re setting up networking to capture 5 unexpected meteor shower captures our all-sky camera recorded this year, not to become a network administrator. Invest time upfront to build reliability, then focus on the sky.
Start with the simplest solution that meets your needs. Add complexity only when simpler approaches fail. Test thoroughly before relying on your setup for irreplaceable observations. Monitor performance over time and maintain equipment regularly.
Your network setup for remote sky monitoring will evolve with your observatory. Build it to grow, document what you build, and don’t let perfect become the enemy of good enough. Clear skies and stable connections make everything else possible.
Post Comment