How Planetary Alignments Actually Look Through a Backyard Telescope
Looking through a telescope at planets for the first time can feel anticlimactic. You expect the stunning images from NASA, but instead you see a tiny disk that barely looks different from a star. That gap between expectation and reality stops many beginners from continuing their astronomy journey, but it shouldn’t.
Planets through telescope appear much smaller than space photos suggest. Jupiter shows clear bands and moons with modest equipment. Saturn’s rings become visible at 50x magnification. Mars reveals surface features only during close approaches. Venus displays phases like the Moon. Mercury and Uranus challenge even experienced observers. Atmospheric conditions matter more than telescope size for planetary detail.
Why Planets Look Different Than You Think
Space agencies use massive telescopes, long exposures, and image stacking software. Your backyard telescope captures a single moment in real time through Earth’s turbulent atmosphere.
The atmosphere acts like looking through water. Air currents bend and distort light. Some nights the air stays calm and planets appear sharp. Other nights they shimmer and blur no matter how good your telescope is.
Magnification also works differently than most people assume. Doubling your magnification doesn’t double the detail you see. It doubles the size of the blur caused by atmospheric turbulence and optical imperfections.
Most planetary viewing happens between 50x and 200x magnification. Going higher rarely helps unless you have exceptional atmospheric conditions and high quality optics.
What Each Planet Actually Shows
Jupiter: The Beginner’s Favorite
Jupiter rewards even small telescopes. At 50x magnification you’ll see an oval disk with two dark bands running horizontally across the middle. Four bright points surround the planet. Those are the Galilean moons.
Increase to 100x and the cloud bands become more defined. You might spot the Great Red Spot if it faces Earth during your observation. The spot looks more like a pale orange oval than the dramatic red storm in photos.
At 150x to 200x, additional cloud bands appear. The polar regions look darker. Individual moons show tiny disks instead of just points of light.
Jupiter’s rapid rotation means cloud features move noticeably in just 30 minutes. The planet completes one rotation every 10 hours.
Saturn: Worth the Investment
Saturn makes telescope ownership worthwhile all by itself. The rings become visible at just 25x magnification as small bumps on either side of the planet. At 50x the rings separate clearly from the planet’s disk.
Push to 100x and you’ll see the Cassini Division, a dark gap in the rings. The planet itself shows subtle banding, though less dramatic than Jupiter’s. Titan, Saturn’s largest moon, appears as a bright dot near the planet.
At 150x or higher, the rings show texture and multiple divisions if the atmosphere cooperates. The planet’s hexagonal north polar storm remains invisible to backyard telescopes, despite being a favorite feature in spacecraft images.
Ring tilt changes over Saturn’s 29 year orbit. Some years the rings appear wide open. Other years they turn edge-on and nearly disappear.
Mars: The Frustrating Red Dot
Mars tests patience. During most of its orbit, Mars appears as a small orange dot that shows almost no detail even at high magnification. Surface features become visible only during opposition when Mars approaches Earth.
Even during favorable oppositions, Mars rarely exceeds the apparent size of Jupiter’s moons. At 150x to 200x you might see the polar ice caps as bright spots. Dark regions like Syrtis Major appear as subtle smudges.
Dust storms can obscure the entire planet for weeks. The thin Martian atmosphere creates its own turbulence that softens details.
Color filters help. An orange or red filter darkens the sky and increases contrast on Martian surface features. A blue filter makes dust clouds more visible.
Venus: Phases and Glare
Venus shows distinct phases like the Moon. When Venus appears in evening or morning twilight, even binoculars reveal its crescent or gibbous shape.
The planet’s thick clouds prevent any surface detail. You see a brilliant white disk or crescent. No amount of magnification reveals continents or weather patterns.
Venus appears largest when it shows a thin crescent. As it moves away from Earth, the phase fills in but the apparent size shrinks. This trade-off means Venus never shows as much detail as Jupiter or Saturn.
The planet’s extreme brightness can hurt your eyes and create internal reflections in your telescope. Observing during twilight rather than full darkness reduces glare.
Mercury: The Challenge
Mercury stays close to the Sun, making observation difficult and potentially dangerous. You must catch it during twilight when the Sun sits below the horizon but Mercury remains visible.
The planet shows phases like Venus but appears much smaller. Surface details remain invisible to backyard telescopes. Most observers simply try to spot Mercury and note its phase.
Never sweep your telescope near the Sun while searching for Mercury. Even a brief glimpse of sunlight through a telescope causes permanent eye damage.
Uranus and Neptune: Barely There
Uranus appears as a tiny blue-green disk at high magnification. Neptune looks similar but smaller and fainter. Neither planet shows cloud bands or storms through amateur equipment.
These ice giants test your telescope’s light gathering ability more than its magnification. A 6-inch or larger aperture helps, but don’t expect dramatic views.
The main satisfaction comes from knowing you’ve seen worlds nearly 2 billion miles away with your own eyes.
Setting Realistic Magnification Goals
| Planet | Minimum Useful | Sweet Spot | Maximum Useful |
|---|---|---|---|
| Jupiter | 50x | 120x to 150x | 250x |
| Saturn | 50x | 100x to 150x | 250x |
| Mars | 100x | 150x to 200x | 300x |
| Venus | 30x | 50x to 100x | 150x |
| Mercury | 30x | 50x | 100x |
| Uranus | 100x | 150x | 200x |
| Neptune | 100x | 150x | 200x |
These numbers assume good atmospheric conditions and quality optics. Pushing magnification higher on poor nights just enlarges a blurry image.
Your telescope’s maximum useful magnification equals about 50 times the aperture in inches. A 4-inch telescope tops out around 200x. An 8-inch can reach 400x on exceptional nights.
Timing Your Observations
Planets look best when they reach opposition, the point where Earth passes between the planet and Sun. Opposition brings planets closest to Earth and keeps them visible all night.
Jupiter reaches opposition roughly every 13 months. Saturn takes about 12.5 months. Mars oppositions occur every 26 months, and not all Mars oppositions bring the planet equally close.
Viewing planets when they sit high in the sky reduces atmospheric distortion. Looking through less air means sharper images. Planets near the horizon shimmer and blur even on otherwise calm nights.
The hour after sunset and before sunrise often provides the calmest air. Daytime heating creates turbulence that takes hours to settle after dark.
Experienced planetary observers often say that aperture gets you to the planet, but atmospheric seeing determines what you’ll actually see. A small telescope on a calm night beats a large telescope on a turbulent night every time.
Common Mistakes That Ruin Views
New telescope owners often make the same errors:
- Using the highest magnification eyepiece immediately
- Observing through an open window where indoor and outdoor air mix
- Setting up on a deck or concrete that radiates stored heat
- Not allowing the telescope to reach outdoor temperature
- Expecting color and detail matching processed astrophotography
- Giving up after one poor viewing session
Temperature equilibration matters more than most beginners realize. Take your telescope outside 30 minutes before observing. Warm optics create air currents inside the telescope tube that destroy image quality.
Improving Your Planetary Views
Simple upgrades make noticeable differences:
-
Add quality eyepieces in the 80x to 150x range for planets. Budget eyepieces that came with your telescope often perform poorly at higher magnifications.
-
Use a Barlow lens to double your eyepiece magnifications. A 2x Barlow turns a 10mm eyepiece into a 5mm equivalent, doubling magnification without buying new eyepieces.
-
Try color filters on Mars and Jupiter. A light blue filter enhances Jupiter’s festoons and polar regions. Orange and red filters increase contrast on Mars.
The biggest improvement comes from learning to recognize good atmospheric conditions. Check planets on multiple nights. You’ll quickly learn what excellent seeing looks like compared to average nights.
Keep a log of your observations. Note the date, time, magnification, and seeing conditions. Patterns emerge that help you predict the best viewing opportunities.
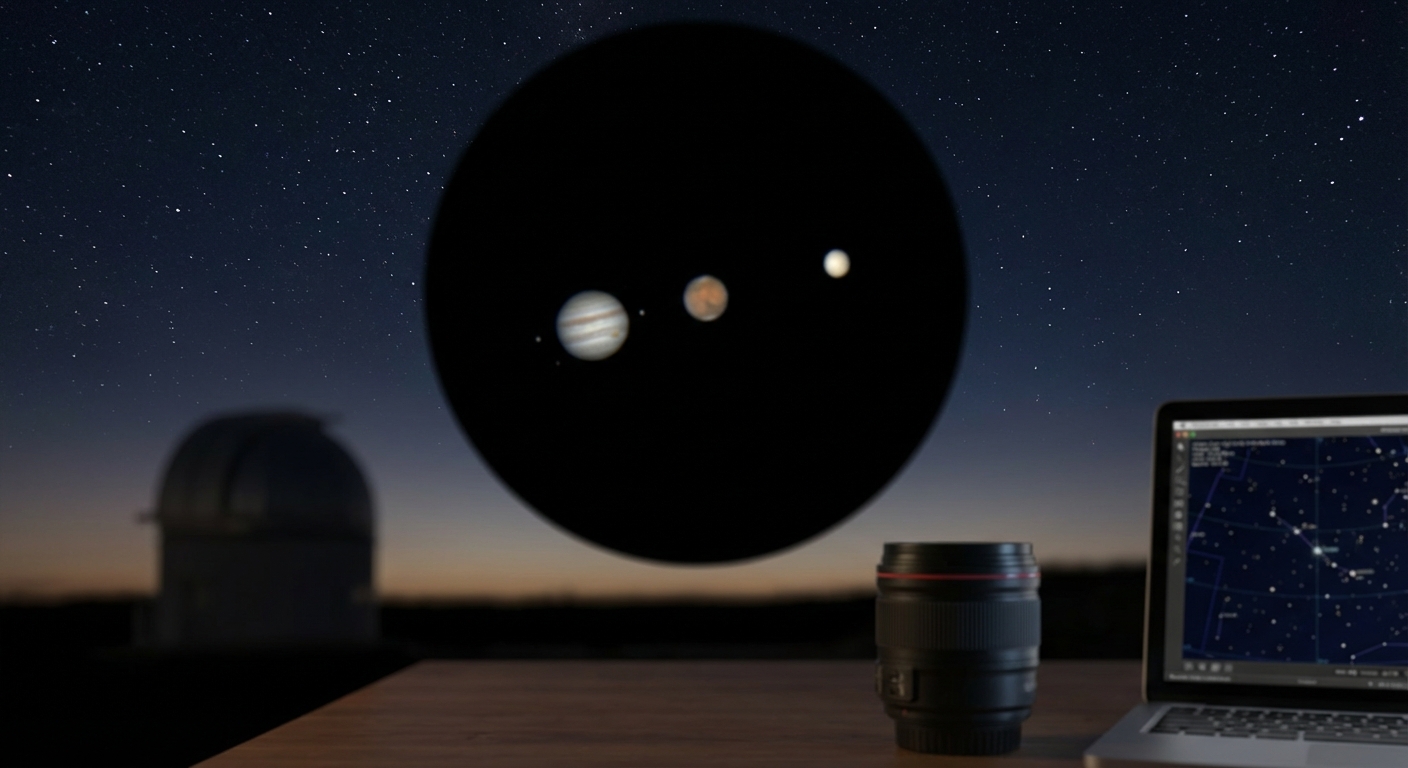
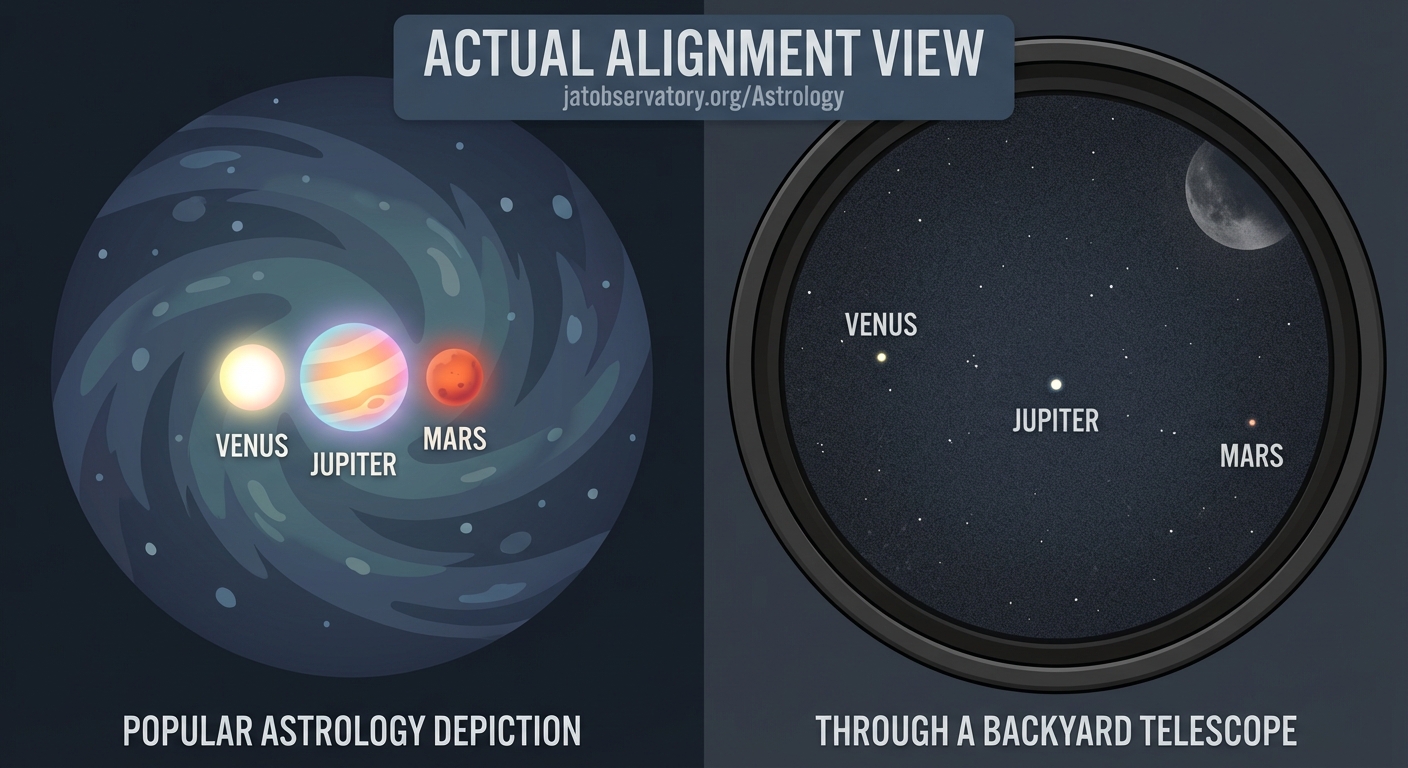
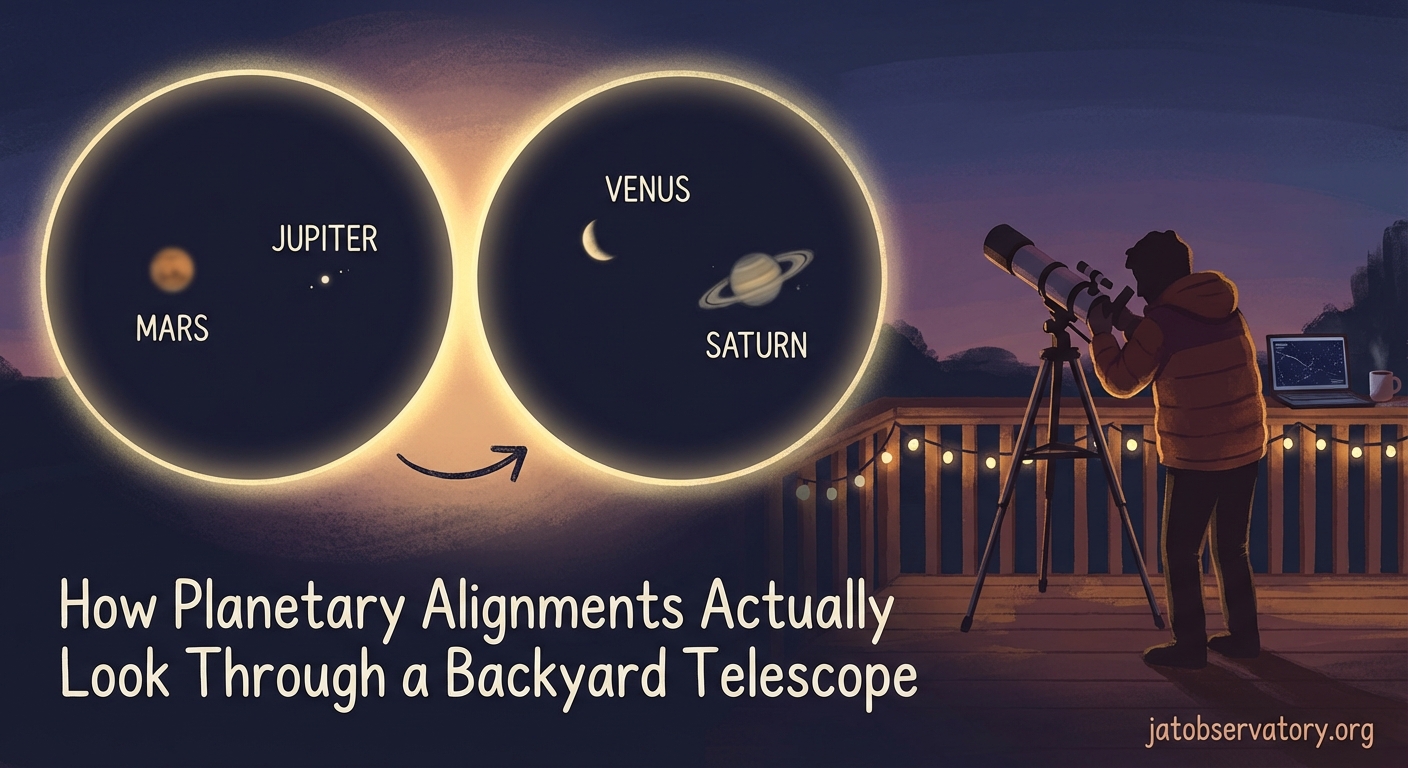
Planetary Alignments: Managing Expectations
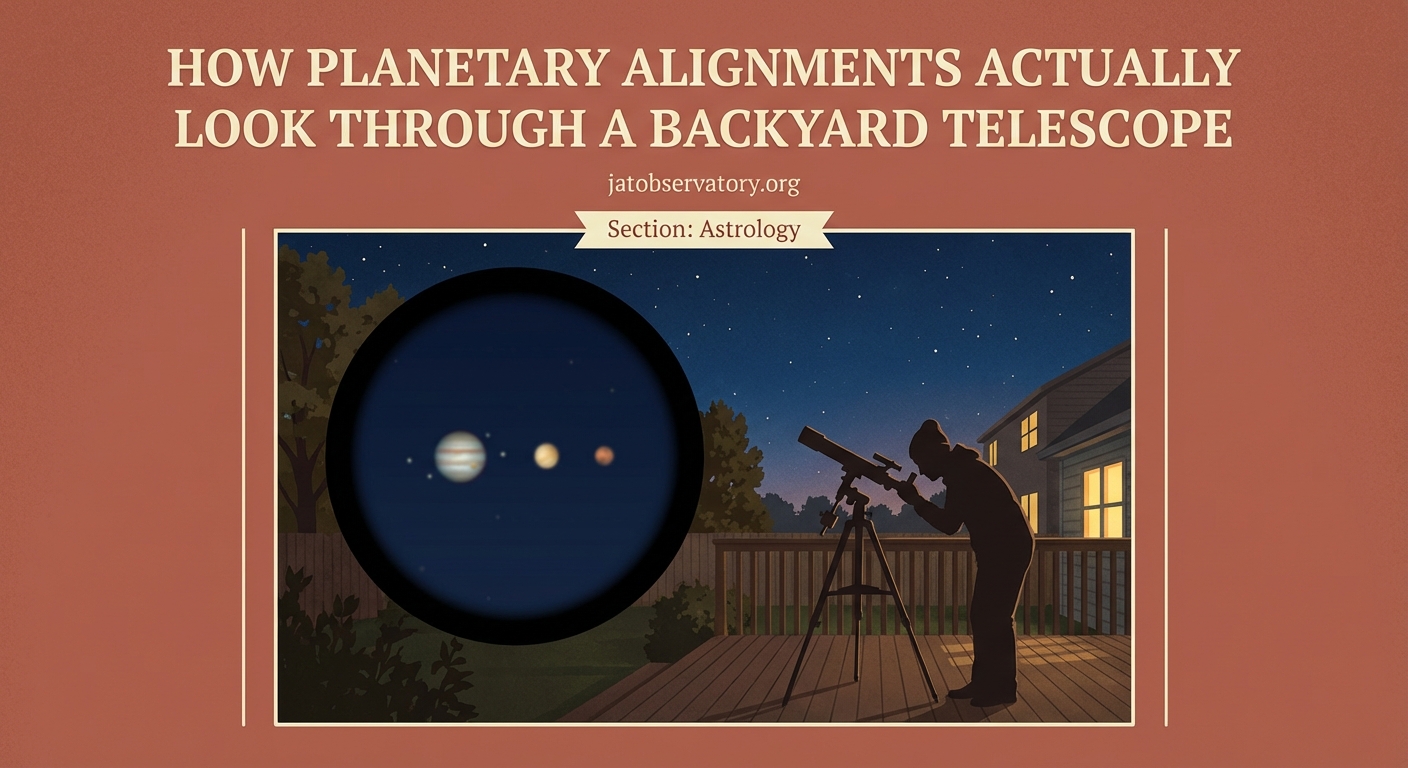
When news reports announce planetary alignments, expectations soar. Multiple planets appearing close together sounds spectacular.
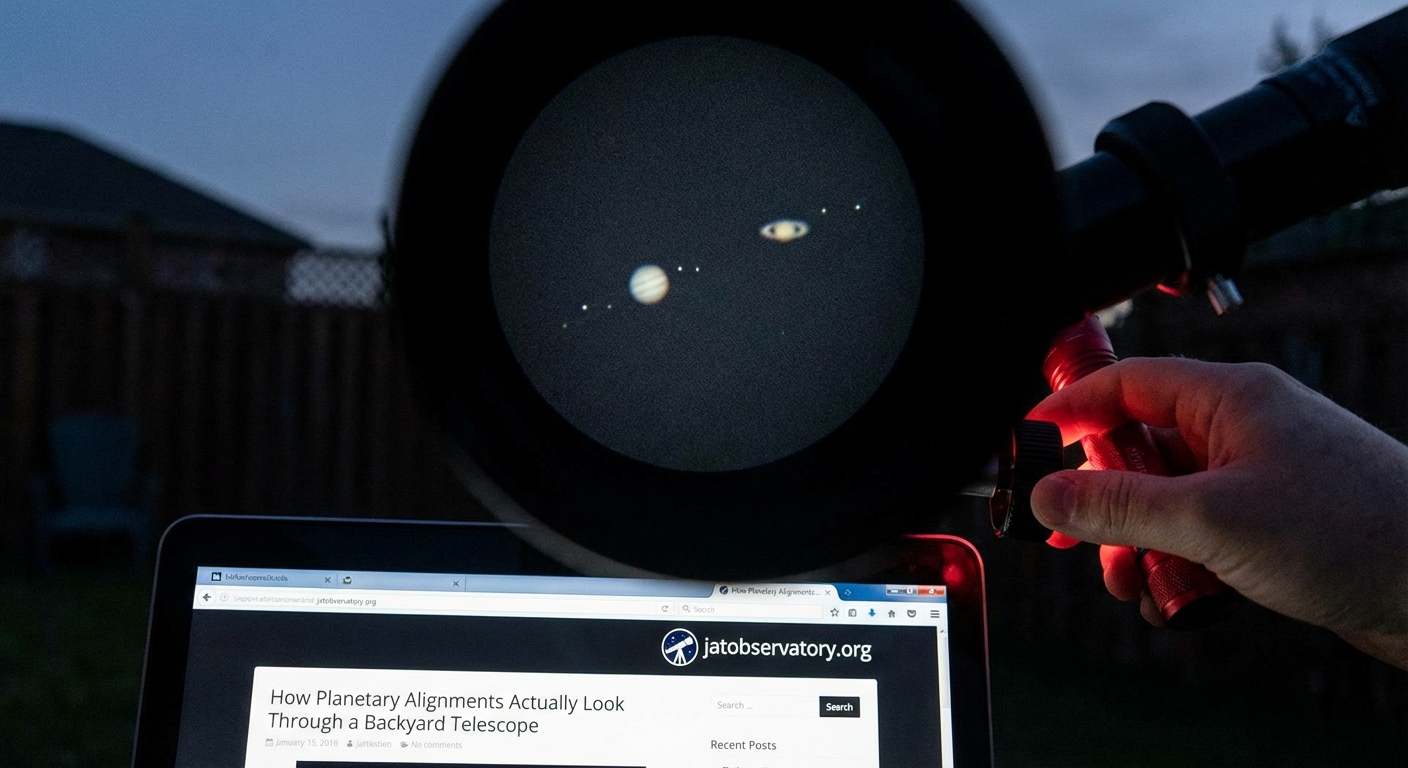
The reality feels less dramatic. Planets still appear as separate points or tiny disks. They don’t merge or create special visual effects. An alignment simply means multiple planets appear in the same general area of sky.
You can observe each planet individually during an alignment. Switching between them becomes convenient since they sit close together. But each planet still looks the same as it would on any other night at that phase and distance.
The best alignments for telescope users happen when bright planets appear close to the Moon. The Moon provides an easy target for getting your bearings, then you can hop to nearby planets.
When Seeing Really Matters
Atmospheric seeing describes how steady the air is. Turbulence in Earth’s atmosphere causes stars to twinkle and planets to shimmer.
Professional observatories rate seeing on a scale. Amateur astronomers use simpler descriptions:
- Poor seeing: Planets look like boiling water, details impossible
- Average seeing: Planets show soft edges, major features visible
- Good seeing: Sharp edges, fine details appear at high magnification
- Excellent seeing: Rare moments of perfect clarity
Coastal areas often experience better seeing than inland locations. Cold fronts passing through can bring exceptional seeing for a night or two. High pressure systems with calm winds create stable air.
You can’t control the atmosphere, but you can choose which nights to observe. Check planets regularly and you’ll catch those magical nights when everything snaps into focus.
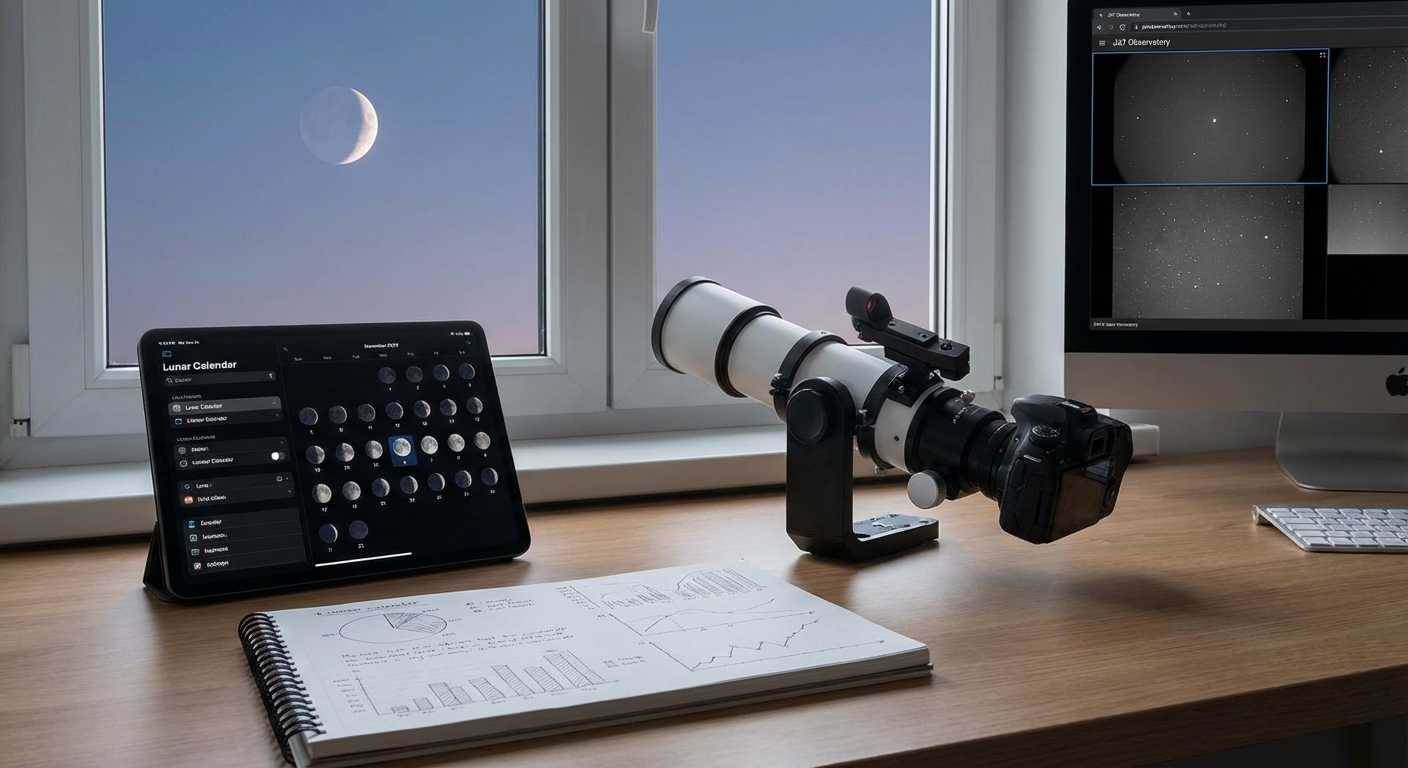
Astrophotography Changes Everything
Taking photos of planets requires different techniques than visual observation. Cameras capture details invisible to your eye by recording thousands of frames and stacking the sharpest moments.
Even smartphone cameras held to the eyepiece can capture Jupiter’s moons and Saturn’s rings. Dedicated planetary cameras reveal cloud features and surface details that remain subtle or invisible during visual observation.
But photography requires practice, equipment, and processing time. Visual observation offers immediate satisfaction. You see photons that left Jupiter 40 minutes ago hitting your retina directly.
Both approaches have value. Many observers enjoy the real-time experience of visual astronomy and save photography for nights when they want permanent records.
Your First Night with Planets
Start with Jupiter or Saturn if either is visible. These planets show obvious features even to complete beginners. Success on your first night builds confidence for observing more challenging targets.
Use your lowest magnification eyepiece first. Center the planet in the field of view. Make sure it looks sharp and steady. Only then switch to higher magnification.
Don’t rush. Spend 10 minutes with each planet. Your eyes adapt to seeing subtle details. Features invisible at first glance become obvious after patient observation.
Take breaks. Planetary observing requires concentration. Your eyes and brain fatigue after extended sessions. Step away for a few minutes, then return for another look.
Making Peace with Reality
Backyard telescopes won’t match Hubble images. They can’t. But they offer something photographs never will: direct connection to other worlds.
Those photons entering your eye traveled across the solar system without being recorded, processed, or enhanced. You’re seeing Jupiter or Saturn with your own eyes, not through someone else’s camera.
The subtle details you learn to spot become more satisfying than any photograph. You’ll notice when Jupiter’s Great Red Spot rotates into view. You’ll track Saturn’s moons as they orbit. You’ll catch Mars during a rare close approach and actually see Syrtis Major with your own eyes.
Start with realistic expectations and you’ll find genuine wonder in what planets through telescope actually show. The views might be smaller and subtler than you imagined, but they’re real, they’re yours, and they’re happening right now in your backyard.
Post Comment