The Complete Guide to Remote Desktop Solutions for Observatory Control
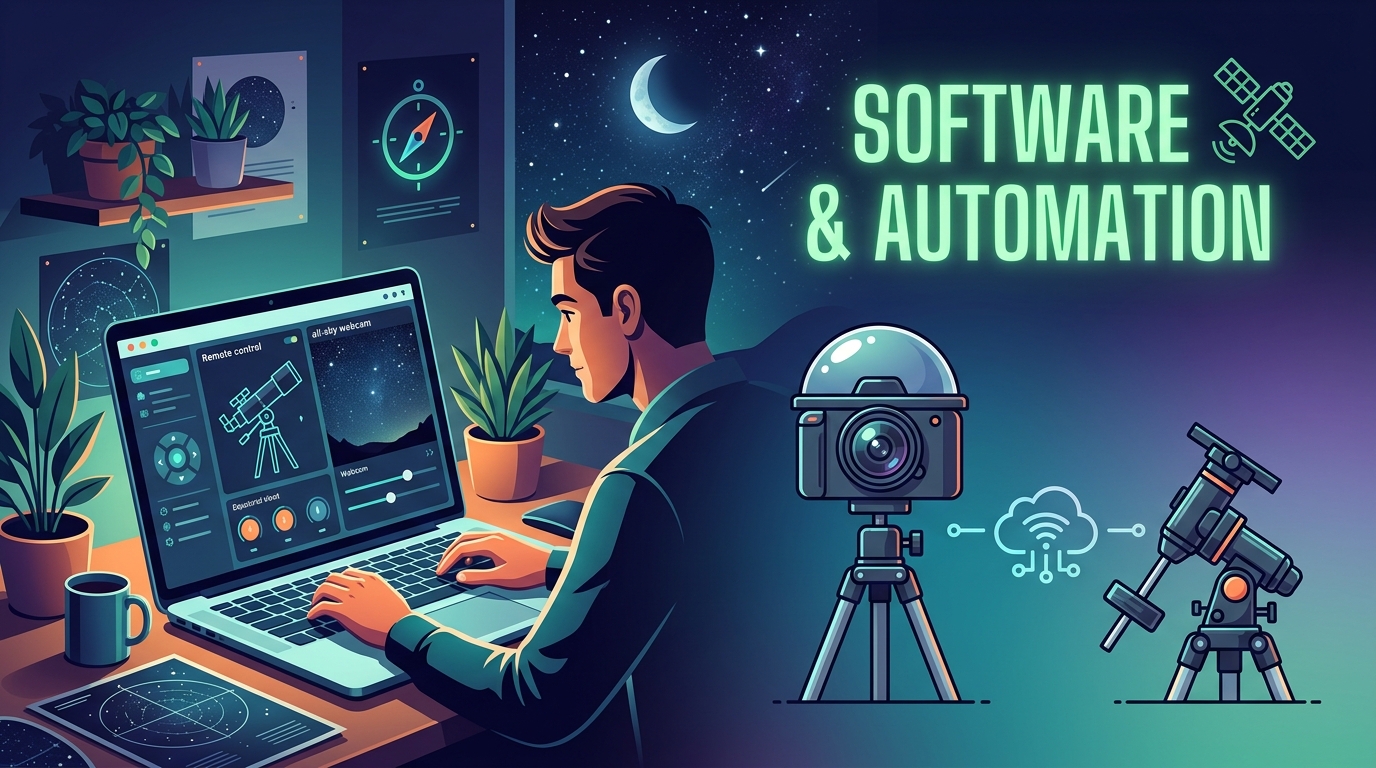
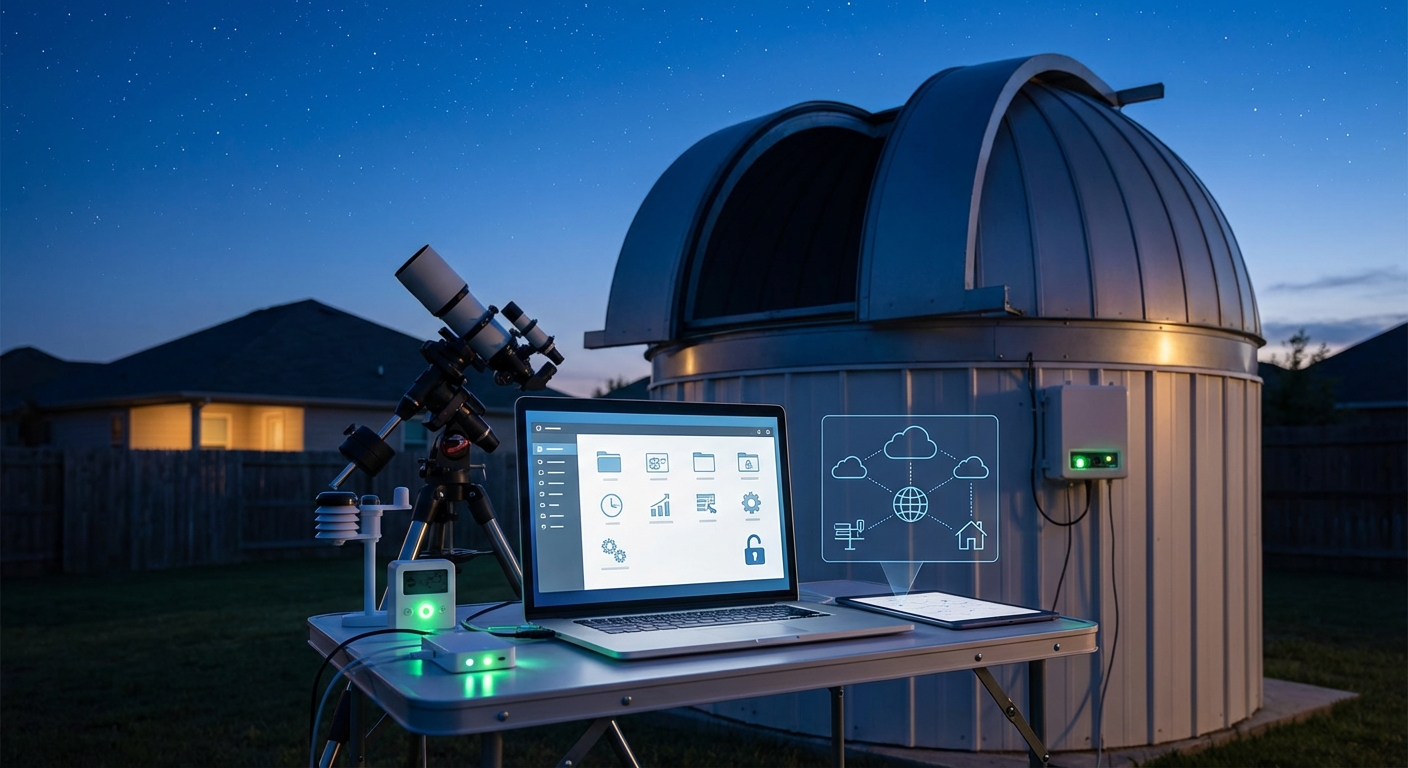
Running an observatory from your living room sounds like science fiction, but it’s become the norm for amateur astronomers who value their sleep and comfort. Remote observatory control software lets you manage telescopes, cameras, weather stations, and dome systems without stepping outside.
The technology has matured beautifully over the past decade. You can now monitor conditions, slew to targets, capture images, and shut down safely before bad weather arrives, all from a web browser or desktop application.
Remote observatory control software connects your telescope, cameras, focuser, mount, and safety systems into one manageable interface. The best solutions offer automated imaging sequences, weather monitoring, cloud detection, and emergency shutdown protocols. Choose platforms based on your equipment compatibility, operating system preference, and whether you need full automation or manual control. Budget options exist alongside professional suites.
Understanding What Remote Observatory Control Software Actually Does
Remote observatory control software acts as the central nervous system for your equipment.
It coordinates multiple devices that normally operate independently. Your mount needs to track accurately. Your camera needs to expose at the right moment. Your focuser needs to adjust for temperature changes. Your roof or dome needs to close if clouds roll in.
Without control software, you’d juggle five different applications and manually coordinate each action. That works fine for visual observing, but imaging sessions require precision timing and repeatability.
Modern control platforms handle device communication through standardized protocols like ASCOM (for Windows) or INDI (for Linux). These protocols let different manufacturers’ equipment talk to each other without custom programming.
The software also manages your imaging workflow. You create sequences that specify targets, filters, exposure times, dithering patterns, and autofocus intervals. The system executes these plans while you sleep or work.
Safety monitoring represents the most critical function. The software watches weather sensors, cloud detectors, and rain monitors. When conditions deteriorate, it parks the mount, closes camera shutters, and seals the observatory before expensive equipment gets damaged.
Core Features Every Control Platform Should Include
Device connectivity forms the foundation. Your software needs native support for your specific mount, camera, focuser, and filter wheel models.
Check compatibility lists carefully. Some platforms work better with certain brands. TheSkyX excels with Software Bisque mounts. NINA integrates beautifully with ZWO cameras. Sequence Generator Pro supports an enormous range of equipment.
Imaging sequence planning lets you build observation runs that execute automatically. You specify:
- Target coordinates or object names
- Number of exposures per filter
- Exposure duration for each frame
- Dithering frequency and distance
- Autofocus triggers (temperature change or frame count)
- Meridian flip handling
The software calculates whether your targets will be visible during your imaging window and warns you about conflicts.
Weather monitoring integration prevents disasters. Your control software should accept input from:
- Cloud sensors (infrared sky temperature)
- Rain detectors
- Wind speed anemometers
- Humidity sensors
- Dew point calculators
When safety thresholds get exceeded, the system aborts the current sequence and executes your shutdown routine.
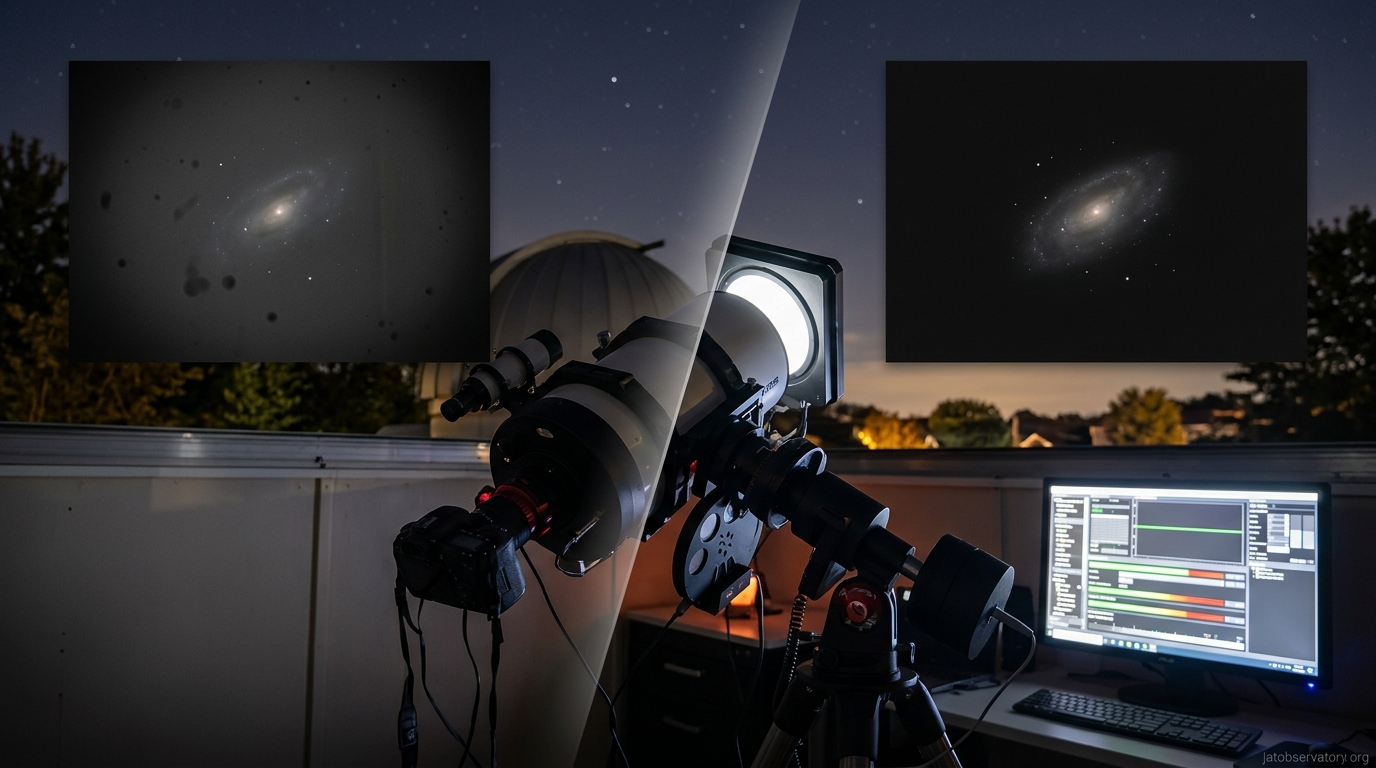
Focusing automation saves enormous time. Manual focusing through remote desktop gets tedious and imprecise. Automated routines measure star shapes across the field, calculate the optimal focus position, and move the focuser accordingly.
Most platforms support multiple autofocus methods. V-curve routines take exposures at different focus positions and fit a curve to find the minimum. Contrast detection analyzes image sharpness in real time.
Comparing Popular Remote Observatory Control Software Options
Several mature platforms dominate the amateur astronomy market. Each brings different strengths.
Sequence Generator Pro (SGP) runs on Windows and offers deep imaging workflow integration. It handles plate solving, meridian flips, automated focusing, and complex sequencing with minimal user intervention.
The interface feels dense at first. You’ll find dozens of options and settings. But this complexity enables precise control over every aspect of your imaging session.
SGP excels at recovery from errors. If your mount loses its way or clouds interrupt imaging, the software can re-solve plate positions and resume where it left off.
N.I.N.A. (Nighttime Imaging ‘N’ Astronomy) provides a free, open-source alternative for Windows users. The community behind NINA grows rapidly, and the feature set rivals commercial options.
The interface uses a modern design with drag-and-drop sequence building. You create imaging plans by connecting instruction blocks visually rather than filling out forms.
NINA’s plugin ecosystem adds capabilities that aren’t in the core software. Community developers contribute weather integrations, advanced focusing algorithms, and specialized camera controls.
PRISM targets serious imagers who need professional-grade tools. It costs more than other options but includes sophisticated features like automated spectroscopy, photometry workflows, and publication-quality data reduction.
The learning curve is steep. PRISM assumes you understand astronomical concepts and terminology. But if you’re doing scientific imaging or contributing to research projects, the investment pays off.
ACP Observatory Control pioneered fully automated observatory operation. It’s been around longer than most alternatives and has proven reliability in robotic installations.
ACP focuses on unattended operation. You can schedule weeks of imaging targets, and the system will work through the list whenever conditions permit. It’s less suited for interactive control but perfect for remote sites you visit rarely.
For Linux users, KStars with Ekos provides a complete solution built around the INDI driver framework. It runs on Raspberry Pi computers, making it ideal for embedded observatory controllers.
The platform integrates planetarium software, imaging tools, and device control in one application. You can plan observations visually on star charts and send targets directly to your imaging sequence.
| Software | Platform | Cost | Best For | Learning Curve |
|---|---|---|---|---|
| Sequence Generator Pro | Windows | $150 | Deep sky imaging | Moderate |
| N.I.N.A. | Windows | Free | Budget-conscious imagers | Gentle |
| PRISM | Windows | $400+ | Scientific imaging | Steep |
| ACP Observatory Control | Windows | $250 | Robotic operation | Moderate |
| KStars/Ekos | Linux | Free | Raspberry Pi setups | Moderate |
Setting Up Your First Remote Control System

Getting your observatory online requires methodical configuration. Rush the process and you’ll troubleshoot connection problems for weeks.
-
Install device drivers before control software. Your operating system needs to recognize each piece of equipment. Download ASCOM Platform (Windows) or INDI Library (Linux) first, then install manufacturer drivers for your specific models.
-
Connect devices one at a time. Start with your mount. Verify it responds to slew commands and reports position correctly. Add your camera next, confirming you can take test exposures. Then integrate focuser, filter wheel, and accessories.
-
Configure safety monitoring. Set up weather sensors and define your shutdown thresholds. Test the emergency routine manually before trusting it with expensive equipment. Make sure the software actually closes your roof or dome cover.
-
Build a simple imaging sequence. Create a basic plan with one target and short exposures. Run it while you watch. Observe how the software handles focusing, dithering, and filter changes.
-
Enable plate solving. Install a local plate solving engine like PlateSolve2 or ASTAP. Configure your software to solve images after each slew. This confirms your telescope points where you think it does.
-
Test recovery procedures. Deliberately cause problems. Disconnect your camera mid-sequence. Manually slew the mount away from your target. See how the software responds and whether it can recover automatically.
-
Document your configuration. Write down connection settings, COM ports, IP addresses, and driver versions. You’ll need this information when troubleshooting or rebuilding after updates.
“The biggest mistake new remote observatory operators make is skipping safety testing. They set up imaging sequences perfectly but never verify their shutdown routine actually works. Then a thunderstorm rolls in at 3 AM and they discover the dome won’t close because a limit switch wasn’t configured properly.” – Observatory automation consultant
Automating Your Observation Workflow
Full automation transforms your observatory from a remote-controlled telescope into a robotic imaging platform.
Start by creating target lists. Most control software accepts lists in CSV format or can import from planetarium programs. Include object coordinates, desired filters, exposure counts, and priority rankings.
The software uses this list to schedule observations based on:
- Object altitude and meridian transit times
- Moon phase and separation angle
- Previously captured data (avoiding duplicates)
- Weather forecast integration
- Your specified imaging windows
Advanced platforms can optimize the schedule dynamically. If clouds obscure your primary target, the system switches to an alternate object in a clear part of the sky.
Automated calibration frame capture saves time. Configure your software to take dark frames, bias frames, and flat fields during twilight or when the observatory sits idle.
Some systems integrate with motorized flat panels. These LED light sources mount over your telescope aperture and provide consistent illumination for flat field calibration.
Focus maintenance throughout the night prevents soft images. Temperature changes cause your telescope to expand and contract, shifting the focal plane. Your control software should trigger autofocus routines when:
- Temperature drops more than 2°C since the last focus
- A specified number of frames have been captured
- You switch to a different filter
- The telescope crosses the meridian
If you’re building an all-sky camera system to monitor celestial patterns year-round, integrate its cloud detection data with your control software for smarter weather decisions.
Common Mistakes That Waste Time and Data
Network configuration problems plague remote observatory setups. You need reliable connectivity between your control computer and equipment.
USB hubs seem convenient but cause intermittent disconnections. Powered hubs with quality chipsets (Texas Instruments, VIA) work better than cheap models. Keep USB cable runs under 15 feet or use active extension cables.
Static IP addresses prevent connection headaches. Configure your mount, camera, and any network-enabled devices with fixed IPs outside your router’s DHCP range. Document these addresses.
Insufficient cooling time ruins early images. CCD and CMOS cameras need 10-15 minutes to reach operating temperature and stabilize. Start your cooling before you begin sequences, or configure your software to wait for temperature stability before exposing.
Ignoring meridian flips causes tracking errors and lost data. When your telescope crosses the meridian, the mount must flip to continue tracking. Your control software should:
- Predict flip timing based on target declination
- Pause imaging before the flip occurs
- Re-center and re-focus after flipping
- Resume the sequence automatically
Inadequate disk space monitoring leads to failed sessions. A night of imaging can generate 50+ GB of data. Configure your software to check available storage before starting sequences and alert you when space runs low.
Poor time synchronization creates plate solving failures and inaccurate logs. Use NTP (Network Time Protocol) to keep your control computer’s clock accurate to within one second. This matters for precise pointing and astronomical calculations.
Integrating Weather Safety and Cloud Detection
Weather monitoring separates successful remote observatories from expensive disasters.
Your control software needs real-time data from multiple sensors. Cloud detectors measure sky temperature using infrared sensors. Clear skies radiate heat into space and measure colder than ambient temperature. Clouds reflect ground heat and measure warmer.
A typical safety configuration might specify:
- Cloud sensor reading less than -15°C (clear sky)
- Wind speed under 25 mph
- No rain detected for at least 15 minutes
- Humidity below 85%
- Dew point at least 2°C below ambient temperature
When any threshold gets violated, your software should:
- Stop the current exposure
- Close camera shutters
- Park the mount in its home position
- Close dust caps or lens covers
- Seal the observatory roof or dome
- Send notification alerts
The system should wait for conditions to improve before resuming. Define how long sensors must report safe conditions (typically 10-15 minutes) before opening back up.
Some advanced setups integrate weather forecast APIs. The software checks hourly predictions and won’t start long imaging sequences if rain is forecast within the next two hours.
For those interested in capturing transient events, setting your remote telescope for lunar occultation events requires precise timing that weather-aware control software can manage automatically.
Remote Desktop Solutions for Observatory Access
Your control software runs on a computer inside or near your observatory. You need reliable remote access to that system.
Windows Remote Desktop Protocol (RDP) provides the standard solution for Windows-based control systems. It’s built into the operating system, requires no additional software, and offers reasonable performance over broadband connections.
Configure RDP to use a non-standard port (not the default 3389) to reduce automated attack attempts. Set up strong passwords or certificate-based authentication.
VNC (Virtual Network Computing) works across operating systems and offers more flexibility than RDP. TightVNC and RealVNC are popular choices. Performance varies based on network conditions and compression settings.
TeamViewer and similar commercial remote desktop tools provide easier setup for users uncomfortable with network configuration. They work through firewalls without port forwarding but introduce dependency on third-party services.
For Linux-based systems running open-source observatory automation software, VNC or SSH with X11 forwarding provides remote access to graphical applications.
Web-based interfaces eliminate the need for separate remote desktop software. Some control platforms include built-in web servers that let you monitor and control imaging sessions through a browser.
Mobile apps extend control to phones and tablets. NINA Remote, ACP Web Access, and similar tools let you check status, pause sequences, or trigger emergency shutdowns from anywhere.
Security matters when your equipment connects to the internet. Use VPN (Virtual Private Network) connections to create encrypted tunnels between your home network and observatory. This prevents unauthorized access and protects your data.
Monitoring and Troubleshooting Remote Sessions
You can’t physically observe your equipment when operating remotely. Comprehensive monitoring prevents small problems from becoming disasters.
Enable detailed logging in your control software. Logs should capture:
- Every device command and response
- Focus measurements and adjustments
- Weather sensor readings
- Sequence progress and completion status
- Error messages and recovery attempts
Review logs after each session. Patterns emerge that predict problems. Gradual focus drift might indicate temperature compensation needs adjustment. Intermittent camera disconnections could mean a failing USB cable.
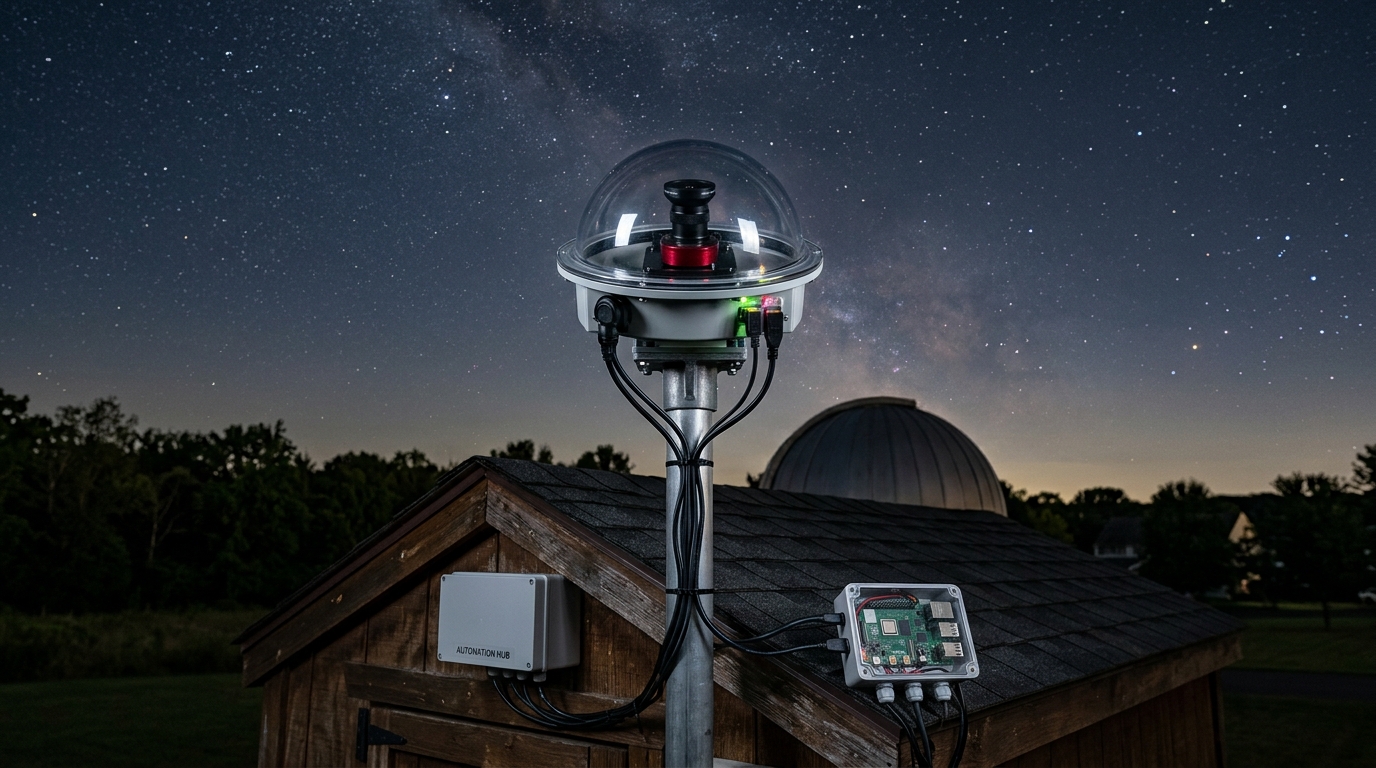
Real-time monitoring through all-sky cameras shows actual sky conditions. You can verify the cloud sensor’s assessment and spot approaching weather systems. Choosing the right all-sky camera for your monitoring needs depends on your budget and image quality requirements.
Email and SMS notifications keep you informed without constant monitoring. Configure alerts for:
- Sequence completion or failure
- Weather safety violations
- Device connection losses
- Autofocus failures
- Low disk space warnings
Some operators set up IP cameras inside their observatory enclosures. These let you visually verify that roof mechanisms operate correctly and equipment remains properly positioned.
Network monitoring tools like Ping or SNMP can alert you if your observatory computer becomes unreachable. This early warning lets you investigate connectivity problems before your imaging session fails.
Power Management and Unattended Operation
Remote observatories need reliable power with intelligent management. Unattended operation requires planning for various failure scenarios.
Switched power distribution units (PDUs) let your control software turn equipment on and off remotely. This enables:
- Powering up devices in the correct sequence
- Rebooting frozen equipment without site visits
- Reducing power consumption during daylight hours
- Emergency shutdown of all systems
Some PDUs include current monitoring. You can detect equipment failures by watching for abnormal power draw. A camera that stops pulling current probably lost connection or failed.
Uninterruptible power supplies (UPS) protect against brief outages and provide clean power. Choose UPS units with network management capabilities so your control software can monitor battery status and initiate graceful shutdowns during extended outages.
For truly remote sites without reliable grid power, essential power management solutions include solar panels, battery banks, and intelligent charge controllers that your software can monitor.
Configure your control software to check power status before starting sequences. If battery charge falls below a threshold or UPS runtime estimates less than your planned imaging session, the system should wait or abort.
Choosing Software Based on Your Observatory Type
Your observatory’s physical setup influences which control software works best.
Backyard roll-off roof observatories need software that integrates with roof automation. Look for platforms that support relay controllers or motor drivers for opening and closing mechanisms. The software should verify roof position before unparking the mount.
Dome observatories require sophisticated coordination between mount position and dome rotation. Your control software must keep the dome slit aligned with your telescope’s pointing direction. Not all platforms handle dome control equally well.
Permanent pier installations with fixed equipment can use simpler configurations. You won’t need to handle different telescope setups or equipment changes. Focus on imaging workflow efficiency rather than equipment flexibility.
Portable setups that you deploy and tear down need software with quick configuration profiles. The ability to save and load equipment configurations speeds setup when you move between observing sites.
Shared observatories with multiple users benefit from software that supports user profiles and scheduling systems. Some platforms include calendar integration so users can reserve telescope time and avoid conflicts.
Budget constraints matter too. Free options like NINA and KStars/Ekos deliver professional results for patient users willing to learn complex interfaces. Commercial software offers better documentation and support but requires ongoing investment.
Planning Your Imaging Sequences for Maximum Efficiency
Efficient sequence planning maximizes your observatory’s productivity during limited clear nights.
Start with target selection based on seasonal visibility. Your control software can filter object databases by:
- Current altitude above the horizon
- Hours until meridian transit
- Angular separation from the moon
- Previous imaging history
Prioritize targets that will be well-placed for the fewest nights. An object at 70° altitude tonight but only 40° next month deserves priority over something that stays high all season.
Group targets by required filters and exposure settings. Switching filters takes time and risks focus shifts. Imaging multiple targets with the same filter before switching reduces overhead.
Calculate realistic time estimates. Your sequence includes more than just exposure time:
- Slew and settling time between targets (30-60 seconds)
- Autofocus routines (2-3 minutes)
- Filter changes (10-15 seconds each)
- Dithering moves (5-10 seconds)
- Plate solving verification (30-60 seconds)
A 300-second exposure actually consumes 6-7 minutes of clock time when you account for overhead.
Build in buffer time for unexpected events. Weather might pause your sequence temporarily. Autofocus might need extra attempts. Leave 15-20% of your imaging window unscheduled.
Many control platforms support mosaic imaging for large objects. The software calculates panel positions, manages the sequence, and can even pre-process the data for stitching. This works beautifully for targets like photographing the Andromeda Galaxy that exceed your camera’s field of view.
Scripts and Plugins That Extend Control Software
Most control platforms support scripting or plugins that add custom functionality.
Pre-imaging scripts can:
- Check weather forecasts via API calls
- Verify network connectivity to critical services
- Confirm adequate disk space exists
- Test communication with all devices
- Send “session starting” notifications
Post-imaging scripts handle:
- Uploading images to cloud storage
- Running initial calibration and stacking
- Updating imaging logs and databases
- Sending completion reports with thumbnails
- Shutting down non-essential equipment
Some users write scripts that integrate external services. You might query satellite tracking databases to avoid imaging when the ISS or Starlink trains will cross your field. Or check solar activity forecasts to predict aurora possibilities.
The community around platforms like NINA develops plugins for specialized needs. Available plugins handle:
- Advanced weather service integration
- Telescope cover automation
- Flat panel control
- Custom focus routines
- Target scheduling algorithms
If you’re comfortable with programming, essential scripts every remote observatory owner should be running can dramatically improve your automation reliability.
Python and PowerShell work well for observatory automation. Both can interact with ASCOM devices, manipulate files, send notifications, and integrate web services.
Network Requirements for Reliable Remote Control
Your network infrastructure determines whether remote operation feels responsive or frustrating.
Bandwidth requirements are modest for control traffic. Commands and telemetry consume minimal data. But if you want to view live images or stream video from observatory cameras, you need upstream bandwidth of at least 5-10 Mbps.
Latency matters more than bandwidth for interactive control. Satellite internet with 500+ ms latency makes manual telescope control feel sluggish. Cable or fiber connections with sub-50ms latency provide responsive operation.
For detailed guidance on network infrastructure, what network setup do you actually need for remote sky monitoring covers routers, switches, and connectivity options in depth.
Reliability trumps speed. A consistent 10 Mbps connection beats an unreliable 100 Mbps connection that drops randomly. Look for internet service providers with good uptime records in your area.
Local network quality matters too. Use gigabit Ethernet between your control computer and network switch. WiFi works for monitoring but can introduce connection instability for critical device control.
Consider redundant internet connections for critical installations. A cellular backup connection provides failover if your primary internet fails. Some routers support automatic switching between connections.
Static IP addresses or dynamic DNS services let you find your observatory computer reliably. Most residential internet uses dynamic IPs that change periodically. Dynamic DNS services like No-IP or DynDNS update automatically when your IP changes.
Making Remote Control Work Through the Seasons
Seasonal changes affect your remote observatory operation in ways you might not anticipate.
Summer brings heat and humidity. Camera cooling systems work harder to reach operating temperature. You might need to adjust target temperatures or accept longer cooling times. Some control software can adapt cooling setpoints based on ambient temperature.
Dew becomes a serious problem in humid conditions. Configure your software to monitor dew point and activate dew heaters when condensation risk increases. Some platforms support PWM (pulse width modulation) control of heater intensity.
Winter cold improves camera performance but challenges mechanical systems. Focusers move more slowly in freezing temperatures. Dome rotation mechanisms might require more power. Your software should allow longer timeout periods for device responses.
Focus changes more rapidly with temperature in winter. Configure more frequent autofocus triggers when temperature drops quickly after sunset.
Spring and fall bring unpredictable weather. Your safety monitoring becomes critical during transitional seasons when conditions change rapidly. Tighten your safety thresholds during these months.
Daylight saving time changes can confuse scheduling systems. Make sure your control software and operating system handle time zone transitions correctly. Use UTC for astronomical calculations to avoid ambiguity.
Seasonal targets require updated imaging plans. Your control software should make it easy to switch between summer and winter target lists as constellations change.
Getting Started Without Overwhelming Yourself
Remote observatory control software offers enormous capability, but you don’t need to master everything immediately.
Begin with basic manual control. Use the software to slew your telescope and take single exposures. Get comfortable with the interface before attempting automation.
Add one feature at a time. Once manual control feels natural, enable autofocus. After that works reliably, add simple sequences with one target. Then integrate weather monitoring. Build complexity gradually.
Join online communities focused on your chosen software platform. The best online astronomy forums connect you with experienced users who’ve solved the problems you’ll encounter.
Many software platforms offer detailed tutorials and documentation. Work through these systematically rather than jumping to advanced features. The fundamentals matter more than fancy capabilities.
Start with short imaging sessions you can monitor. Stay awake for your first few automated runs. Watch how the software handles different situations. You’ll build confidence and catch configuration problems before they cause serious issues.
Document your configuration and settings. Take screenshots of working setups. Write notes about what values work for your equipment. You’ll reference this information constantly during troubleshooting.
Consider starting with free software before investing in commercial platforms. NINA provides a full-featured environment for learning remote control concepts. You can always migrate to paid software later if your needs outgrow free options.
Why Your Observatory Deserves Proper Control Software
Remote observatory control software transforms astronomy from a hobby that demands your physical presence into one that fits your schedule and comfort.
The right platform lets you capture data on cold winter nights while you stay warm inside. It maximizes clear sky time by operating automatically when you’re sleeping or working. It protects your equipment from weather disasters you’d never catch manually.
Most importantly, it removes the tedious parts of imaging so you can focus on the interesting work: planning observations, processing data, and actually looking at what you’ve captured.
Your first automated imaging session feels like magic. You’ll set up a sequence, watch it start, then go to bed. In the morning, you’ll find dozens of perfectly exposed, focused, and dithered frames waiting for processing. The software handled everything while you slept.
That’s when you realize your observatory has evolved from a telescope you operate into a robotic imaging system that works for you.
Post Comment