Weatherproofing Your Backyard Observatory on a Hobbyist Budget
Building a backyard observatory on a budget doesn’t mean sacrificing quality or functionality. Thousands of amateur astronomers have proven that you can create a reliable observing space without draining your savings account. The key lies in smart material choices, strategic planning, and understanding which corners you can cut without compromising your equipment or observations.
You can build a functional backyard observatory for under $1,000 by prioritizing weatherproofing essentials, using repurposed materials, and focusing on protecting your equipment rather than creating elaborate structures. Smart material selection, proper ventilation design, and systematic moisture control will keep your telescope and cameras safe while staying within a hobbyist budget. Start small and expand as your needs grow.
Understanding Your Observatory Budget Priorities
Most beginners make the mistake of allocating funds evenly across all aspects of their observatory build. This approach leaves you with mediocre everything instead of excellent protection where it matters most.
Your telescope and imaging equipment represent the largest investment. Protecting these items from moisture, temperature swings, and weather damage should consume 60 to 70 percent of your budget. The remaining funds can cover comfort features and aesthetic improvements.
A basic shelter costs between $300 and $800 when you source materials strategically. Add another $200 to $300 for weatherproofing supplies, ventilation components, and moisture control systems. This leaves room in a $1,000 budget for essential accessories like power management and basic automation.
Material Selection That Protects Without Breaking the Bank
Choosing the right building materials determines both your upfront costs and long-term maintenance expenses. Here are proven options that balance affordability with durability:
- Marine-grade plywood offers excellent weather resistance at half the cost of composite panels
- Corrugated polycarbonate panels provide transparent roof sections for around $3 per square foot
- Recycled vinyl siding protects exterior walls for $1.50 per square foot
- Foam board insulation prevents condensation and costs only $0.40 per square foot
- Aluminum flashing seals joints and edges effectively for under $15 per roll
- Silicone caulk rated for outdoor use runs about $6 per tube
Avoid pressure-treated lumber for interior surfaces. The chemicals can off-gas and affect sensitive optical coatings. Regular construction-grade lumber works fine for framing when properly sealed and painted.
The biggest weatherproofing mistake I see is skimping on ventilation to save $50, then spending $500 replacing equipment damaged by condensation. Always prioritize airflow over cosmetic features.
Step-by-Step Weatherproofing Process
Follow this systematic approach to protect your observatory from the elements:
- Start with a raised foundation using concrete blocks or treated lumber to prevent ground moisture infiltration
- Install a vapor barrier beneath all flooring materials, overlapping seams by at least six inches
- Frame your structure with adequate roof pitch (minimum 3:12 slope) for water runoff
- Apply weatherproof membrane to all exterior sheathing before adding siding
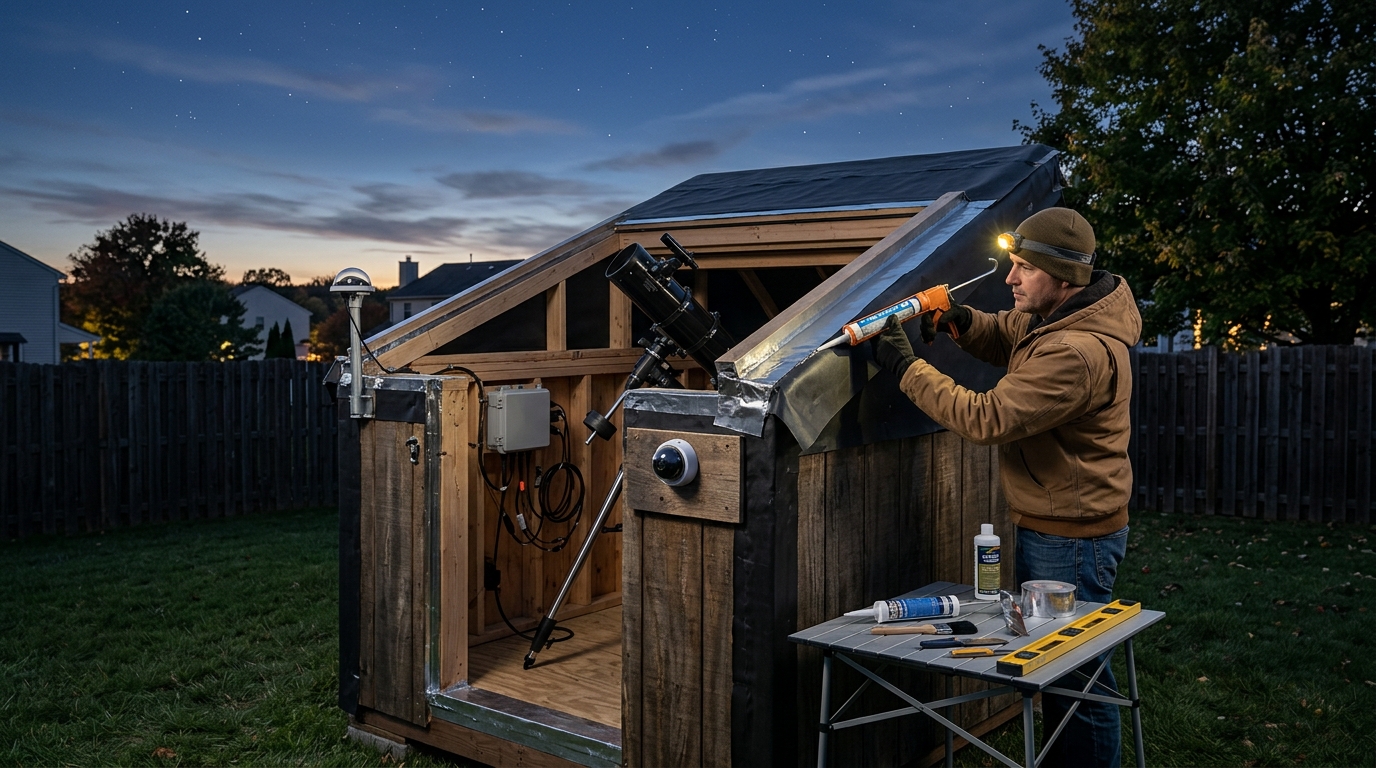
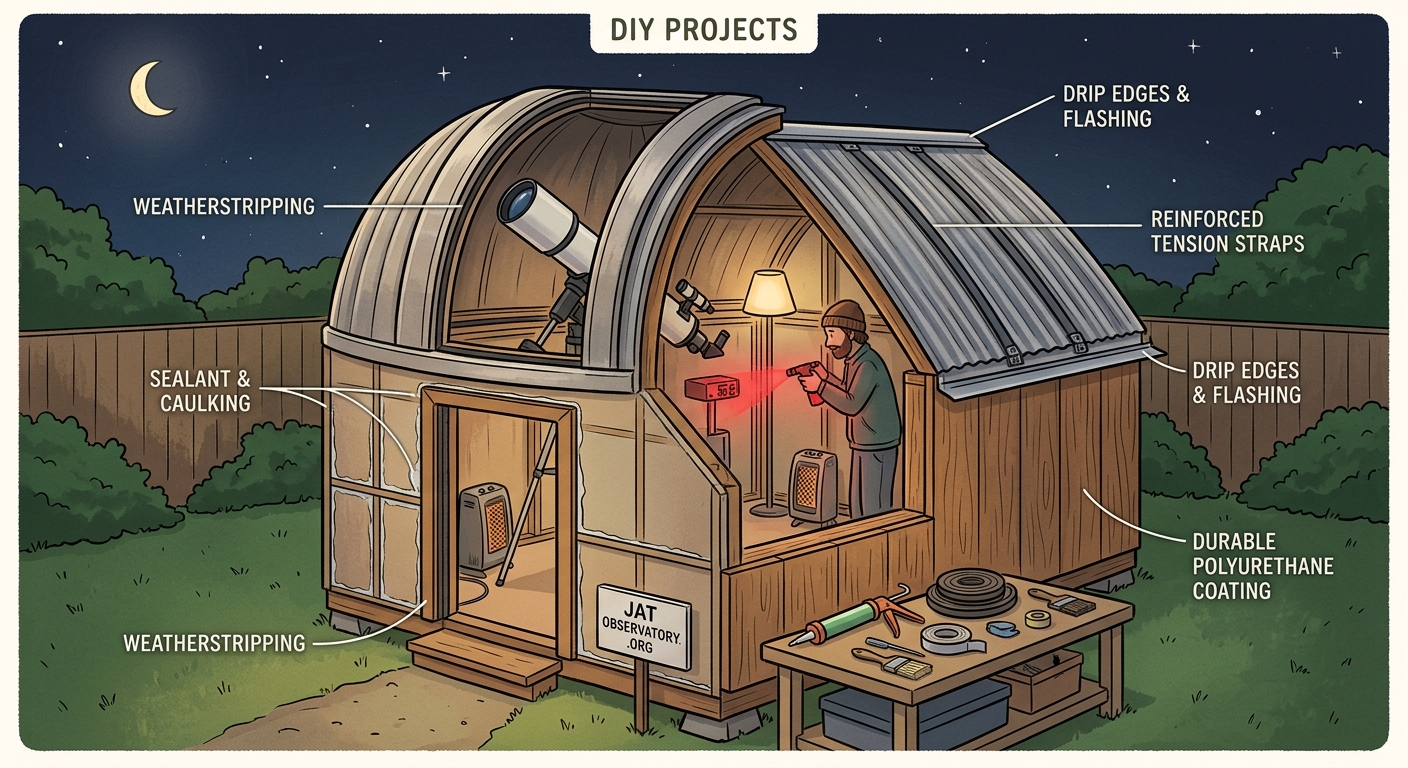
- Install drip edges and flashing around all roof penetrations and wall joints
- Seal every seam, gap, and fastener hole with appropriate caulk or expanding foam
- Add soffit vents at the eaves and ridge vents at the peak for continuous airflow
- Install a dehumidifier or desiccant system sized for your interior volume
- Test your weatherproofing during a rain event before moving in expensive equipment
This sequence ensures each layer builds upon the previous one, creating overlapping protection against water intrusion.
Common Weatherproofing Mistakes and Solutions
| Mistake | Why It Fails | Budget-Friendly Solution |
|---|---|---|
| Single-layer roof | Water finds any imperfection | Add ice and water shield under shingles ($45 per roll) |
| No ventilation plan | Condensation damages optics | Install $8 passive vents at peak and eaves |
| Flat or low-slope roof | Water pools and penetrates | Increase pitch to 4:12 minimum or add rubber membrane |
| Untreated wood edges | Moisture wicks into grain | Seal all cut ends with exterior primer before assembly |
| Missing drip edge | Water runs back under shingles | Install aluminum drip edge for $2 per linear foot |
| Interior moisture traps | Humidity concentrates overnight | Add $30 rechargeable desiccant containers |
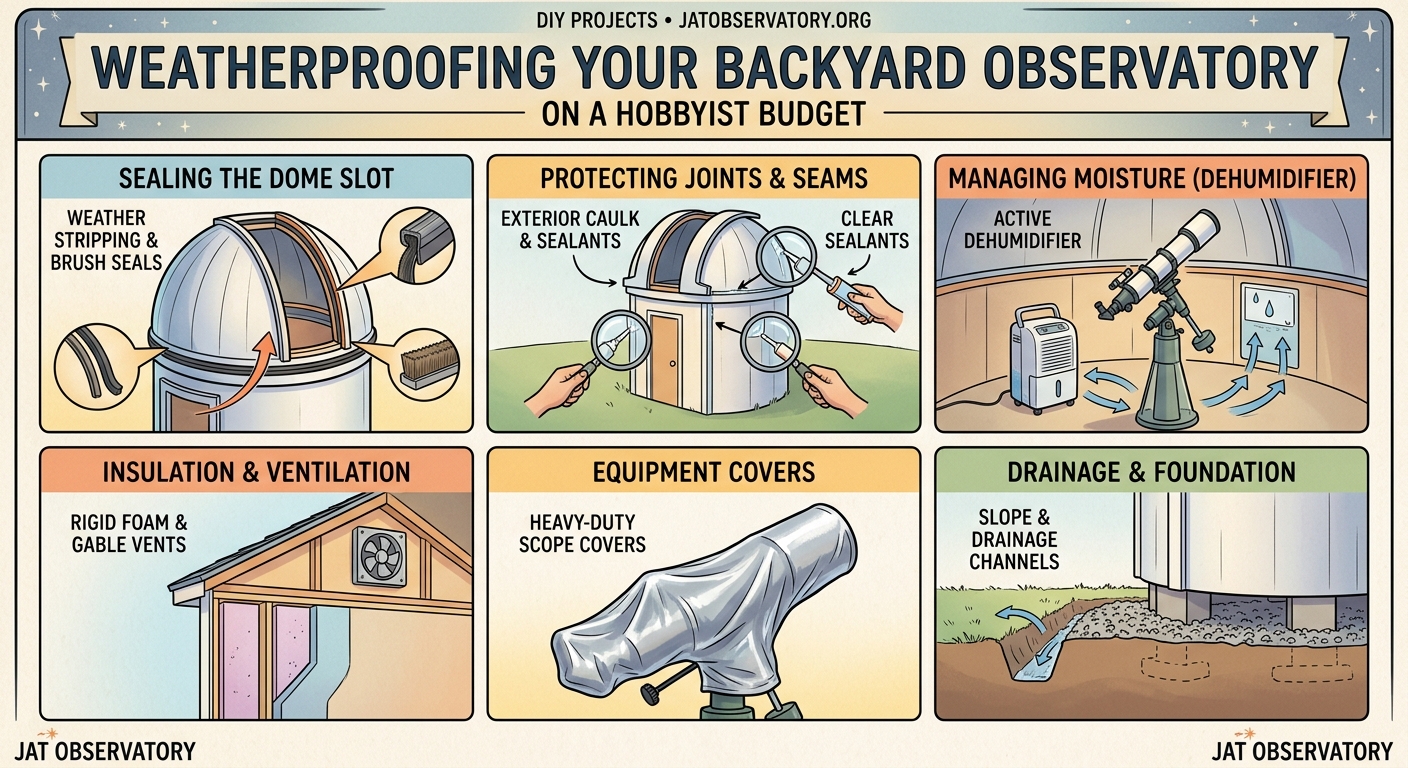
Ventilation Design for Equipment Protection
Proper airflow prevents the condensation that ruins telescope optics and camera sensors. Your observatory needs both passive and active ventilation components.
Passive ventilation relies on natural convection. Hot air rises and exits through ridge vents while cooler air enters through soffit vents. This continuous cycle requires no power and costs under $50 to implement.
Active ventilation uses small fans to force air movement. A 120mm computer fan running at low speed moves sufficient air for most backyard observatories while drawing only 5 watts. Mount one fan low on the north wall as an intake and another high on the south wall for exhaust.
Calculate your ventilation needs using this simple formula: observatory volume in cubic feet divided by 15 equals required airflow in cubic feet per minute. A typical 8x8x8 foot structure needs about 34 CFM of airflow.
Temperature equalization matters as much as humidity control. When your telescope sits 10 degrees warmer than ambient air, thermal currents distort your images. Good ventilation brings interior temperatures within 2 to 3 degrees of outside conditions within 30 minutes of opening your vents.
Power Management on a Shoestring Budget
Running power to your observatory enables lighting, ventilation fans, equipment charging, and computerized mounts. You have several cost-effective options depending on distance from your house.
Direct burial cable works for runs under 100 feet. A 50-foot length of 12-gauge outdoor-rated wire costs around $45. Bury it 18 inches deep in PVC conduit to meet electrical codes in most jurisdictions.
For remote locations, a solar power system provides independence from the grid. A basic setup includes a 100-watt panel ($85), 20-amp charge controller ($25), and 35 amp-hour deep-cycle battery ($90). This configuration powers LED lighting and small fans indefinitely while supporting occasional laptop use.
Battery-powered LED strips offer the simplest lighting solution. Stick-on strips with remote controls cost $15 to $25 and run for weeks on AA batteries. Choose red LEDs to preserve your night vision during observing sessions.
Consider these power management solutions for unattended remote observatories if you plan to operate equipment remotely.
Moisture Control Systems That Actually Work
Humidity destroys astronomical equipment faster than any other environmental factor. Implement multiple layers of moisture defense:
- Silica gel desiccant packs absorb ambient moisture and recharge in your oven
- Eva-Dry renewable dehumidifiers handle small spaces for $20 to $40
- Damp Rid hanging bags target specific problem areas for $5 each
- Small electric dehumidifiers extract moisture actively but require power
- Moisture-absorbing crystals in open containers work passively
Monitor humidity levels with a digital hygrometer ($12 to $18). Keep interior humidity below 50 percent to prevent condensation on optical surfaces. During humid summer months, you may need to run a small dehumidifier continuously.
Store eyepieces, cameras, and accessories in airtight containers with desiccant packs. This creates a microclimate that stays dry even if your observatory humidity fluctuates.
Roof Designs That Shed Water and Snow
Your roof design impacts both weatherproofing effectiveness and construction costs. Four popular options suit different budgets and skill levels:
Roll-off roof: A simple rectangular structure with a roof section that slides on rails. Material costs run $400 to $600. This design excels at shedding water but requires careful sealing where the moving section meets stationary walls.
Flip-top roof: Hinged panels that open upward provide full sky access. Budget $300 to $500 for materials. Weatherproofing the hinge line presents the main challenge.
Dome: Rotating domes look professional but cost $800 to $1,200 even for DIY versions. They shed water excellently but require precise construction.
Simple shed roof: The most economical option at $200 to $350. A fixed roof with a large opening panel provides adequate sky access while maintaining excellent weather protection.
Whatever design you choose, ensure your roof overhangs walls by at least 6 inches. This overhang directs water away from wall joints and foundation.
Protecting Your Investment During Construction
Building your observatory exposes materials to weather before weatherproofing is complete. Take these precautions:
Cover stored materials with tarps weighted at corners. Even brief rain exposure can warp plywood and swell lumber joints. Stage your construction so you can complete weatherproofing steps immediately after framing.
Apply primer to all wood surfaces within 48 hours of cutting. Raw wood absorbs moisture rapidly, leading to warping and splitting. A single coat of exterior primer costs about $30 per gallon and covers 400 square feet.
Install temporary rain protection over work areas. A simple frame with plastic sheeting lets you continue construction during light rain while protecting partially completed sections.
Seasonal Weatherproofing Considerations
Your observatory faces different challenges across the seasons. Plan for these variations:
Winter: Snow loading requires adequate roof strength. Calculate expected snow weight for your region (typically 20 to 40 pounds per square foot). Ensure roof framing can handle this load plus a 50 percent safety margin. Heat tape prevents ice dams on roof edges in snow country.
Spring: Rapid temperature swings cause condensation. Increase ventilation during this transition period. Check all seals and caulk joints after winter freeze-thaw cycles potentially opened gaps.
Summer: High humidity challenges moisture control systems. Run dehumidifiers more frequently. Inspect for mold or mildew in corners and under flooring.
Fall: Falling leaves clog gutters and vents. Clean all drainage paths monthly. Seal any gaps discovered during summer use before winter arrives.
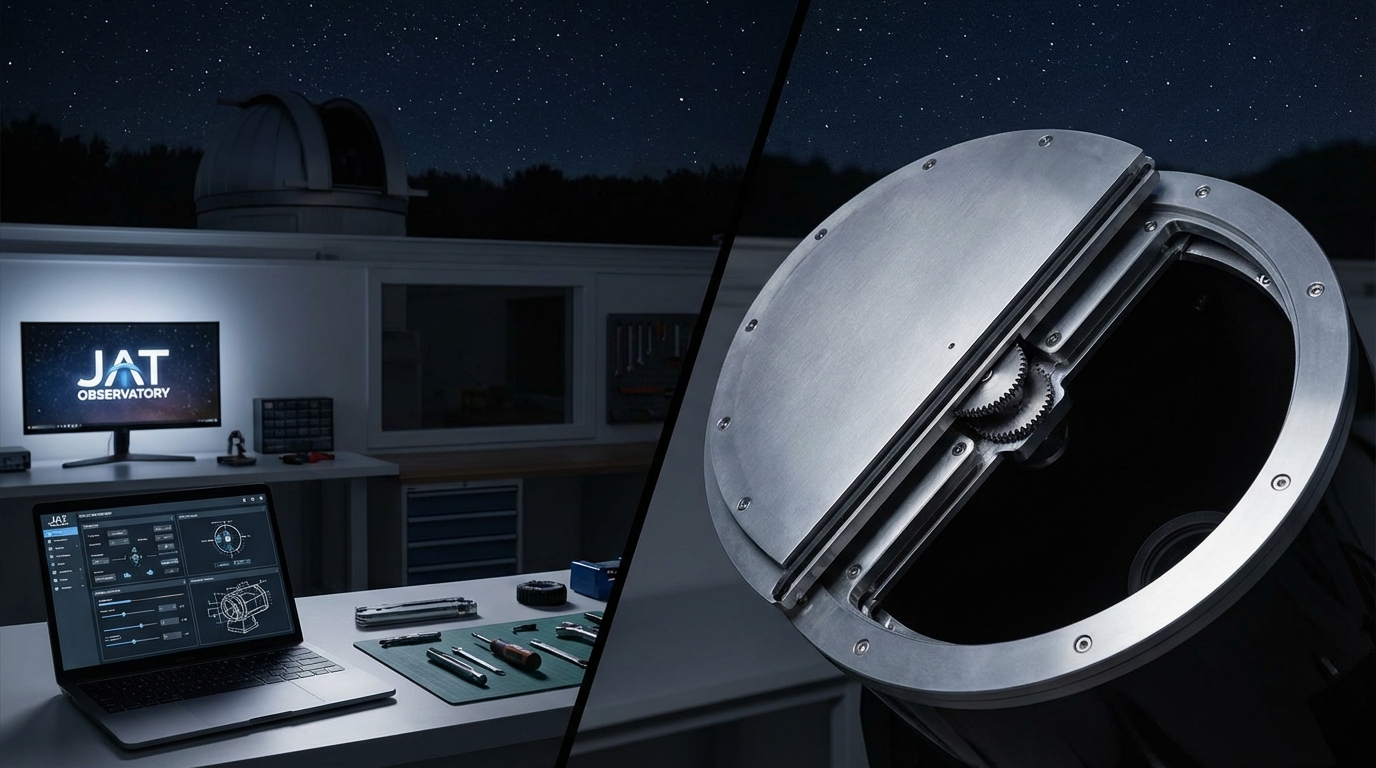
Integration With Monitoring and Automation
A weatherproof observatory enables remote operation and monitoring. Even basic automation protects your equipment when weather changes unexpectedly.
Simple weather stations cost $50 to $100 and provide temperature, humidity, and barometric pressure data. More advanced units add rain sensors and wind speed monitoring for $150 to $250.
Automated roof closures protect equipment when rain begins. A basic system using a rain sensor and motorized mechanism costs $200 to $300 to build. This investment pays for itself the first time it saves your equipment from an unexpected storm.
If you’re interested in remote operation, consider building an all-sky camera system to monitor celestial patterns year-round to track weather conditions.
Testing Your Weatherproofing Before Equipment Installation
Never assume your weatherproofing works until you test it. Run these checks before moving in expensive gear:
Spray test all exterior surfaces with a garden hose. Work from bottom to top, soaking each section for several minutes. Inspect interior surfaces for water intrusion. Mark any leaks and seal them.
Conduct a humidity test over 72 hours. Place a hygrometer inside with doors and vents closed. Monitor humidity levels. They should remain stable or decrease slightly as desiccants absorb ambient moisture.
Perform a temperature test on a sunny day. Record interior and exterior temperatures every hour for 8 hours. Proper ventilation should keep the interior within 5 degrees of outside temperature.
Check for light leaks at night. Any light entering from outside indicates a gap where water can also enter. Seal these openings with weatherstripping or caulk.
Budget Allocation Strategy for Maximum Protection
Distribute your observatory budget according to these proven ratios:
- 40% for structural materials and framing
- 25% for weatherproofing supplies and sealants
- 15% for ventilation and moisture control
- 10% for power and lighting
- 10% for finishing touches and improvements
This allocation ensures robust weather protection while leaving room for essential functionality. You can always add cosmetic improvements later, but retrofitting weatherproofing after construction costs significantly more.
Observatory Layouts That Minimize Weather Exposure
Smart interior design reduces how often you expose equipment to the elements. Consider these layout principles:
Position your telescope mount near the center of your roof opening. This minimizes the distance you must move the scope between storage and observing positions.
Store accessories along walls in sealed cabinets. This keeps them dry and organized while maximizing floor space around your mount.
Create a small vestibule or covered entry area. This prevents rain from blowing directly into your main observing space when you enter during storms.
Install equipment on raised platforms or shelves. This protects against floor-level moisture and makes cleaning easier.
Maintenance Schedule for Long-Term Weather Protection
Weatherproofing requires ongoing maintenance. Follow this schedule:
Monthly: Inspect all seals and caulk lines for cracks or separation. Check ventilation fans for proper operation. Empty and recharge desiccant containers.
Quarterly: Clean gutters and drainage paths. Test rain sensors and automated systems. Inspect roof for damage or wear.
Annually: Repaint or reseal exterior surfaces as needed. Replace weatherstripping around doors and roof panels. Conduct full spray test of all surfaces.
After major storms: Inspect for new damage. Check that automated systems functioned properly. Look for water intrusion evidence.
Document your maintenance activities. This helps you identify recurring issues and plan preventive measures.
Expanding Your Observatory While Maintaining Weather Integrity
Most observers eventually want to expand their observatory. Plan for future growth during initial construction:
Frame walls with standard spacing (16 or 24 inches on center) so you can easily add sections later. Extend your foundation slightly beyond current walls to support future expansion.
Install oversized electrical conduit. This lets you pull additional wires later without tearing into walls. Cap unused conduit ends to prevent moisture intrusion.
Use modular construction techniques. Build wall sections that can be removed and relocated as your observatory grows.
When you do expand, maintain the same weatherproofing standards throughout. A weak link in one section compromises your entire structure.
Some observers start with a basic shelter and gradually add features like automated systems using open-source software as their budget allows.
Real-World Cost Breakdown for a Complete Build
Here’s what a typical $1,000 backyard observatory on a budget actually costs:
Foundation and framing: $280 (concrete blocks, lumber, fasteners)
Roof materials: $220 (plywood, shingles, flashing, ridge vent)
Siding and trim: $150 (vinyl siding, corner trim, J-channel)
Weatherproofing supplies: $120 (caulk, foam sealant, vapor barrier, primer, paint)
Ventilation: $80 (soffit vents, ridge vent, two 120mm fans)
Moisture control: $50 (hygrometer, desiccant containers, Eva-Dry unit)
Power: $60 (outdoor-rated wire, outlet box, switch)
Lighting: $40 (LED strips, red bulbs, fixtures)
Total: $1,000
This budget assumes you already own basic tools. If you need to purchase tools, add $150 to $200 for essentials like a circular saw, drill, level, and measuring tape.
When to Splurge and When to Save
Not all observatory components deserve equal investment. Spend more on these items:
- Roof waterproofing membrane (upgrade to premium ice and water shield)
- Exterior caulk and sealants (choose 50-year rated products)
- Ventilation fans (buy quality units that will run reliably for years)
- Foundation materials (proper support prevents future structural issues)
Save money on these components:
- Interior paint (basic exterior paint works fine inside)
- Decorative trim (functionality matters more than appearance)
- Fancy door hardware (simple latches work as well as expensive ones)
- Lighting fixtures (stick-on LEDs perform like expensive fixtures)
Weatherproofing for Different Climate Zones
Your location determines which weatherproofing challenges need the most attention:
Humid climates: Double your moisture control budget. Install larger dehumidifiers and more desiccant capacity. Increase ventilation airflow by 50 percent.
Arid climates: Focus on dust sealing rather than moisture control. Use weatherstripping around all openings. Consider positive pressure ventilation to keep dust out.
Cold climates: Add insulation to prevent condensation from interior-exterior temperature differences. Increase roof strength for snow loads. Install heat tape on roof edges.
Coastal areas: Use marine-grade materials throughout. Increase maintenance frequency due to salt air corrosion. Apply protective coatings to all metal components.
Making Your Observatory Last Decades
Proper weatherproofing extends your observatory’s lifespan from years to decades. These practices ensure long-term durability:
Use quality fasteners rated for outdoor exposure. Stainless steel or hot-dipped galvanized screws resist corrosion far better than standard hardware.
Apply two coats of exterior paint to all exposed wood surfaces. The second coat fills microscopic gaps the first coat misses.
Maintain positive drainage around your foundation. Grade soil away from walls and install gutters to direct water at least 3 feet from your structure.
Replace weatherstripping every 3 to 5 years. This inexpensive maintenance prevents expensive water damage.
Keep detailed records of construction methods and materials. Future repairs go much smoother when you know exactly what’s behind each wall.
Getting Started With Your First Observatory
Building a backyard observatory on a budget becomes manageable when you break it into phases. Start with a weatherproof shell that protects your equipment. Add comfort features and automation gradually as funds allow.
Your first priority should always be keeping moisture away from your telescope and cameras. A simple but well-sealed structure outperforms an elaborate building with poor weatherproofing. Focus on the fundamentals: a watertight roof, proper ventilation, effective moisture control, and reliable seals around all openings.
Many successful amateur astronomers began with structures even simpler than described here. They learned, improved, and expanded over time. Your backyard observatory on a budget represents the beginning of a journey, not a finished destination. Build it well, protect your equipment properly, and enjoy countless clear nights under the stars.


Post Comment