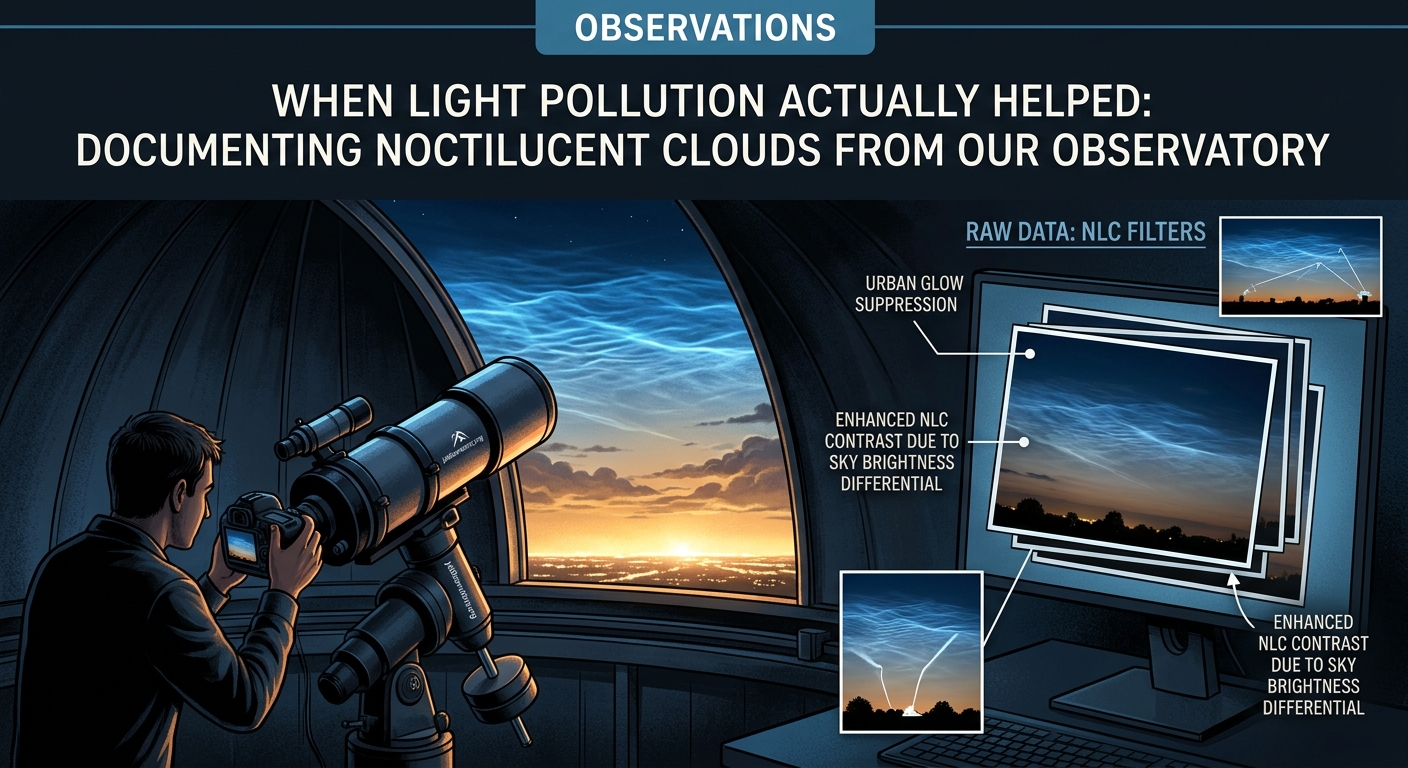
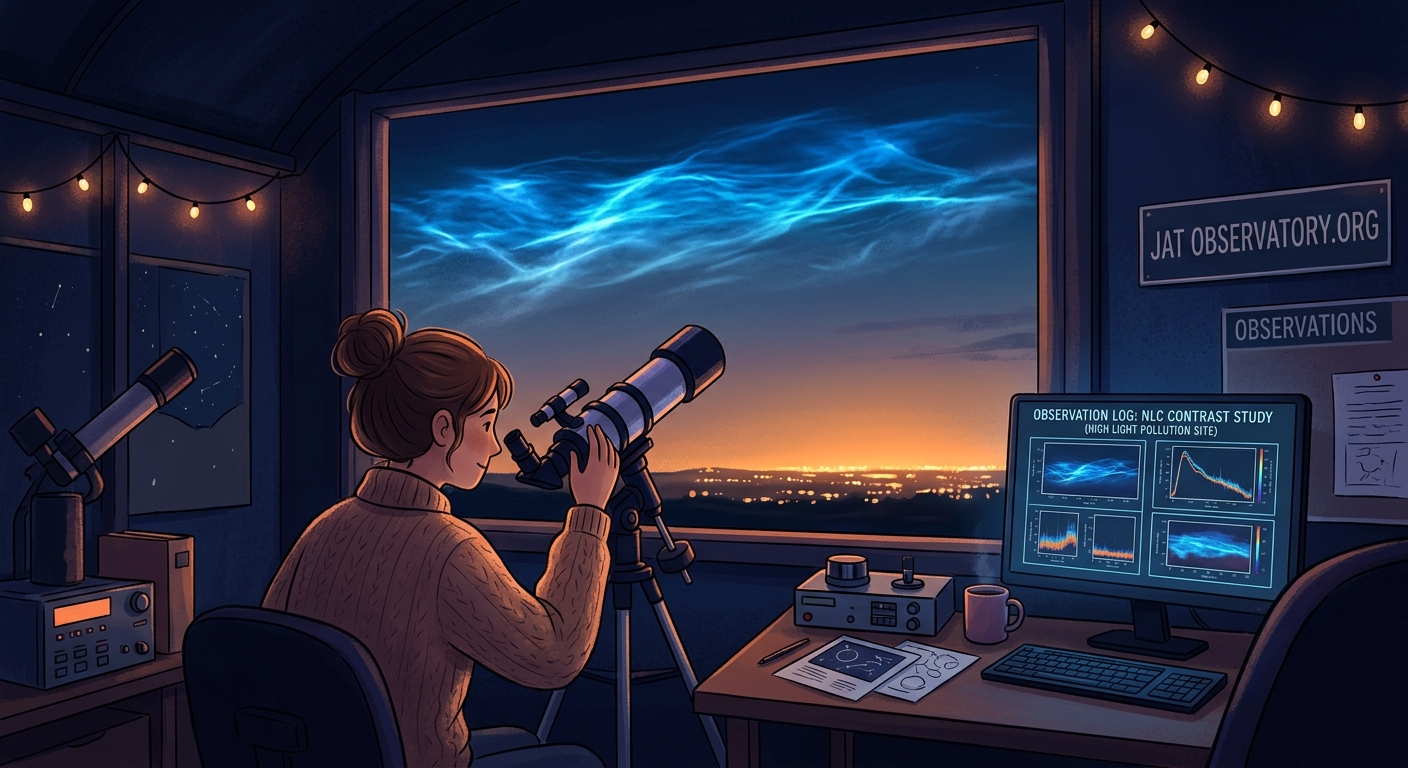
When Light Pollution Actually Helped: Documenting Noctilucent Clouds from Our Observatory
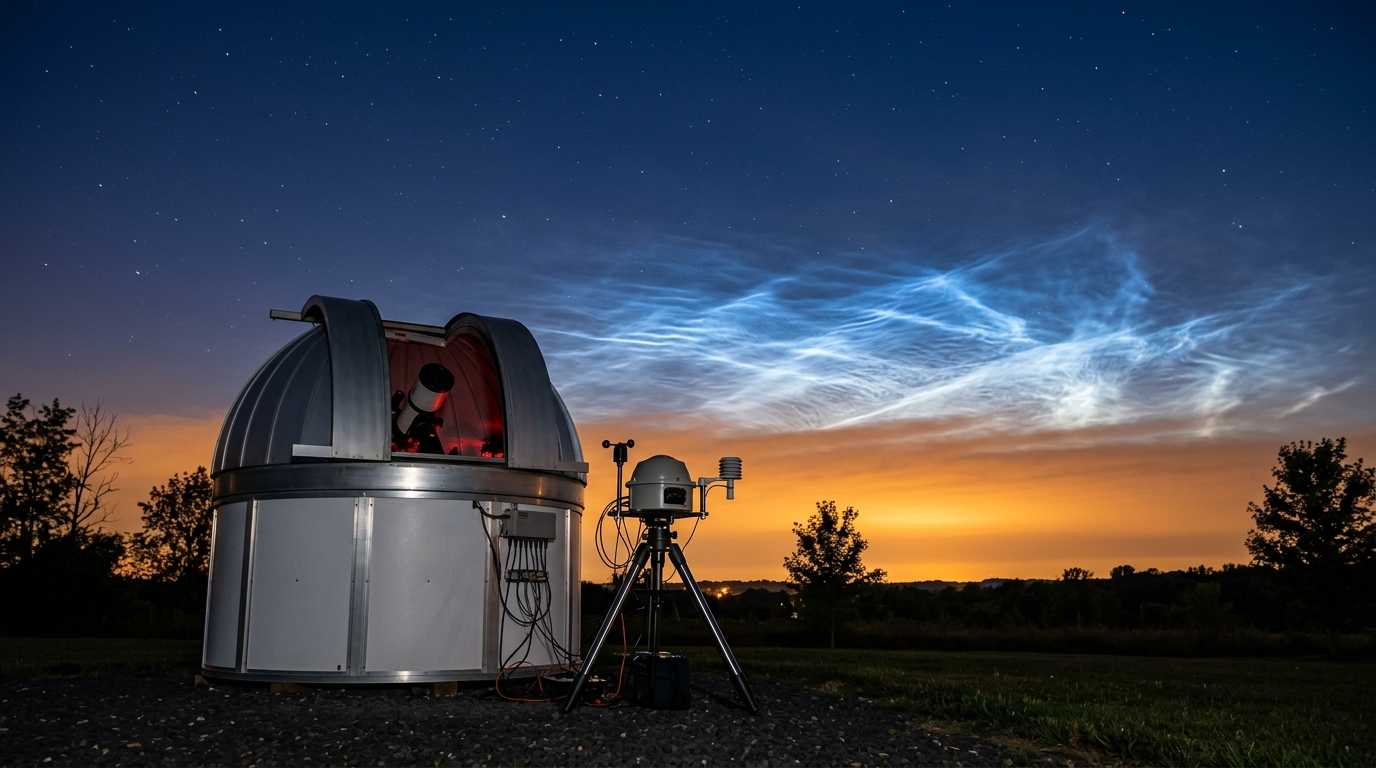
Most astronomers curse light pollution. We’ve spent years fighting it at our observatory, installing filters and timing sessions around streetlight schedules. But last summer, something unexpected happened. Our all-sky camera captured stunning noctilucent clouds, and the very light pollution we’d been battling actually made them easier to document.
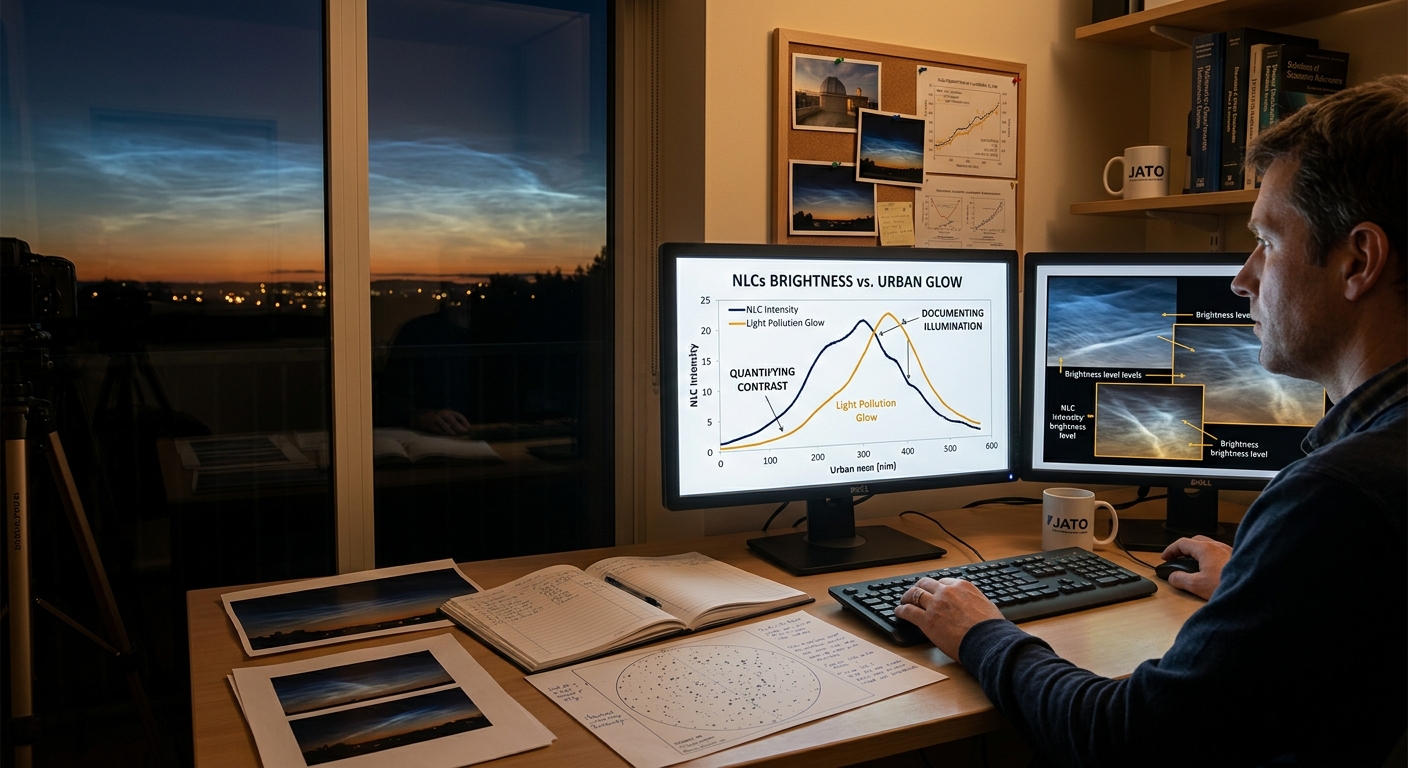
Light pollution noctilucent clouds observations reveal an unexpected advantage. Urban skyglow provides consistent background illumination that enhances contrast for these high-altitude ice crystal formations. Amateur astronomers can leverage this effect through proper camera settings, timing windows, and documentation methods that turn a typical disadvantage into a research opportunity for atmospheric phenomena monitoring.
Understanding noctilucent clouds and why they stand out
Noctilucent clouds form at extreme altitudes, roughly 50 miles above Earth’s surface. They’re made of ice crystals so small they scatter sunlight long after sunset. These formations appear during summer months at latitudes between 50 and 70 degrees, though climate changes have pushed them to lower latitudes recently.
The clouds glow electric blue against a darkening sky. They’re only visible during astronomical twilight, that narrow window when the sun sits between 6 and 16 degrees below the horizon. Too early and the sky is too bright. Too late and they fade completely.
Here’s where light pollution creates an advantage. The ambient glow from nearby cities provides a stable reference brightness. This consistent background makes the silvery-blue clouds pop with better contrast than you’d get against a pitch-black rural sky.
How urban skyglow enhances cloud documentation
Traditional astronomy wisdom says darker skies are always better. For stars and galaxies, that’s absolutely true. But noctilucent clouds behave differently. They need that twilight glow to be visible at all.
Light pollution extends the effective observation window. In a truly dark site, you might have 20 minutes of optimal viewing. From our suburban observatory, we get closer to 45 minutes because the artificial lighting maintains that sweet spot of background illumination longer.
The contrast effect works because noctilucent clouds reflect sunlight from below the horizon. Against a light-polluted sky, they appear as distinct bright structures. Against pure darkness, they fade into the background noise of your camera sensor.
Camera settings that would normally wash out deep-sky objects actually help with noctilucent cloud imaging. The goal isn’t to eliminate light pollution but to balance it against the cloud brightness for maximum contrast.
Setting up your camera for optimal captures
Getting good noctilucent cloud images requires different techniques than standard astrophotography. You’re working with a bright subject against a moderately bright background.
Start with these baseline settings and adjust based on your local conditions:
- ISO between 800 and 1600
- Aperture at f/2.8 to f/4
- Exposure length of 2 to 5 seconds
- White balance set to daylight (5500K)
- RAW format for post-processing flexibility
The shorter exposures prevent star trailing and capture cloud motion. These formations can move surprisingly fast, sometimes crossing the entire sky in under an hour.
Your lens choice matters more than you might think. A wide-angle lens between 14mm and 24mm captures enough sky to show cloud structure and movement patterns. We use a 16mm lens on a full-frame sensor, which gives us about 100 degrees of sky coverage.
Timing your observation sessions correctly
Noctilucent clouds only appear during specific conditions. You need the right season, the right time of night, and clear skies at ground level.
The prime viewing season runs from late May through early August in the Northern Hemisphere. Southern Hemisphere observers get their window from November through February. These align with each hemisphere’s summer months when mesospheric temperatures drop low enough for ice crystal formation.
Follow this observation timeline for best results:
- Check sunset time for your location
- Add 90 to 120 minutes to that time
- Begin watching the northern horizon (or southern if you’re below the equator)
- Continue monitoring for 60 to 90 minutes
- Document any formations immediately as they can disappear within minutes
Weather forecasting helps but isn’t perfect. Standard weather apps only predict conditions up to about 6 miles altitude. Noctilucent clouds form eight times higher than that. You can have perfectly clear skies at ground level and still miss clouds due to upper atmospheric conditions.
Documentation methods that produce useful data
Casual snapshots are fun, but systematic documentation contributes to actual science. Several research programs accept amateur observations of noctilucent clouds. Your light-polluted backyard observatory can feed real data to atmospheric scientists.
Record these details for each observation session:
- Date and precise time (UTC is standard)
- Your exact location coordinates
- Cloud brightness on a scale of 1 to 5
- Structure type (veils, bands, billows, or whirls)
- Azimuth and elevation of cloud formations
- Any color variations you notice
Time-lapse sequences prove especially valuable. Set your camera to capture one frame every 15 to 30 seconds throughout your observation window. The resulting video shows cloud evolution and movement patterns that single frames miss.
If you’re running an all-sky camera setup, you’re already positioned perfectly for noctilucent cloud monitoring. The same wide-field coverage that captures meteors works beautifully for these atmospheric phenomena.
Common mistakes and how to avoid them
New observers often make predictable errors that cost them good documentation opportunities. Learning from others’ mistakes saves you frustration.
| Mistake | Why It Fails | Better Approach |
|---|---|---|
| Waiting for full darkness | Clouds fade before true night | Start observing during late twilight |
| Using deep-sky camera settings | Too much exposure washes out detail | Shorter exposures with moderate ISO |
| Focusing on stars | Clouds appear soft and blurry | Focus at infinity but check cloud sharpness |
| Ignoring the northern horizon | Missing prime viewing area | Point camera 10-20 degrees above north horizon |
| Single wide shots only | Lose structural detail | Combine wide-field and telephoto captures |
The focusing issue trips up many photographers. Noctilucent clouds sit at the edge of your lens’s hyperfocal distance. What looks sharp for stars might render clouds as fuzzy streaks. Take a test shot and zoom in on your LCD to verify cloud edges appear crisp.
Exposure bracketing helps too. Take three frames at different exposures for each composition. One will usually nail the contrast between clouds and background better than the others. This technique costs nothing but a few extra seconds and megabytes of storage.
Processing your images for maximum clarity
Raw files from your camera need processing to reveal full cloud detail. Light pollution that helps during capture can muddy your final images if you’re not careful.
Start with these processing steps:
- Import RAW files into your preferred editing software
- Adjust white balance to neutralize orange skyglow
- Increase contrast by 20 to 30 percent
- Pull down highlights slightly to preserve cloud texture
- Add a gentle clarity boost to emphasize structure
- Apply mild noise reduction if needed
Don’t go overboard with saturation. Noctilucent clouds are naturally silvery-blue. Pumping up colors creates unrealistic results that don’t match visual observations. Scientists reviewing your data want accurate representations, not artistic interpretations.
Stacking multiple frames can reduce noise and bring out faint details. But remember these clouds move. You’ll need to align frames on the clouds themselves, not the stars. Most stacking software designed for deep-sky work won’t handle this correctly. Manual alignment in Photoshop or similar tools works better.
Contributing to citizen science programs
Your observations have scientific value. Several organizations collect amateur noctilucent cloud reports to track changes in frequency, brightness, and geographic distribution.
NASA’s GLOBE Observer program accepts smartphone photos and written reports. The process takes about five minutes per observation. You upload your image, mark cloud locations, and answer a few questions about appearance and conditions.
The International Noctilucent Cloud Observation Network maintains a database going back decades. They’re particularly interested in long-term trends that might connect to climate change. Your suburban observations help fill geographic gaps in their coverage.
Some programs even provide feedback on your submissions. You’ll learn whether your identification was correct and get tips for improving future observations. It’s like having a mentor without needing to join a formal research team.
Equipment upgrades worth considering
You don’t need expensive gear to start documenting noctilucent clouds. A decent camera and basic lens will capture useful images. But a few targeted upgrades can improve your results significantly.
A sturdy tripod matters more than you’d think. Even light breezes cause vibrations during those 2 to 5 second exposures. Cheap tripods create soft images that look like focus errors. Spend a bit more here and your overall image quality jumps noticeably.
Consider adding a second camera body if you get serious about documentation. Run one with a wide-angle lens for context and another with a moderate telephoto (85mm to 135mm) for structural details. The combination gives you both overview and close-up perspectives from the same observation session.
Automated systems take documentation to another level. Setting up automation lets your equipment monitor the sky every clear night during noctilucent cloud season. You’ll catch displays you would have missed because you were at work or asleep.
Comparing light-polluted and dark-sky observations
We’ve had chances to photograph noctilucent clouds from both our suburban observatory and truly dark rural sites. The differences surprised us.
From dark locations, the clouds appeared more subtle. They blended into the deep blue twilight sky with less obvious contrast. Visual observation felt more challenging because there wasn’t that consistent background glow to set them apart.
The light-polluted site gave us more dramatic images with less processing. The clouds stood out immediately, both to our eyes and in camera. We could spot formations earlier and track them longer into the evening.
Color rendition differed too. Dark-sky shots showed more natural silvery-blue tones. Light-polluted captures had warmer backgrounds that we needed to correct in post-processing. Neither approach is wrong, just different workflows with different end results.
For serious documentation work, the light-polluted site actually proved more productive. We captured more displays simply because we could see them more easily. The extended observation window meant fewer missed opportunities.
Advanced techniques for pattern tracking
Once you’ve documented basic noctilucent cloud observations, you might want to track specific patterns and behaviors. This level of work starts contributing to research questions scientists are actively studying.
Wave patterns in the clouds reveal information about upper atmospheric winds. Measure the spacing between parallel bands in your images. Scientists use this data to model mesospheric dynamics. Your measurements from a backyard observatory can validate satellite observations.
Brightness variations over time suggest changes in ice crystal density or solar illumination angles. Take measurements from the same sky region at 5-minute intervals. Plot the results and you’ll see patterns emerge. Some formations brighten as they move, others fade steadily.
Multi-site coordination produces even better science. Connect with other observers at different longitudes. When you spot a display, alert them to watch for the same formation as Earth’s rotation brings it into their view. This kind of collaborative observation helps determine cloud extent and movement speed.
Seasonal variations and what they mean
Noctilucent clouds don’t appear randomly throughout their season. Frequency and intensity follow patterns connected to mesospheric temperature cycles and water vapor availability.
Early season displays (late May to mid-June in the Northern Hemisphere) tend to be fainter and less structured. The mesosphere is still cooling down from winter warmth. Ice crystals form less readily.
Peak season (mid-June through mid-July) brings the brightest and most complex formations. Multiple cloud types might appear in a single night. This is when your light pollution advantage really shines because you can track subtle changes other observers might miss.
Late season (late July into August) shows a gradual decline. Displays become less frequent but can still produce spectacular shows. Some of our best captures came in early August when we weren’t expecting much.
Year-to-year variations are significant. Some summers produce clouds almost nightly. Other years give you just a handful of displays. Climate patterns, solar activity, and volcanic eruptions all influence formation rates. Long-term monitoring from your observatory helps document these trends.
Connecting atmospheric phenomena to broader patterns
Noctilucent clouds don’t exist in isolation. They’re part of a complex atmospheric system that includes meteor showers, auroral activity, and seasonal temperature cycles.
Meteor activity might seed noctilucent cloud formation. The theory suggests meteor smoke particles provide nucleation sites for ice crystals. During active meteor showers, some observers report increased noctilucent cloud displays. Your documentation could help confirm or refute this connection.
Solar activity influences mesospheric temperatures through complex mechanisms. During solar minimum years, some research suggests noctilucent clouds appear more frequently. Track your observations against the solar cycle and see if your data matches the pattern.
Even lunar phases might play a role, though not through any mystical influence. The moon’s brightness affects your ability to see faint cloud structures. Full moon periods wash out subtle displays. New moon darkness helps, but remember you still need that twilight glow.
Making the most of unexpected opportunities
Noctilucent cloud displays don’t follow schedules. The best formations often appear when you’re not specifically watching for them. Having systems in place to capture unexpected events makes all the difference.
Automated monitoring solves this problem elegantly. An all-sky camera running continuously catches displays even when you’re not home. Review the footage the next morning and you’ll know exactly what you missed or captured.
Mobile alerts help too. Several apps and websites now send notifications when other observers report noctilucent clouds in your region. You get a heads-up to check your northern horizon even if you weren’t planning an observation session.
Keep a camera bag ready with preset configurations. When you get an alert, you can be outside and shooting within two minutes. Those precious early moments of a display often show the most dramatic structures before they dissipate or evolve into simpler forms.
Why light pollution gets a rare win here
Most of astronomy involves fighting light pollution. We install filters, drive to dark sites, and time our sessions carefully. It feels strange to acknowledge a scenario where artificial lighting actually helps.
But science isn’t about rigid rules. It’s about understanding conditions and adapting methods to match reality. Noctilucent clouds represent one of those edge cases where conventional wisdom flips.
Your suburban backyard observatory isn’t a liability for this type of work. It’s actually an asset. The same skyglow that ruins galaxy photography provides the stable background illumination that makes cloud documentation easier and more productive.
This doesn’t mean you should celebrate light pollution. It’s still a massive problem for most astronomical observation. But recognizing specific situations where it provides advantages helps you maximize your observatory’s capabilities across different types of projects.
The key is matching your methods to your targets. Deep-sky photography demands dark skies and careful light pollution mitigation. Noctilucent cloud work benefits from moderate skyglow. Understanding these differences makes you a more versatile observer.
Building a documentation routine that works
Consistency matters more than occasional heroic efforts. Building sustainable observation habits produces better long-term results than sporadic intense sessions.
Set realistic goals based on your schedule and location. Maybe you commit to checking the northern horizon every clear night during peak season. Or perhaps you review your automated camera footage weekly. Either approach works if you stick with it.
Create a simple logging system. A spreadsheet with date, time, conditions, and image filenames takes 30 seconds per observation. Over a season, you’ll build a dataset that reveals patterns you wouldn’t notice from memory alone.
Connect with other observers through online astronomy communities. Sharing observations keeps you motivated and exposes you to different techniques and perspectives. You’ll learn faster and contribute more effectively to citizen science efforts.
Turning observations into lasting contributions
The images you capture this summer could still be referenced decades from now. Proper documentation and archiving ensure your work remains useful long after you’ve moved on to other projects.
Upload observations to established databases rather than just posting on social media. Social platforms are great for sharing, but they’re terrible for long-term data preservation. Scientific databases maintain your submissions with proper metadata and make them discoverable to researchers.
Keep original RAW files organized and backed up. Storage is cheap enough now that there’s no excuse for losing data. Your 2026 observations might help answer questions that scientists haven’t even thought to ask yet.
Write notes about your methods and equipment. Future you (or other researchers) will want to know exactly how you captured specific images. Camera settings, processing steps, and observing conditions all matter when evaluating data quality.
Watching the sky with fresh appreciation
There’s something deeply satisfying about finding value in unexpected places. Light pollution has frustrated us for years at the observatory. Discovering it actually helps with noctilucent cloud work changed our perspective.
You don’t need perfect conditions to do meaningful astronomy. You need to understand your conditions and choose appropriate targets. Those silvery-blue clouds glowing against your light-polluted sky are just as real and just as scientifically valuable as anything you’d capture from a mountaintop.
Start watching this summer. Point a camera north during late twilight. Adjust your settings for the conditions you actually have, not the ones you wish you had. You might be surprised what your suburban backyard can reveal about the edge of space.
Post Comment