Solar Power Your Remote Observatory: A Practical Guide for 2026
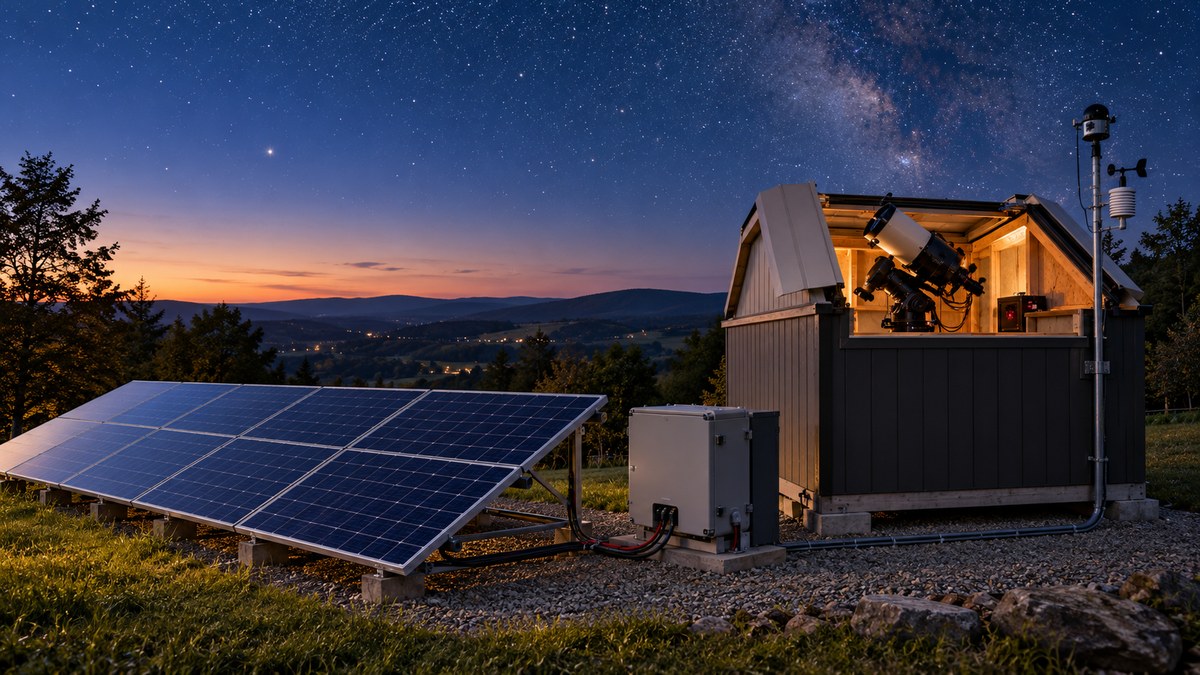
You have spent months building your remote observatory. The mount is polar aligned. The camera is cooled and ready. The only thing standing between you and a full night of automated imaging is something far less glamorous: power. Running extension cords to a shed in the backyard works for a while, but the moment you move that setup to a dark sky site or a corner of the property without grid access, everything changes. That is where solar power for a remote observatory stops being a nice idea and becomes the backbone of your entire operation.
Solar power for a remote observatory is not just possible; it is reliable if you size your system correctly. You need three core components: solar panels, a battery bank, and a charge controller. Match your daily power draw to your local sunlight hours, and you can run a mount, camera, dew heaters, and a mini PC all night without touching the grid. This guide walks you through every step for 2026.
Why Solar Works for a Remote Observatory
Your observatory gear has a secret advantage. It runs at night. That means your solar panels spend all day charging batteries while your equipment sleeps. By the time the sun goes down, you have a full reservoir of energy waiting to power your mount, your cooled camera, your dew heaters, and your network gear. This day-charge, night-discharge cycle is a perfect match for solar.
Most amateur setups draw somewhere between 50 and 150 watt-hours per night. A typical 100-watt solar panel in the United States can generate 300 to 500 watt-hours on a good summer day. Even in winter, when the sun sits lower, you can still bank enough power for a clear night of imaging. The math works in your favor.
The Three Pillars of Your Solar System
Every off-grid observatory solar setup relies on three main components. Understanding how they work together is the first step to building a system that does not let you down at 2 AM during a narrow window on the Orion Nebula.
Solar Panels
These are your energy collectors. For a remote observatory, you want monocrystalline panels. They perform better in low light and take up less space than polycrystalline alternatives. A single 200-watt panel is often enough for a modest setup, but many owners install two panels to build in a buffer for cloudy stretches.
Battery Bank
You need deep-cycle batteries. Do not use starter batteries from your car. They are not designed for repeated draining and recharging. Two popular choices dominate the amateur astronomy world:
- AGM (Absorbent Glass Mat) batteries: Affordable, maintenance-free, and reliable. They handle cold weather well, which matters if your observatory sits in a northern state like Minnesota or Maine.
- Lithium iron phosphate (LiFePO4) batteries: Lighter, longer lifespan, and you can drain them deeper without damage. They cost more upfront but pay off over years of use.
A 100 amp-hour battery at 12 volts gives you about 1200 watt-hours of stored energy. Realistically, you only want to drain an AGM battery to 50%, which leaves you with 600 usable watt-hours. LiFePO4 batteries let you go to 80% or 90%, giving you more usable capacity from the same size.
Charge Controller
This device sits between your panels and your batteries. It prevents overcharging and manages the flow of power. Two types exist:
- PWM (Pulse Width Modulation): Cheaper but less efficient. Fine for very small setups.
- MPPT (Maximum Power Point Tracking): More expensive but significantly more efficient, especially in cold weather or partial shade. For a remote observatory, spend the extra money on MPPT.
How to Size Your Solar Power Remote Observatory System
This is where most people get stuck. The process is straightforward if you follow a logical order.
- Calculate your nightly power draw. List every device in your observatory and find its power consumption in watts. Multiply by the hours it runs each night. A typical example looks like this:
- Mount running 8 hours at 15 watts = 120 watt-hours
- Cooled camera running 8 hours at 25 watts = 200 watt-hours
- Dew heaters running 8 hours at 20 watts = 160 watt-hours
- Mini PC running 8 hours at 10 watts = 80 watt-hours
-
Total = 560 watt-hours per night
-
Add a safety margin. Multiply your total by 1.5 to account for inefficiencies and unexpected loads. That 560 watt-hours becomes 840 watt-hours.
-
Determine your battery capacity. Divide your adjusted watt-hours by your system voltage (12 volts is standard for small observatories). 840 divided by 12 equals 70 amp-hours. If you use AGM batteries, double that number to account for the 50% discharge limit. You need 140 amp-hours of AGM capacity.
-
Size your solar panels. Divide your daily power requirement by the average sunlight hours in your location. The southwestern United States gets about 5.5 peak sun hours per day. The Pacific Northwest might get 3.5. If you need 840 watt-hours and you get 4 peak sun hours, you need at least 210 watts of solar panels. Round up to 300 watts for cloudy days.
-
Choose your charge controller. An MPPT controller rated for at least 30 amps handles a 300-watt panel array at 12 volts comfortably.
Common Mistakes and How to Avoid Them
Learning from other people’s errors saves you time and money. Here are the most frequent mistakes observatory owners make when setting up solar power.
| Mistake | Why It Hurts | The Fix |
|---|---|---|
| Undersizing the battery bank | You run out of power during long winter nights or cloudy stretches. | Calculate your worst-case scenario, not your best. Size for three nights of autonomy. |
| Using a PWM controller | You lose 20-30% of your panel’s potential energy. | Pay the premium for an MPPT controller. Your batteries will thank you. |
| Mounting panels flat on the roof | Panels produce significantly less power when not angled toward the sun. | Build an adjustable mount or tilt them to your latitude angle. |
| Forgetting about voltage drop | Long cable runs between panels and batteries waste power as heat. | Use thicker cables (10 AWG or lower) and keep runs as short as possible. |
| Ignoring temperature compensation | Cold batteries accept charge differently than warm ones. | Get a charge controller with a temperature sensor probe. |
Expert advice from a veteran observatory builder: “I spent my first year with a PWM controller and a single 100-watt panel. I was always anxious about power. When I switched to an MPPT controller and added a second panel, I stopped thinking about power entirely. The system just works. Spend the extra $100 on the controller. It is the best money you will spend on your observatory.”
Building a System That Handles Winter
Winter imaging is where solar power proves its worth. The nights are longer, which means higher power demand. The days are shorter, which means less solar collection. Add snow cover and low sun angles, and you have a recipe for power anxiety.
Here is how to build a winter-ready system:
- Oversize your panels by 50%. If summer calculations say 200 watts, install 300 watts. The extra capacity compensates for reduced winter sunlight.
- Tilt your panels steeper. In winter, the sun sits lower in the sky. A steeper tilt angle (latitude plus 15 degrees) captures more energy.
- Insulate your battery box. Cold batteries lose capacity. AGM batteries in particular suffer in freezing temperatures. A simple insulated enclosure with a small heating pad keeps them warm.
- Monitor your system remotely. A $30 battery monitor with a shunt gives you real-time data on your power levels. You can check it from your phone before you decide to stay up for that transit of the International Space Station.
Recommended Components for a 2026 Setup
The market has matured. You no longer need custom-built solutions. Off-the-shelf components work well for most amateur observatories.
Solar panels: Go with 200-watt or 300-watt monocrystalline panels from a reputable manufacturer. Renogy and HQST are popular choices among astronomers. They are durable, efficient, and widely available.
Batteries: For a budget build, pick two 100 amp-hour AGM batteries wired in parallel. For a premium build, choose a single 100 amp-hour LiFePO4 battery. The lithium option costs about twice as much but lasts three times longer.
Charge controller: The EPEver Tracer series offers reliable MPPT performance at a reasonable price. The 30-amp model handles most small observatory setups.
Cabling and connectors: Use MC4 connectors for the panel wiring and Anderson PowerPole connectors for the battery connections. They are polarized, lock securely, and handle the current without overheating.
Monitoring: A Victron Energy BMV-712 battery monitor gives you precise state-of-charge readings. It connects to your phone via Bluetooth, so you can check your power levels from inside your house while your observatory runs unattended.
Putting It All Together
You have your components. Now you need to wire them. The order matters.
- Connect the solar panels to the charge controller. The controller needs to see panel voltage before it does anything.
- Connect the charge controller to the battery bank. The controller will detect the battery voltage and begin charging.
- Connect your load (the observatory equipment) to the battery bank, either directly or through a separate distribution panel.
Always fuse the wires between the battery and the charge controller. A 30-amp inline fuse or breaker protects your system from a short circuit. Never skip this step.
For a deeper look at managing power in an unattended setup, read our guide on 5 essential power management solutions for unattended remote observatories. It covers remote monitoring, automatic load shedding, and failover strategies.
Your Next Steps
Building a solar power system for your remote observatory does not require an engineering degree. It requires a weekend of planning, a few hundred dollars in components, and the willingness to do the math. Start by calculating your nightly power draw. That single number tells you everything you need to know about panel size, battery capacity, and controller selection.
Once your system is running, you will wonder why you did not switch sooner. No more extension cords. No more worrying about the breaker tripping in the middle of a 3-hour hydrogen-alpha capture. Just clean, silent power that charges while you sleep and runs your gear while the stars turn overhead.
If you are still planning your observatory layout, take a look at our article on building a weatherproof enclosure for remote observatory equipment on a budget. A weatherproof enclosure protects your batteries and controller from the elements and keeps your system running for years.
Solar Power and Your Observing Rhythm
There is something satisfying about an observatory that powers itself. You set up the panels, you wire the batteries, and then you walk away. The sun does the work. Your gear runs all night. In the morning, the panels start charging again. It is a closed loop that mirrors the natural rhythm of day and night.
That rhythm matters when you are trying to capture a planetary alignment or a rare conjunction. You do not want to cut a session short because your battery is running low. With a properly sized solar system, you never have to.
Start small. Build a system that covers your current gear. If you add more equipment later, you can always add another panel or a second battery. Solar scales beautifully. Your observatory will thank you, and so will your sleep schedule.

Post Comment