What’s the Best Tripod for Your All-Sky Camera? A Guide to Stability and Portability
You have spent weeks dialing in your all-sky camera. The focus is perfect. The gain is set. The field of view covers the entire dome. Then a gust of wind hits, and a single vibration turns a brilliant fireball streak into a jagged blur. For anyone running continuous sky monitoring, the weak link is almost always the tripod. A shaky base ruins hours of data and makes meteor counting unreliable. The best tripod for an all-sky camera is not a luxury. It is the foundation that separates clear, continuous coverage from a frustrating collection of smears.
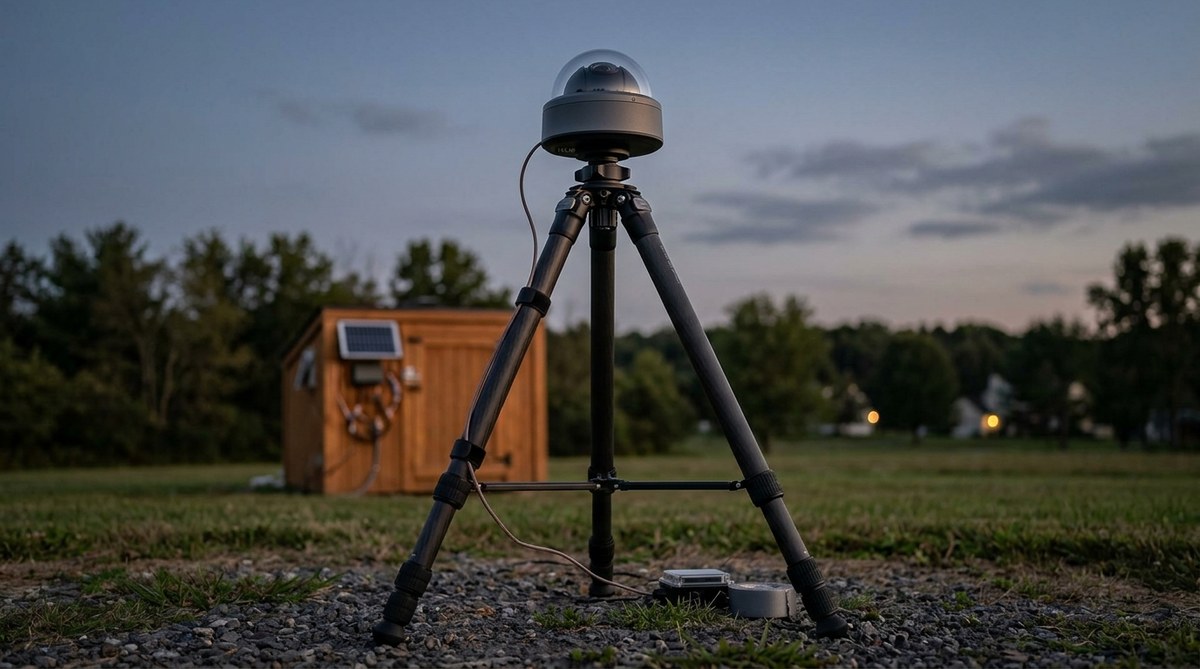
An all-sky camera tripod must resist wind, hold a low center of gravity, and survive exposure to weather. Do not prioritize height over stability. A carbon fiber model with locking leg angles, a removable center column, and a hook for weight will outperform a taller aluminum option in real-world backyard conditions. Invest in the legs that stay still so your camera can see the stars.
Why All-Sky Cameras Demand a Different Kind of Tripod
A regular photographer can brace a tripod against a fence or shoot a single 30-second exposure and call it done. An all-sky camera, however, runs for hours each night, often unattended. It faces changing wind, passing animals, and the slow creep of dew. The tripod must absorb all of that without passing any movement to the camera. Even a tiny sway can cause star trails on a 15-second exposure that repeats every 30 seconds. Over a full night, you will end up with dozens of frames that are useless for meteor photometry or stacking.
The typical astrophotography tripod is built for a telescope with a heavy mount. Those are overkill in weight but correct in stability. For an all-sky camera, which usually weighs under two pounds, the challenge is different. You need a tripod that can handle light weight without being flimsy. Many general-use travel tripods are designed to be compact, not stiff. They use thin leg tubes that twist when the wind pushes sideways. That twist is exactly what kills an all-sky image.
The Four Specs That Actually Matter for All-Sky
Ignore marketing numbers about max height and pan heads. Focus on these four factors.
Leg Tube Diameter
Thicker legs resist lateral movement. Look for a tripod with leg sections that start at 28 mm or wider at the top and taper to at least 22 mm at the bottom. Anything smaller than that will flex, especially if you extend the legs fully. Carbon fiber tubes dampen vibration better than aluminum, but diameter matters more than material. A thick aluminum leg often beats a thin carbon fiber one.
Minimum Height and Center Column
Most all-sky cameras sit high enough to see over obstructions. You do not need a center column that lifts the camera another 12 inches. In fact, a center column introduces a weak point. Every inch you extend it reduces stability. The best approach is to set the tripod legs low (knee high or lower) and tilt the camera upward. If you can remove the center column entirely, do it. The lowest stable position is the best for wind resistance.
Leg Locks
Twist locks are common, but they can loosen over time if the tripod lives outside. Flip locks are easier to check visually and less likely to slip with temperature changes. Whichever style you choose, test them after a cold night. If they need a tool to tighten, look for another model. Rubber o-rings dry out in the sun, so models with replaceable friction rings get extra points.
Weight Hook
A simple hook under the center column lets you hang a sandbag, a water jug, or even your backpack. That extra mass dramatically lowers the center of gravity and stops the tripod from toppling in a gust. For a permanent all-sky installation, this is a cheap upgrade that solves most stability problems. Even a one-liter water bottle makes a difference. If the tripod lacks a hook, you can often thread a carabiner through the center column hole.
Comparing Materials and Trade-Offs
The classic decision between aluminum and carbon fiber takes on a different shape for all-sky work. Here is a quick breakdown.
| Material | Weight | Vibration Dampening | Weather Resistance | Price |
|---|---|---|---|---|
| Aluminum | Heavier (4-6 lbs) | Moderate; rings longer | Prone to corrosion if scratched | Inexpensive |
| Carbon Fiber | Light (2-4 lbs) | Excellent; deadens quickly | Resistant to rust, but UV can weaken resin over years | Expensive |
| Hybrid (Alu legs, CF center) | Middle ground | Good | Best of both if sealed | Mid-range |
For a tripod that will stay in one spot for weeks at a time, carbon fiber wins because it absorbs vibrations from wind and passing vehicles better than aluminum. You do not carry it far, so the weight savings are not critical, but the stability is. If you plan to move the tripod from your backyard to a dark site on weekends, the lighter carbon fiber makes it more portable.
5 Steps to Pick the Right One
Do not guess. Follow this process.
- Measure your camera’s weight with all accessories. Include the camera body, lens hood (if any), and any dew heater or USB cable strain relief. Add 10% for safety. Most all-sky cameras are under 1.5 pounds, but a full enclosure with heater can hit 3 pounds.
- Decide on a permanent vs. mobile setup. Permanent: prioritize stability over weight. Mobile: prioritize carbon fiber and compact folded length.
- Choose leg locks that you can operate in the dark. Flip locks that click into place are easier to tighten with gloves on than twist locks that require multiple rotations.
- Budget for a ground stake or tie-downs. If the tripod will sit on grass or gravel for more than a month, secure it with tent stakes through the leg feet or a sandbag around the base. Wind can tip even a heavy tripod if the ground is soft.
- Test the tripod with a laser pointer at night. Set it up outside, tape a laser pointer to the camera mount, and let it run for 30 minutes. Check the laser dot on a distant wall for movement. If you see any jitter, the tripod is not stiff enough.
Common Mistakes That Meteor Observers Make
- Using a photo tripod designed for portrait mode lock. Those have ball heads that shift under constant load. A fluid head or a simple three-way pan/tilt head is more stable for a fixed zenith view.
- Extending the center column to avoid bending down. This makes the whole setup top-heavy and prone to sway. Instead, adjust the leg angles to lower the camera.
- Placing the tripod directly on a wooden deck or roof. The floor transmits vibrations from footsteps, appliances, or wind. A heavy rubber mat under the feet decouples the tripod from those micro-movements.
- Forgetting to tighten the leg lock at the top of each section. The thickest section is the most critical. A loose top lock allows the entire leg to wobble.
“I lost three nights of Perseid data because I used a cheap travel tripod with skinny legs. Now I use a carbon fiber model with no center column and a hook for a five-pound weight. I haven’t had a single trail-destroying vibration since.” – Mark, all-sky camera builder and meteor observer from Arizona.
Choosing Between Traditional and Specialty Tripods
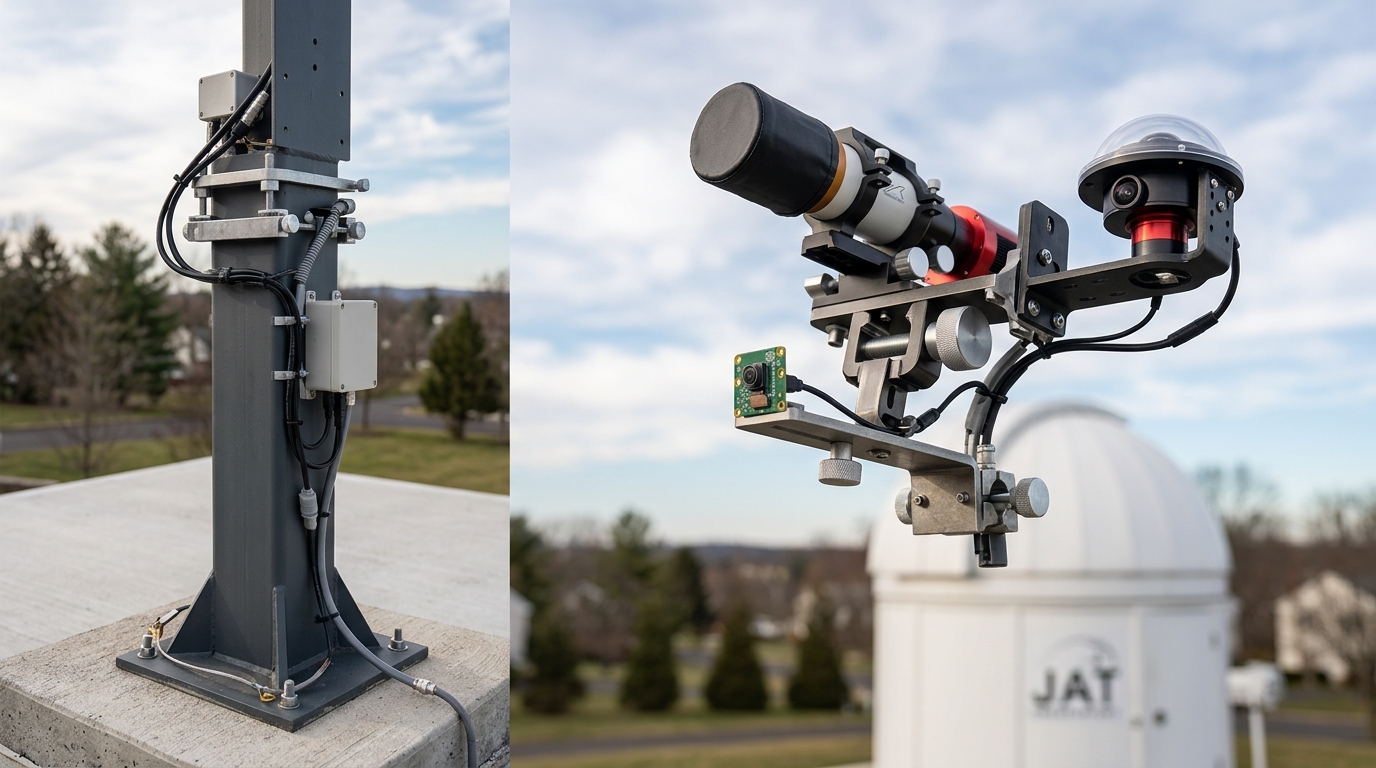
The general photography market offers hundreds of tripods, but only a few meet the all-sky standard. A small number of manufacturers now produce dedicated all-sky or fixed observatory tripods. These often include stainless steel feet, sealed leg locks, and a base plate that bolts directly into a concrete pad. If you plan to leave your camera outdoors for years, those options save you from replacing corroded components.
If you are building an all-sky camera system from scratch, you may want to pair the tripod with a purpose-built enclosure. Check out our All-Sky Camera Setup: Complete Guide from Hardware to First Light for a step-by-step walkthrough. For tips on selecting the right sensor, read How to Choose the Right All-Sky Camera for Your Backyard Observatory. And if you are looking to automate the whole system, How to Automate Your Backyard Observatory with Open-Source Software covers the software side.
The Hidden Cost of a Bad Tripod
You might think a $60 tripod is fine because the camera is light. But a poor tripod wastes hours of observation. Every frame that shows vibration is a frame that cannot be used for meteor trajectory analysis or brightness calibration. Over a year, a shaky tripod can cost you dozens of good meteor captures. The well-known meteor shower peaks especially hurt. During the Geminids in December 2026, you do not want to spend your best clear night fixing a wobble.
Consider also the emotional cost. You wake up, check the morning download, and see blurs where there should be streaks. That is discouraging. The tripod is the one piece of gear you cannot fix after the fact. A stable base gives you confidence that your data is clean.
Your All-Sky Tripod: The Base of Every Great Night
Choosing the best tripod for your all-sky camera does not need to be complicated. Focus on leg diameter, a removable center column, and weather-resistance. Carbon fiber provides the best vibration damping for continuous use. Aluminum is fine if you keep the legs short and add weight. Test your setup before a meteor shower, not during it. A few hours of tuning your tripod can save you weeks of regret.
So go outside. Set up that tripod low, lock everything tight, hang a bag of gravel on the hook, and let the camera do what it does best. The stars will stay where they belong. And the meteors will finally be sharp.
Post Comment