How to Automate Flat Field Calibration for Your All-Sky Camera
If you run an all-sky camera for night sky monitoring, you know the frustration of waking up to images riddled with dust donuts and uneven brightness. Those dark rings and gradients aren’t just ugly. They mess up your meteor photometry, cloud detection thresholds, and star tracking accuracy. Manual flat field calibration works, but it is a chore. You have to wait for twilight, set up a panel, capture frames, then apply them. Doing that every night? No thanks. The good news is that you can completely automate flat field calibration for your all-sky camera, freeing up your time and ensuring consistent, professional-grade data every single night.
Automating flat field calibration for your all-sky camera removes manual twilight sessions and guarantees clean, photometric data. Use a flip-flat or dawn sky flat script triggered by solar altitude. Pair it with a master flat builder that stacks and normalizes frames. With open-source tools like indi-allsky or custom Python scripts, you can set it up in an afternoon and forget about dust motes forever.
Why Bother Automating Flat Field Calibration?
Flat field calibration corrects for two persistent problems: optical vignetting (the corners of your image being darker than the center) and dust particles on the lens or sensor window. Without flats, your all-sky images have a fixed pattern noise that changes when dew evaporates or dust settles. Over a month of monitoring, those subtle artifacts can throw off your analysis of cloud coverage or meteor brightness.
Manually taking flats means waking up at astronomical twilight, placing a diffuser over the camera, and capturing dozens of frames. Then you need to average them and apply the resulting master flat to every night image. If you forget one night, your data pipeline breaks.
Automation solves this. A script runs at the right solar elevation, captures a set of flat frames, builds a new master flat, and applies it to that night’s images. You never have to think about it again.
What You Will Need
Before we get into the how, here is the gear and software that makes automation possible:
- An all-sky camera that supports remote capture (USB or network connected, capable of exposure control)
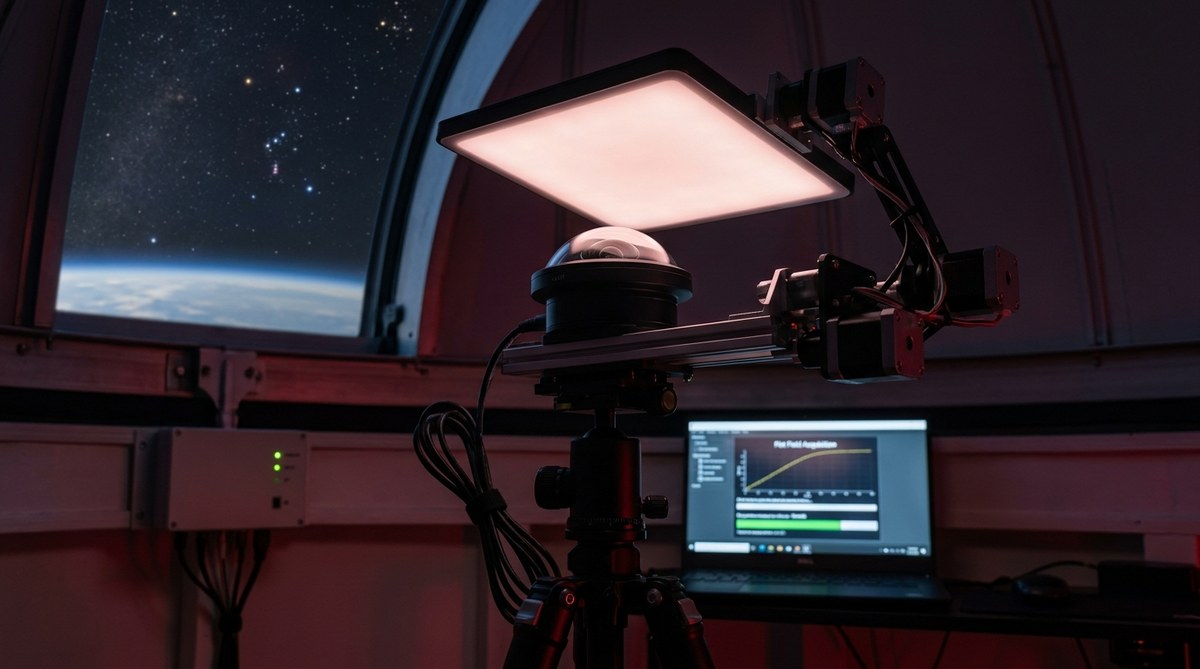
- A motorized flip-flat panel or a fixed electroluminescent panel you can switch on via a relay
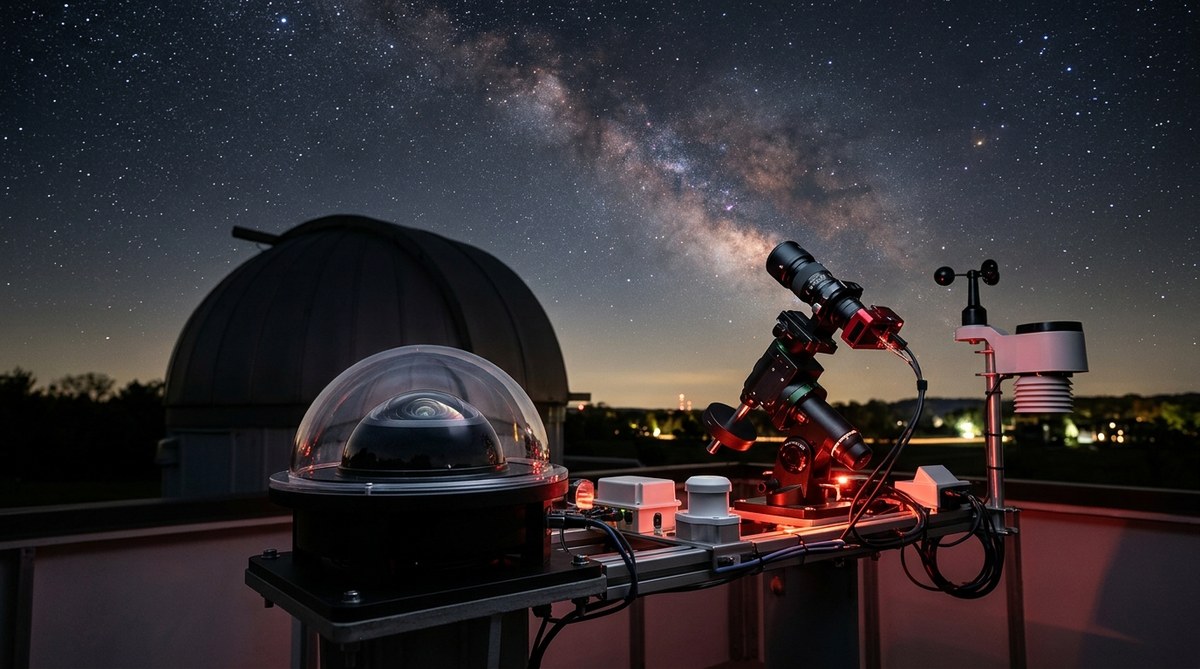
- A weatherproof enclosure with a clear dome (to let twilight through for sky flats)
- A computer running Linux (Raspberry Pi 4/5 works perfectly) with Python and OpenCV
- Software: indi-allsky (recommended), or a custom script using the camera’s SDK
- A cron job or systemd timer to trigger the script at the right time
If you prefer a hardware-free method, you can use the twilight sky itself as a flat source. That is what we will focus on here, because it is the most reliable for remote, unattended setups.
The Automation Process: Step by Step
Follow these steps to set up automated flat field calibration for your all-sky camera. The method uses the dawn and dusk sky, no moving parts needed.
Step 1: Determine the optimal solar altitude for flats
Your goal is a uniformly illuminated sky. Too dark and you get noise; too bright and the sky gradient ruins the flat. For most locations, a solar altitude of 6 degrees below the horizon (civil twilight) works well. This is when the sky is a soft, even blue.
Step 2: Write or configure a capture script
If you use indi-allsky, the built-in “sky flat” module does this. Set the sun altitude window in the config file. For a custom setup, use Python to check solar position with astral or PySolar and trigger the camera when conditions are met.
Step 3: Capture a set of flat frames
Aim for 20 to 30 frames. Use the same gain and exposure settings you use for night imaging. Save each frame as a FITS or TIFF file in a temporary directory.
Step 4: Build a master flat
Combine the frames using median stacking to remove stars and transient artifacts. Normalize the median stack to a mean value of 1.0 (divide by its own mean). This step ensures you are only correcting relative pixel sensitivity, not changing overall brightness.
Step 5: Apply the master flat to night images
Each time the camera captures a night frame (typically every 30 seconds to 2 minutes), divide that frame by the master flat. Clip any values that exceed the bit depth. Save the calibrated image.
Step 6: Schedule the whole process
Use cron to run the capture and master flat builder every morning around dawn. You can also run it at dusk to catch any dust changes that happened during the day. Set it and forget it.
Here is a sample cron entry:
30 5 * * * /home/pi/scripts/capture_sky_flats.py
45 5 * * * /home/pi/scripts/build_master_flat.py
This runs at 5:30 AM (adjust for your time zone) and builds the new master flat 15 minutes later.
Common Mistakes and How to Avoid Them
Even with automation, a few pitfalls can ruin your flats. Here is a table of the most frequent issues and their fixes.
| Mistake | Why It Happens | How to Fix It |
|---|---|---|
| Saturated flat frames | Sky too bright (solar altitude too high) | Narrow your capture window, e.g., solar elevation between -8 and -4 degrees. |
| Star trails in flats | Long exposure or moving clouds | Use a shorter exposure (0.1 to 0.5 seconds) and reject frames with high variance. |
| Master flat has gradient | Uneven sky illumination, light pollution gradient | Use a gradient removal algorithm (e.g., background subtraction) before stacking. |
| Dust donuts change after building flat | Dew or dust settled during the night | Schedule two flat runs: one at dusk, one at dawn, and use the nearest one for each segment. |
| Calibrated images too dark | Master flat normalization error | Ensure master flat is normalized to mean = 1.0. Check with np.mean(master) after building. |
Expert Advice on Scripting and Validation
“I have been running automated sky flats on my all-sky camera for three years. The single most important step is validating the master flat before applying it. If a passing bird or satellite photobombs your flat frames, the resulting master will have a ghost line across every night image. Always compute the median absolute deviation of your flat stack and reject frames where the MAD exceeds a threshold. That simple check saved me countless hours of reprocessing.”
– Aaron Morris, maintainer of indi-allsky
To implement that check, compute the median of each frame, then the MAD across all frames. Remove any frame whose median deviates more than 2 percent from the median of all frames. This filters out transient bright objects and clouds.
Tools and Scripts You Can Use Right Now
You do not need to reinvent the wheel. Several mature solutions exist.
- indi-allsky: Full all-sky camera automation suite. Includes sky flat capture, master flat builder, and dark frame correction. Configure via web interface.
- allsky: Popular on Raspberry Pi. The “flat capture” plugin does exactly this. GitHub repo has detailed setup guides.
- Custom Python script: If you want full control, use
astroplanfor solar altitude,opencvfor image processing, andparamikoto control a relay for a flat panel.
For a deeper look at building the whole system, check out our guide on building an all-sky camera system to monitor celestial patterns year-round. It covers the hardware mounting and wiring you need.
If you are already running an unattended observatory, you might also be interested in 5 essential scripts every remote observatory owner should be running. One of those scripts handles flat field calibration automatically.
Integrating Automation into Your Nightly Workflow
Once your flat field calibration is automated, you can trust your data for photometric measurements. Meteor light curves become more accurate. Cloud detection thresholds stay consistent even after a lens cleaning. You can even run automated meteor shower captures knowing your flat field is current.
The trick is to treat your master flat as a dynamic asset, not a one-time calibration. Dust accumulates. The dome develops scratches. Twilight conditions change with the seasons. By rebuilding the master flat every dawn, your calibration stays fresh.
From Manual Drudgery to Set-and-Forget
Setting up automated flat field calibration is one of those upgrades that pays for itself in sanity. You stop worrying about whether your data is clean. You stop checking images at 5 AM. Instead, you wake up to a folder full of properly calibrated FITS files ready for analysis.
Give it a try this weekend. Pick your tool (indi-allsky is the easiest), set the solar altitude to negative 6 degrees, and let the machine do the work. Your future self will thank you the next time a spectacular fireball streaks across the sky, and your camera captures it with perfect photometric precision.
Post Comment