Should You Build or Buy Your Remote Observatory Camera Mount?
You are standing in your backyard observatory. The dome is open, the camera is cooled, and the forecast is clear. But the mount under your telescope is the single point of failure that keeps you up at night. You have been weighing the decision for months. Do you save money and build your own remote observatory mount, or do you buy a commercial system that just works?
This is the central question for anyone running a semi-professional or advanced amateur remote observatory in 2026. The mount is the backbone of every image. If it drifts, your 10-minute subframes turn into streaks. If it fails at 3 AM, you lose a whole night of data. So let us walk through the real trade-offs between DIY and commercial mounts, with honest numbers and practical advice.
For most advanced amateurs running a remote observatory in 2026, buying a commercial mount remains the safer bet unless you have serious mechanical and electronics experience. DIY can save 40 to 60 percent on cost, but the hidden price is your troubleshooting time. If you value reliable unattended operation over saving a few thousand dollars, go commercial. If you love tinkering and have a machine shop, build.
The Real Cost of a Remote Observatory Mount
Let us start with money, because that is usually the first thing people ask about. A commercial German equatorial mount (GEM) suitable for a 100-pound imaging rig and remote operation costs between $4,000 and $10,000 in 2026. Brands like Software Bisque, Astro-Physics, and 10Micron dominate this space. You get precision encoders, proven software, and support.
A DIY mount built from a harmonic drive, a custom aluminum saddle, and an open-source controller like OnStep can come in under $2,500. Some builders on forums have done it for $1,200 using surplus parts. But here is the catch. That price does not include your labor. If you value your time at $50 per hour and spend 60 hours building and tuning, the DIY option suddenly costs $5,000 or more.
| Factor | Commercial Mount | DIY Mount |
|---|---|---|
| Upfront cost | $4,000 to $10,000 | $1,200 to $3,000 |
| Setup time | 1 to 3 hours | 40 to 100 hours |
| Technical support | Phone and email | Forums and self |
| Tracking accuracy (RMS) | 0.3 to 0.7 arcseconds | 0.8 to 2.0 arcseconds |
| Resale value | 60 to 70 percent | Low, parts only |
| Reliability for unattended use | High | Variable |
The table above shows the biggest gap is not in the price tag. It is in the tracking accuracy and reliability for unattended operation. If your mount loses tracking at 2 AM and your autoguider cannot recover, you lose hours of data. Commercial mounts are engineered to avoid that failure mode.
What You Are Really Paying For
When you buy a commercial mount, you are paying for engineering that has been refined over decades. Companies test their drives under load, in cold weather, and after thousands of hours of use. They design clutch mechanisms that do not slip. They write firmware that handles park sequences and meridian flips without crashing.
“The best mount is the one that lets you sleep through the night.” That is a saying you hear often at star parties, and it holds true for remote observatories. If you wake up to find your mount parked properly and your data collected, the money was worth it.
A DIY build gives you something else. It gives you total control. You can choose a harmonic drive for zero backlash. You can design a pier adapter that fits your exact observatory floor. You can swap motors, encoders, and controllers whenever you want. If something breaks, you know exactly how to fix it because you built it.
The Three Most Common DIY Mount Mistakes
Building your own mount is rewarding, but it is also easy to get wrong. Here are the three pitfalls I see most often in the forums.
-
Underestimating the importance of stiffness. A mount that flexes under load will never guide well. Many DIY builders use aluminum plate that is too thin. The result is 5 arcseconds of periodic error that no autoguider can correct. Use steel or thick-walled aluminum for the saddle and dovetail plate.
-
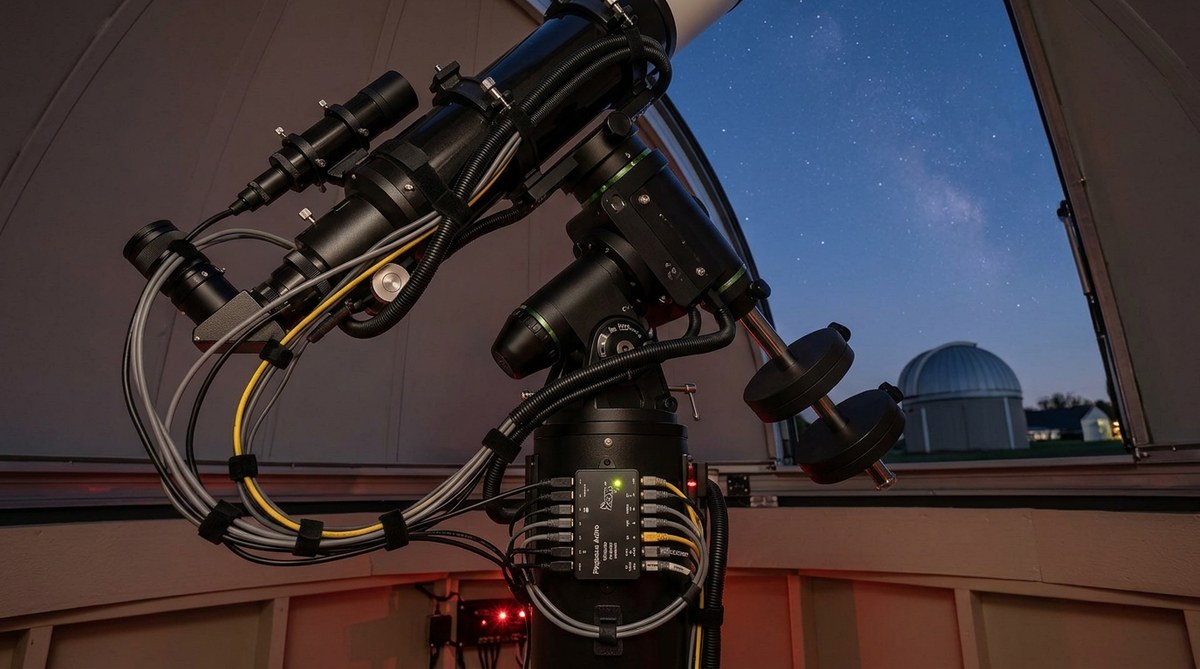
Ignoring cable management. A remote observatory mount needs to flip at the meridian. If your cables are not managed, they will snag on the pier or the tripod legs. Spend time building a cable wrap or using a through-mount wiring solution. This is one area where commercial mounts have a huge advantage.
-
Skipping the environmental testing. Your mount will face dew, dust, and temperature swings from 20 to 100 degrees Fahrenheit. A stepper motor that works fine in your garage may stall when the temperature drops below freezing. Test your electronics in a cold chamber or a refrigerator before installing them remotely.
If you want to avoid these issues, check out our guide on building a weatherproof enclosure for remote observatory equipment on a budget to see how others have solved the environment problem.
When DIY Actually Wins
There are specific scenarios where building your own mount makes perfect sense.
-
You need a very heavy payload. If you are putting a 16-inch reflector on a mount, commercial options are rare and extremely expensive. A DIY mount using a large harmonic drive or a friction drive can handle 150 pounds for a fraction of the cost of a Paramount or a 10Micron.
-
You have access to a machine shop. If you can cut, weld, and machine your own parts, the quality of your build will be much higher than someone working with a hand drill and a hacksaw. You can also produce custom parts that no commercial company sells.
-
You want to learn. Some people enjoy the build process as much as the imaging. If you are one of those people, a DIY mount is a great project. You will learn about gear ratios, PID control, and encoder feedback. That knowledge helps you troubleshoot any mount, commercial or DIY.
-
Your observatory is in a very remote location. If you are setting up in a dark site in New Mexico or Arizona, and you cannot easily ship a heavy mount for repair, being able to fix it yourself is a big advantage. You can carry spare motors and controllers in a small box.
The Hidden Cost of Downtime
This is the factor that most articles overlook. When your commercial mount breaks, you call support. You ship it back. You wait two to six weeks for a repair. That is lost imaging time. When your DIY mount breaks, you fix it yourself. If you have spare parts, you can be back up in one evening.
But here is the other side. Commercial mounts break less often. They are tested. A DIY mount might break more frequently, especially in the first year as you work out the bugs. For a remote observatory that you cannot visit every week, reliability matters more than repairability.
Think about your own situation. If your observatory is in your backyard, you can walk out and fix a DIY mount at any hour. If your observatory is two hours away, or in a different state, you want the mount that will run for months without attention. That is almost always a commercial mount.
A Decision Framework for 2026
Let us make this practical. Here is a simple process to decide whether you should build or buy your remote observatory mount.
-
Step 1: Define your payload. Write down the exact weight of your telescope, camera, filter wheel, guider, and all accessories. Add 20 percent for safety. If your payload is under 60 pounds, commercial options are plentiful. Over 80 pounds, DIY becomes more attractive.
-
Step 2: Set your accuracy target. If you are doing narrowband imaging with 30-minute subframes, you need tracking under 0.5 arcseconds RMS. That is hard to achieve with a DIY mount. If you are doing 5-minute exposures with a small refractor, 1.5 arcseconds is fine.
-
Step 3: Assess your skills. Be honest. Have you built a stepper motor controller before? Do you understand gear reduction ratios and encoder feedback loops? If the answer is no, a commercial mount will save you months of frustration.
-
Step 4: Calculate your time budget. How many hours per month can you spend on mount maintenance? If the answer is less than two, buy commercial. If you enjoy spending weekends in the workshop, build.
-
Step 5: Consider your backup plan. If your mount fails in the middle of a new moon imaging run, what do you do? With a commercial mount, you call support. With a DIY mount, you swap a motor. Neither is perfect, but knowing your options ahead of time helps.
For more on automating your observatory once the mount is sorted, read our guide on how to automate your backyard observatory with open-source software.
The Middle Ground: Hybrid Approaches
You do not have to choose all DIY or all commercial. Many remote observatory owners use a hybrid approach. They buy a commercial mount head but build their own pier, tripod, and cable management. Or they buy a used commercial mount and rebuild the electronics with an open-source controller.
Another popular hybrid is to use a commercial mount for the main imaging scope and a DIY alt-az mount for a secondary all-sky camera. The all-sky camera does not need high precision, so a simple DIY mount works fine. You can see how we set this up in our article on building an all-sky camera system to monitor celestial patterns year-round.
Some builders also buy the mechanical parts of a commercial mount (the worm gear, the bearings, the saddle) and build their own control electronics. This gives you the mechanical precision of a commercial mount with the flexibility of DIY firmware. It is more expensive than a full DIY build but cheaper than buying new.
What the Forums Say in 2026
I spend a lot of time on Cloudy Nights and the INDI forum. The consensus in 2026 is shifting slightly toward DIY for a specific reason. Harmonic drive motors have become much cheaper. A good harmonic drive can now be had for under $500. Combined with a simple aluminum plate and an OnStep controller, you can build a direct-drive mount with zero backlash. That was impossible five years ago.
But the forum veterans also warn about the software side. Getting plate solving, pointing models, and meridian flips to work reliably with a DIY mount takes real work. Commercial mounts have these features baked in. If you want to use INDI drivers to replace proprietary telescope software, you need to be comfortable editing configuration files and debugging serial connections.
Making Your Final Call
Here is my honest take after building two mounts and owning three commercial ones. If you are a semi-professional astrophotographer who sells prints or does research, buy commercial. Your time is better spent imaging and processing than debugging a DIY mount at 2 AM.
If you are an advanced amateur who loves the engineering side of the hobby, build one. You will learn a ton, and you will end up with a mount that is uniquely suited to your observatory. Just be prepared for the learning curve.
And if you are somewhere in the middle, start with a used commercial mount. You can always build your own later. A used Astro-Physics or Paramount from a few years ago is still better than most DIY mounts, and it holds its value if you decide to sell.
Your Next Steps for a Reliable Remote Setup
Whichever path you choose, focus on the fundamentals. A rock-solid pier, good polar alignment, and proper power management matter more than whether your mount was built in a factory or a garage. If you want to see what a fully automated remote observatory looks like in practice, check out our write-up on 5 essential power management solutions for unattended remote observatories.
The goal is the same whether you build or buy. You want to wake up to a full night of crisp, well-guided data. You want to spend your time looking at images, not troubleshooting hardware. Choose the path that gets you there with the least friction for your specific situation.
Now go look at the forecast. A clear night is coming, and your mount is waiting.

Post Comment